Elevador Hidráulico - Experimento
Summary
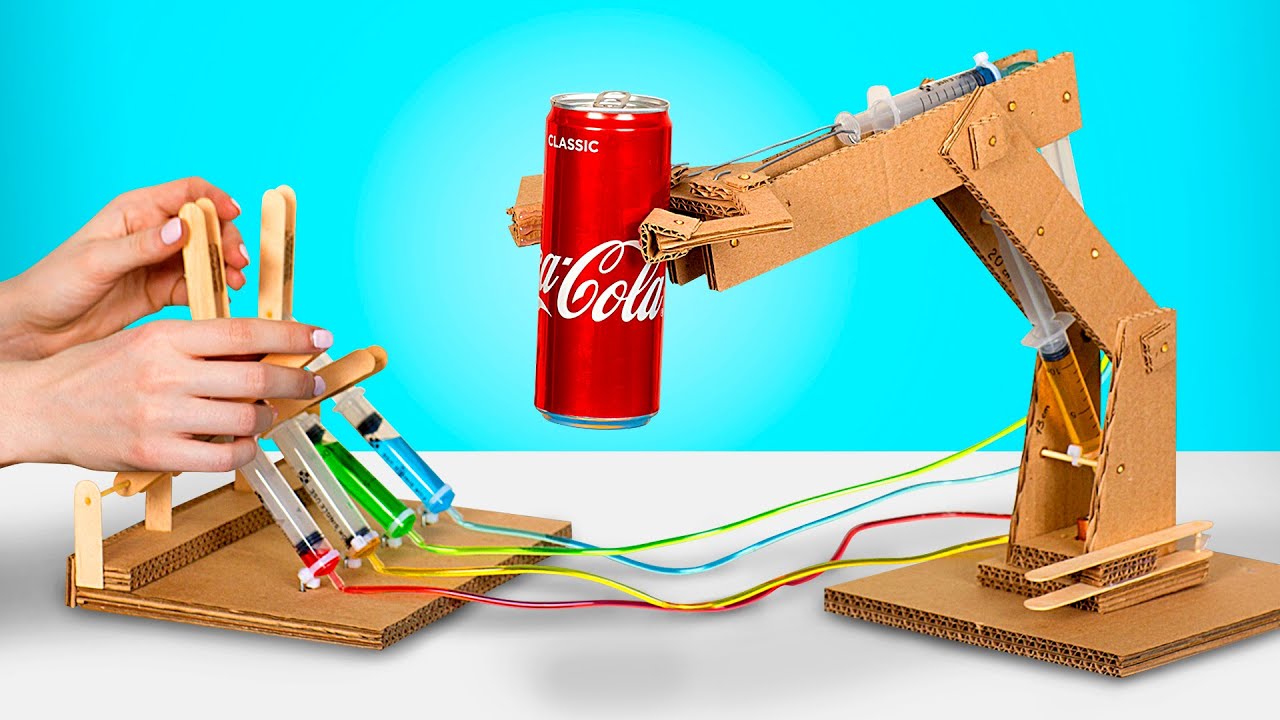
TLDRIn this tutorial, viewers are guided through the process of building a hydraulic elevator using simple materials like popsicle sticks, wire, syringes, and hose. The script explains the assembly steps in detail, starting from creating a base structure to connecting syringes for fluid transmission. The project demonstrates Pascal's Principle, showing how pressure is transmitted through fluid and how varying syringe sizes can amplify force. The hydraulic elevator functions by applying pressure to make the elevator move up and down, offering a hands-on approach to understanding basic hydraulic principles.
Takeaways
- 😀 The experiment demonstrates how to build a hydraulic elevator using simple materials like popsicle sticks, nails, wire, syringes, and hoses.
- 😀 12 popsicle sticks are required for the assembly, with a recommendation to buy extra sticks in case some break during construction.
- 😀 The assembly process involves making holes in the popsicle sticks, joining them with nails to form structures, and using wire to connect the structures.
- 😀 A syringe is used as a key component in the hydraulic system, with a hole made in its plunger to pass a wire through for the setup.
- 😀 The experiment requires two syringes, one filled with air (to create pressure) and another to control the elevator's movement.
- 😀 Cardboard bases are used to stabilize the structure during the assembly, with one optional base for additional support.
- 😀 The hydraulic elevator uses Pascal's Principle, which states that pressure applied to a fluid is transmitted equally in all directions.
- 😀 The relationship between force, pressure, and area is explored, with smaller areas resulting in higher pressure, as seen when using a nail to apply force.
- 😀 Friction from the nail and the rigidity of the popsicle sticks slow down the downward movement of the elevator, demonstrating resistance in the system.
- 😀 The experiment helps to visually explain the concept of hydraulic systems and how pressure can lift and lower objects through the application of force.
- 😀 The setup can be modified by using syringes of different sizes to further illustrate the impact of varying piston areas on the hydraulic system's efficiency.
Q & A
What materials are required for the hydraulic elevator experiment?
-You will need 12 popsicle sticks, 4 pieces of wire, 14 nails, pins, a small piece of hose (aquarium or silicone), two syringes, a pair of pliers, two cardboard bases, and adhesive tape.
Why is it recommended to buy extra popsicle sticks?
-It is recommended to buy extra popsicle sticks because some may come bent, and others may break during the assembly process.
What is the first step in assembling the hydraulic elevator?
-The first step is to make three holes in each popsicle stick: one at each end and one in the center. Then, join them in pairs with nails passing through the center hole.
How are the popsicle sticks joined together?
-The popsicle sticks are joined in pairs using nails passed through the center holes. The ends of these sticks are then joined to create a structure that can move.
What role do the wires play in the assembly?
-The wires are used to connect the top parts of the structures and maintain their positioning. They are passed through the holes at the ends of the popsicle sticks to secure the two structures together.
How does the syringe function in the hydraulic elevator?
-One syringe is used to create pressure by filling it with air, which is then transferred to the second syringe, moving the elevator. A hole is made in the plunger of one syringe to allow the wire to pass through.
What is the optional second base used for?
-The second base is optional and is used to support the structure on top. It can be secured with adhesive tape to ensure the assembly is stable.
How does the principle of pressure apply to this experiment?
-Pressure in the hydraulic elevator is directly proportional to the force applied and inversely proportional to the area. This is demonstrated when air pressure is applied to the fluid (air in this case) inside the syringe.
What does Pascal’s Principle state in the context of this experiment?
-Pascal's Principle states that the pressure applied to one point of a fluid is transmitted entirely to all points in the fluid. This explains how the pressure applied to one syringe moves the elevator.
How does the size of the syringes affect the force and pressure?
-If the syringes are of different sizes, the one with the smaller piston area will generate greater pressure when the same force is applied. This demonstrates how smaller areas can result in greater force, according to Pascal's Principle.
Why does the elevator take longer to descend after pressure is released?
-The elevator takes longer to descend because of friction between the nail and the toothpick, making the descent slower as the components are rigidly assembled.
Outlines

Cette section est réservée aux utilisateurs payants. Améliorez votre compte pour accéder à cette section.
Améliorer maintenantMindmap

Cette section est réservée aux utilisateurs payants. Améliorez votre compte pour accéder à cette section.
Améliorer maintenantKeywords

Cette section est réservée aux utilisateurs payants. Améliorez votre compte pour accéder à cette section.
Améliorer maintenantHighlights

Cette section est réservée aux utilisateurs payants. Améliorez votre compte pour accéder à cette section.
Améliorer maintenantTranscripts

Cette section est réservée aux utilisateurs payants. Améliorez votre compte pour accéder à cette section.
Améliorer maintenantVoir Plus de Vidéos Connexes

UPRAK FISIKA | PEMANFAATAN HUKUM PASCAL PADA "JEMBATAN HIDROLIK"

MÁQUINA CASEIRA de agarrar BICHINHOS DE PELÚCIA

Praktikum Hukum Pascal - Mesin Hidrolik | SaBiKum | Eksperimen Sains | DIY
Cara Membuat Lengan Robot Bertenaga Hidraulik dari Kardus

Young Engineers: Pneumatic Machine - Build a DIY Air Pressure Powered STEM Project for Kids

Media pembelajaran dari bahan alam
5.0 / 5 (0 votes)
