LiSci DNA Extraction lab demo
Summary
TLDRThis educational video demonstrates a DNA extraction process using strawberries. The teacher, wearing a lab apron and safety glasses, guides viewers through blending strawberries with salt, filtering the mixture, and adding soap solution. After resting, precise measurements of meat tenderizer are added, followed by the introduction of ice-cold isopropanol. The process concludes with the separation and observation of DNA, emphasizing careful handling and thorough cleanup, promoting a hands-on understanding of molecular biology.
Takeaways
- 🧪 The demonstration is a DNA extraction experiment using strawberries as the sample.
- 👩🔬 Safety precautions are emphasized, including wearing a lab apron and safety glasses.
- 🍓 A 10 mL strawberry solution is prepared with salt and blended, then filtered to remove chunks and seeds.
- 🌡️ The strawberry solution is gently stirred to ensure all ingredients are well mixed and no large particles remain.
- 🧴 A measured 1 mL of soap solution is added to the strawberry solution to facilitate DNA extraction.
- ⏳ The mixture is allowed to rest for 5 minutes to allow the DNA to interact with the soap solution.
- 📐 Accurate measurement of 0.09 grams of meat tenderizer is crucial for the next step of the process.
- 🥄 The meat tenderizer is carefully added to the DNA solution and stirred gently to avoid creating bubbles.
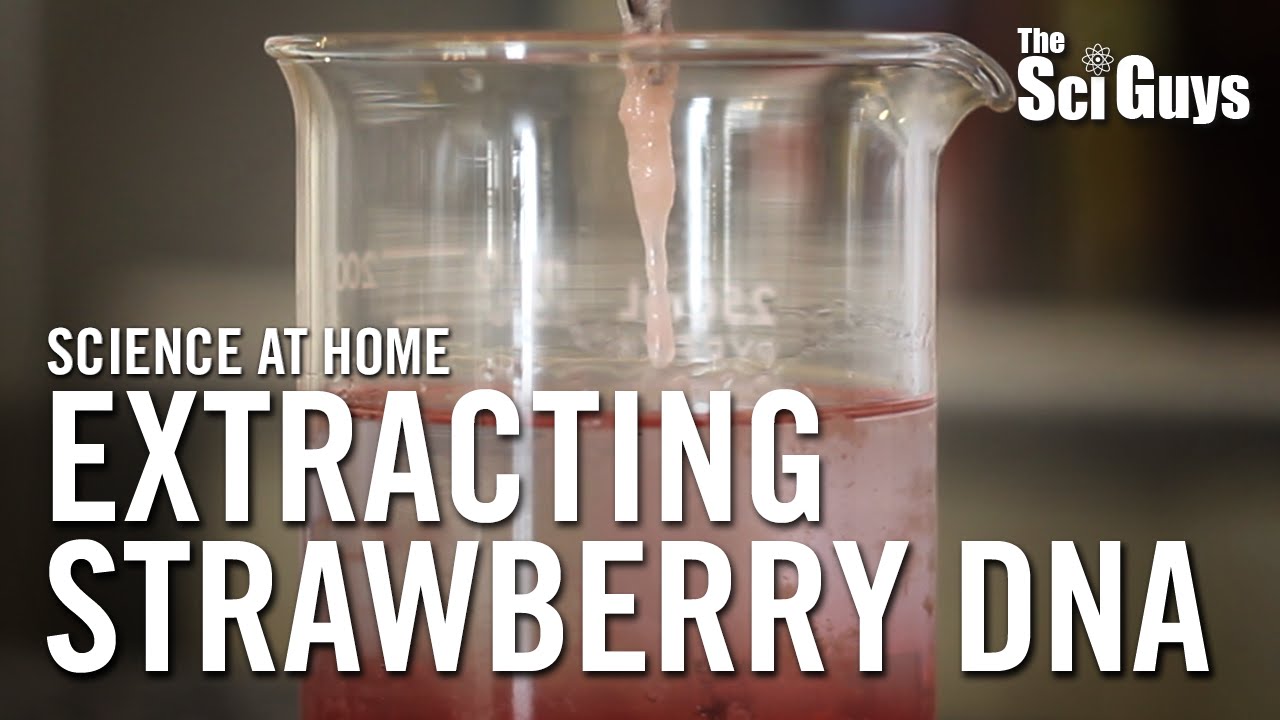
- 🧊 Ice-cold isopropanol is used to precipitate the DNA, requiring careful layering on top of the DNA solution.
- ⏱️ A waiting period of approximately 5 minutes is necessary for the DNA to precipitate at the interface of the solution and alcohol.
- 🔬 Gentle stirring at the interface can help in observing the DNA precipitate, which appears as a white cloudy material.
- 🧼 Cleanup is an essential part of the lab process, including disposing of the solution, washing equipment, and ensuring the lab station is left clean.
Q & A
What is the main purpose of the video?
-The main purpose of the video is to demonstrate a DNA extraction process using strawberries.
Why is the teacher wearing a lab apron and safety glasses?
-The teacher is wearing a lab apron and safety glasses to ensure safety during the laboratory procedure.
What is included in the strawberry solution used for DNA extraction?
-The strawberry solution includes strawberries, salt, and has been blended together.
Why is the strawberry solution filtered through a strainer?
-The strawberry solution is filtered to remove any large chunks, seeds, or other materials that are not part of the DNA extraction.
What is the role of the soap solution in the DNA extraction process?
-The soap solution helps to break down the cell walls and release the DNA from the strawberries.
How much soap solution is added to the strawberry solution in the video?
-1 milliliter of soap solution is added to the 10 milliliters of strawberry solution.
What is the purpose of letting the DNA solution rest for 5 minutes?
-Letting the solution rest allows the soap to work on the cells and helps in the separation of DNA.
What is the role of meat tenderizer in the DNA extraction process?
-The meat tenderizer, which contains enzymes, helps to further break down the proteins and isolate the DNA.
How much meat tenderizer is used in the process?
-0.09 grams of meat tenderizer is used in the process.
Why is ice-cold isopropanol added to the DNA and soap solution in a test tube?
-Ice-cold isopropanol is added to help precipitate the DNA, making it visible and easier to separate from the solution.
What is the final step in the DNA extraction process shown in the video?
-The final step is to gently stir the border of the DNA and isopropanol layer to see the DNA precipitate and then clean up the lab station.
Outlines
🍓 DNA Extraction Preparation
The video script introduces a DNA extraction process using strawberries. The teacher demonstrates the initial steps, which include wearing a lab apron and safety glasses for protection. A 10 mL strawberry solution, mixed with salt in a blender, is collected using a syringe and filtered into a beaker to remove any chunks or seeds. The solution is stirred gently to ensure all components are well mixed. Subsequently, 1 mL of pre-mixed soap solution is added to the strawberry mixture, stirred gently to avoid creating bubbles, and left to rest for 5 minutes. During this rest period, students are instructed to measure 0.09 grams of meat tenderizer using a scale and a small plastic waybo, ensuring the mass of the waybo is not included in the measurement.
🧪 DNA Extraction Process
Following the rest period, 5 mL of the DNA and soap solution is transferred into a test tube using a syringe. The previously measured 0.09 grams of meat tenderizer is carefully added to the test tube, ensuring it does not stick to the sides, and is gently stirred to mix with the DNA solution. The next step involves obtaining a small amount of ice-cold isopropanol, which is poured gently on top of the DNA solution in the test tube to create a layer twice the volume of the DNA mixture. This is left to sit for 5 minutes to allow the DNA to separate. The script describes observing a white cloudy substance forming at the border between the DNA and alcohol layers, which can be gently stirred to encourage it to rise into the alcohol layer.
🧼 Cleanup and Lab Safety
After the DNA extraction and observation, the script emphasizes the importance of cleaning up the lab station. All leftover DNA and soap solution are disposed of in a labeled waste beaker, and all equipment such as syringes, strainers, and test tubes are thoroughly washed with soap and water. Special attention is given to cleaning the test tubes using a test tube scrubber to ensure no residue is left behind. The syringe and its plunger are also cleaned separately, and it is important to keep track of which plunger belongs to which syringe to avoid confusion. The lab bench should be left in the same or better condition than when the experiment began, with all materials properly cleaned and put away.
Mindmap
Keywords
💡DNA extraction
💡Lab apron
💡Safety glasses
💡Strawberry solution
💡Filtering
💡Soap solution
💡Meat tenderizer
💡Test tube
💡Isopropanol
💡Pipetting
💡Scale
💡Cleanup
Highlights
Teacher demonstrates DNA extraction in a life science video.
Safety measures such as lab aprons and safety glasses are emphasized.
DNA is extracted from a strawberry solution mixed with salt in a blender.
Strawberry solution is filtered to remove chunks and seeds.
Soap solution is added to the strawberry solution to aid in DNA extraction.
Gentle stirring is recommended to avoid creating bubbles during mixing.
Meat tenderizer is measured precisely for the DNA extraction process.
A small metal scoopula is used for accurate measurement of meat tenderizer.
DNA and soap solution is transferred to a test tube for further processing.
Meat tenderizer is carefully added to the test tube to facilitate DNA separation.
Ice cold isopropanol is used to precipitate the DNA.
A layering technique is applied when adding isopropanol to the DNA solution.
Observation of the DNA-isopropanol interface reveals a white cloudy substance.
Gentle stirring at the interface helps in collecting the DNA.
Proper cleanup and disposal of materials post-experiment are demonstrated.
Syringe and test tube cleaning techniques are explained for lab safety.
Lab station should be left clean and organized after the experiment.
Transcripts
okay hi life science today we're going
to be doing a DNA extraction and this is
your teacher demo video before we begin
notice I've got my lab apron on I'm also
going to be put putting on my safety
glasses I wear glasses as well so I just
put them over top today I'm going to be
extracting DNA from Strawberry so the
first part of part of our procedure is
going to be collecting 10 mL of
strawberry solution with a 10ml syringe
this strawberry solution includes
strawberry but also some salt and it's
been mixed together in a
blender now I have 10 MLL of my
strawberry solution and because it might
be a little bit chunky I'm going to be
filtering it through a strainer into a
200 or 250 ml beaker
I can set this
aside and I'll use a glass stirring Rod
to just gently stir to make sure that my
strawberry solution all goes down into
the beaker and that I've caught any of
the big chunks or seeds or any of the
things that that I'm not going to be
extracting DNA from
once it's all
inside our next step is to add 1 ml of
soap
solution now the soap solution is
already mixed with water I have a a
pipet on top and if you look at the side
of the pipet you can see markings where
1 ml
begins so in order to obtain 1 ml of
soap Sol solution I squeeze my pipet put
it
inside the
beaker getting about approximately 1 ml
of soap
solution and then I add my 1 ml of soap
Solution by gently squeezing into my 10
m of strawberry
solution I'm going to stir that up with
the glass stirring Rod but I'm going to
do so gently so that I don't make too
many bubs
so now I have strawberries salt water
and a little bit of soap
inside um I'm going to swirl the
solution but now I need to let it rest
for about 5
minutes while your DNA solution is
sitting and resting with the soap inside
you're going to be measuring the amount
of meat tenderizer that you need um
we're going to be using a scale like
this one and a small plastic waybo now
one of the things you have to make sure
is that you are not including the mass
of the waybo in your massive meat
tenderizer so I'm going to put the wayo
onto the scale and make sure that I
press zero and ensure that it's zeroed
before I
begin I need
0.09 G of meat tenderizer and to get
that I'm going to use a small metal
scopula to put that onto the scale
that's already about
0.03
0.06 and I've gone a little bit too high
I don't want to add this back into the
Container because since it's been out
it's now contaminated so if you have a
little extra you can try taking a tiny
bit off
putting it
into the waist Beaker and now I'm at
exactly
0.09 gram this is what we're going to
add to our DNA solution when we do the
next
step after our DNA solution has been
resting we're now going to add 5 m
milliliters of this DNA and soap
solution into a test tube we'll use the
test tube
rack and we can use the same 10ml
syringe that we used last
time I now have 5 milliliters of my DNA
and soap solution and I'm going to
gently add it into the test tube right
down to the bottom just trying to be
careful not to create too many bubbles
our next step will be to add the meat
tenderizer that we just measured the
0.09
GS so to do that sort of tap it to the
edge of the waybo and we want to make
sure that the meat tenderizer doesn't
stick to the sides of our test tube so
I'm just going to very
carefully tap it
in and
then with a wooden stirring rod going to
very gently stir to make sure that the
meat tenderizer is all mixed with the
DNA our next step involves getting some
ice cold
isopropanol in class you're going to
have it in an ice bucket for me I've
already had it just straight out of the
freezer this this will be on the back
bench in class it is very cold um and
you're going to obtain about 10 to
milliliters or so in a very small 50 ml
Beaker it doesn't have to be exact for
this part you just need a very small
amount in the bottom of the
beer our final step is one where you're
going to have to be a little bit careful
we're going to pour the ice cold alcohol
on top of the DNA solution until we have
about twice as much alcohol or about
twice as much as what's in here so
you'll have this much again in alcohol
on
top in order to do this we don't want it
to mix too much we want it to form a
nice layer on top so I'm going to tilt
my DNA test tube I'm going to tilt my
cold isopropanol I'm just going to
gently pour down the side
until I have a
layer that's on top about as large as
the DNA layer below like
this we now need to let this sit for
about five minutes until we can see what
DNA comes
in let's take a look at how our DNA
sample has gone so here's our DNA sample
at the bottom this was our ice cold
isopropanol on the top and notice right
at the border of where the DNA and the
alcohol layer meet you see kind of like
some white cloudy stuff the last step
that you can do is with a stir Rod is
just kind of stir very
gently at the border to see if you can
get some of that that white almost
cloudy looking material to kind of come
up into the alcohol
layer and we see a tiny a little bit
kind of coming up into the layer
there all right now that you've
extracted your DNA and you've taken some
observations we got to clean up so your
DNA solution this is all going to go
into a labeled waist Beaker that's next
to the sink so you can just tip that
into the waist
Beaker um any leftover DNA and soap
solution that was in your Beaker will
also go into the
speaker and then you're going to be
cleaning up your
syringe your
strainer and your test tube so let's go
over to the
sink make sure that you wash everything
with soap and water and when you wash
your test tube please use use a little
test tube scrubby to get all the way
inside okay when you clean your test
tube um just give it a little rinse with
water
first then you're going to use the
scrubby get a little bit of soap
Solution on and just scrub inside the
test tube all the way down to the
bottom okay and then give it a really
good rinse make sure there isn't any
soap Left Behind inside the test tube
and when you dry a test
tube it just goes upside down on the
drying rack that's the signal that it's
now washed and cleaned ready to go for
the next student when it comes time to
clean your syringe notice that the
syringe and plunger can come out so that
you can actually clean inside the
syringe you'll have a little test tube
scrubby you can use that to get
inside and then just make sure that you
flush the tip through with plenty of
water and that it's flowing
freely this can stay at your lab bench
but make sure that you don't mix up
which plunger goes with which syringe
because they tend to fit pretty
exactly your lab bench should look
exactly the way it did when you came in
if not better so make sure that all of
your your materials are cleaned up and
set back before you leave the lab
station thanks everyone
Voir Plus de Vidéos Connexes
WHY DOES SALT MAKE ICE COLDER? LEARN THIS AMAZING PHENOMINA WITH THE HELP OF A SIMPLE EXPERIMENT.
what's the point of SALT in making Ice Cream
Saponification: Making Soap
Kiwi Fruit Experiment: Finding the DNA of a kiwi fruit - Think like a scientist (10/10)
Osmosis Lab Walkthrough
Changing Diapers in Child Care
5.0 / 5 (0 votes)