FUJIFILM X100V SETTINGS Guide | Full Setup

Reggie Ballesteros
31 Mar 202022:50

Summary

TLDRIn this informative video, wedding photographer Reggie Ballesteros shares his personal settings for the Fujifilm X100V, tailored for various photography scenarios. He emphasizes the importance of customization for individual needs, covering aspects from image size and film simulation to autofocus and movie mode settings. Reggie provides a downloadable configuration file for viewers to replicate his setup, encouraging experimentation for finding one's own optimal settings.

Takeaways

  • 📷 The Fujifilm X100V does not have universally 'best' settings; they depend on the photographer's style and needs.
  • 🌟 Reggie Ballesteros, a wedding photographer, shares his personal settings for the Fujifilm X100V for various types of photography.
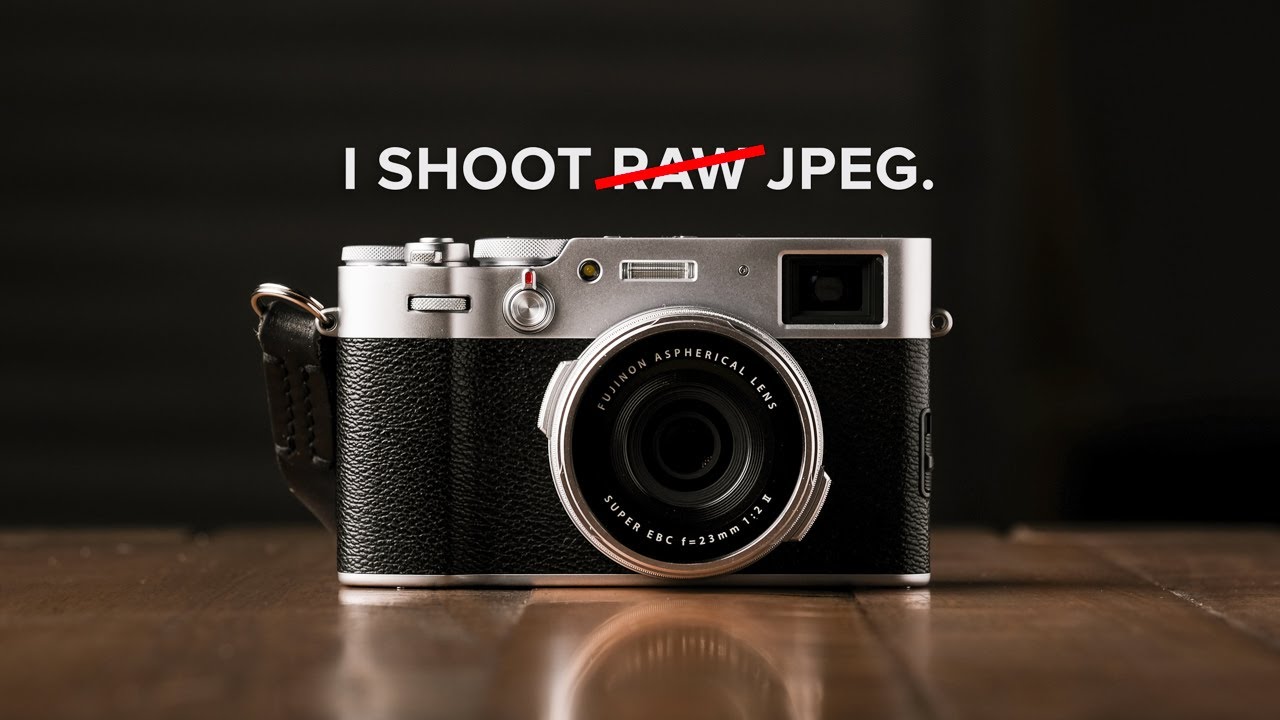
  • 📱 For image size, Reggie chooses 'small 3 by 2' for quick transfer to his phone for Instagram stories, while shooting in RAW for editing in Lightroom.
  • 🎞 Reggie's film simulation of choice is 'Classic Chrome' with adjustments to color and grain effects for a personalized look.
  • ⚙️ He sets white balance to auto but adjusts it with a color shift for warmer skin tones when using 'Classic Chrome'.
  • 📈 For tone curve, Reggie matches what he sees in the camera to what appears on his iPhone, using specific highlight and shadow settings.
  • 🔍 All image quality settings like color, sharpness, noise reduction, and clarity are set to zero, except for long exposure noise reduction which is on.
  • 🛠 Reggie customizes four settings for different scenarios including a warm version of 'Classic Chrome' and a black-and-white preset.
  • 👀 For autofocus, he prefers 'all' to cycle through different focus types easily and sets AF-C custom settings for various situations.
  • 📹 In movie mode, Reggie uses '4K 16:9' at 23.98 fps with 'Classic Chrome' for minimal color grading and a flat profile for post-production.
  • 🔄 He also shares his custom button and dial settings, emphasizing the importance of personalizing the camera for efficient shooting.

Q & A

  • What is the main point of the video?

    -The main point of the video is to share the personal settings that Reggie Ballesteros uses for his Fujifilm X100V camera and to explain why he chose them, encouraging viewers to use these as a starting point and adjust based on their own needs.

  • Who is the presenter of the video?

    -The presenter of the video is Reggie Ballesteros, a wedding photographer based in the San Francisco Bay Area.

  • What type of photography does Reggie Ballesteros specialize in?

    -Reggie Ballesteros specializes in wedding photography, portrait photography, travel photography, and documenting family day-to-day.

  • What firmware version is Reggie using for his Fujifilm X100V?

    -Reggie is using firmware version 1.0 for his Fujifilm X100V.

  • Why does Reggie set the image size to small 3 by 2?

    -Reggie sets the image size to small 3 by 2 because he uses the JPEGs for his camera to send to his phone for Instagram stories, while he shoots in RAW for editing in Lightroom.

  • What film simulation does Reggie prefer to use on the Fujifilm X100V?

    -Reggie prefers to use the Classic Chrome film simulation on the Fujifilm X100V.

  • How does Reggie adjust the white balance for Classic Chrome?

    -Reggie adjusts the white balance for Classic Chrome by setting a white balance shift of negative 3 for the blues and 3 for the red to add warmth to the skin tones.

  • What custom settings does Reggie have for the Fujifilm X100V?

    -Reggie has four custom settings: a warm version of Classic Chrome, the standard version of Classic Chrome, a black-and-white preset based on Acros, and a RAW custom setting based on Negative Standard for a very flat profile.

  • How does Reggie set up the autofocus settings on his Fujifilm X100V?

    -Reggie sets the autofocus settings to 'all' to cycle through different autofocus types easily, uses 'AF+MF' for most situations, and sets the number of focus points to 425 for more selection options.

  • What is Reggie's approach to ISO Auto settings?

    -Reggie sets up three ISO Auto settings with different minimum shutter speeds and top ISO limits to suit different lighting conditions and needs for low-light capability.

  • How does Reggie configure the movie mode settings on the Fujifilm X100V?

    -Reggie sets the movie mode to 4K 16:9 at 23.98 frames per second with 100 megabit per second bitrate, uses Classic Chrome for minimal color grading, and sets highlights and shadows to negative two for an ultra-flat profile suitable for post-production color grading.

  • What is the purpose of the configuration file Reggie provides?

    -The purpose of the configuration file is to allow viewers to quickly duplicate Reggie's camera settings on their own Fujifilm X100V using the Fujifilm X Acquire software's restore camera settings feature.

  • How can viewers get access to Reggie's configuration file for the Fujifilm X100V settings?

    -Viewers can access Reggie's configuration file by clicking the link provided in the video description, filling out the form, and then receiving an email with a link to download the setting configuration file.

Outlines

00:00

📷 Fujifilm X100V Personal Setup Introduction

Reggie Ballesteros, a San Francisco Bay Area-based wedding photographer, introduces his video on the best settings for the Fujifilm X100V. He emphasizes that there are no universal 'best settings' in photography due to individual approaches but will share his personal setup for various situations like weddings, portraits, travel, and family documentation. He encourages viewers to use his settings as a starting point and to experiment to find what works best for their style. He also checks the camera's firmware version and resets all settings to default before beginning his explanation of individual settings.

05:06

🎨 Customizing Image Quality and Film Simulation Settings

Reggie discusses his preferred image size and quality settings for the Fujifilm X100V, opting for small 3:2 and fine plus raw to balance quick sharing and detailed editing. He favors lossless compressed raw recording for quality and space efficiency. His film simulation choice is Classic Chrome, with adjustments to color chroma and white balance to enhance skin tones. He also explains his approach to tone curve, image quality settings like sharpness and noise reduction, and his rationale for choosing sRGB color space for JPEG images to avoid color shifts on mobile devices.

10:14

🔍 Autofocus and Focus Area Custom Settings

This section delves into the autofocus settings Reggie uses for the Fujifilm X100V. He prefers the 'all' setting for focus mode, allowing easy cycling through autofocus types. His AF+C custom settings are tailored for most situations, with adjustments for unpredictable moving subjects. He details his preferences for focus point display, number of focus points, and pre-AF settings for battery life optimization. Reggie also covers manual focus assist, focus check, and settings for instant AF and continuous autofocus for capturing fast action.

15:17

📹 Movie Mode and Additional Camera Settings

Reggie configures his movie mode settings for the Fujifilm X100V, choosing 4K 16:9 at 23.98 fps with 100 Mbps bitrate for high-quality video. He sets film simulation to Classic Chrome for minimal color grading and adjusts white balance, dynamic range, and色调curve for a flat profile suitable for post-production. He also discusses focus area selection, autofocus custom settings, and manual focus assist for video. Additionally, he mentions HDMI output settings, zebra patterns for exposure, and audio settings for video recording.

20:21

⚙️ Button, Dial, and Touchscreen Customization

In this part, Reggie customizes the button and dial settings on the Fujifilm X100V to streamline his photography workflow. He sets the focus lever and quick menu for easy access to common settings. He also configures function buttons for quick adjustments and utilizes the touchscreen for performance swipe and custom settings. Reggie explains his choices for rear dial and selector settings, which allow him to control shutter speed and ISO independently. He wraps up with his preferences for touch screen settings, ensuring they complement his shooting style.

🔋 Power Management and Final Settings

Reggie concludes the video with power management settings to optimize the Fujifilm X100V's performance and battery life. He mentions the default settings for save data and copyright information. Additionally, he covers Bluetooth settings for easy image transfer to his phone, general settings for file transfer, and his approach to configuring the camera's sound settings for a more silent shooting experience. He invites viewers to download his configuration file for a quick setup and encourages subscription for weekly photography tips.

Mindmap

Keywords

💡Fujifilm X100V

The Fujifilm X100V is a digital camera known for its compact design and advanced features, which is the central subject of the video. The video's theme revolves around the best settings for this specific camera model, as used by the presenter for various photography scenarios such as weddings, portraits, travel, and family documentation.

💡Settings

In the context of photography and videography, 'settings' refer to the various options and parameters that can be adjusted on a camera to achieve desired results in terms of image quality and style. The video discusses the presenter's personal preferences for these settings on the Fujifilm X100V, emphasizing that there is no 'one size fits all' approach.

💡Film Simulation

Film Simulation is a feature on Fujifilm cameras that allows users to mimic the look of traditional film stocks with digital images. The video mentions 'Classic Chrome' as the presenter's choice for its particular color rendering and how it can be adjusted with other settings for different looks.

💡RAW

RAW is a file format that stores unprocessed image data directly from the camera sensor, offering the most flexibility for post-processing. The script mentions that the presenter shoots in RAW for the highest image quality and uses the 'Fine plus RAW' setting to also send a JPEG to their phone for quick sharing.

💡White Balance

White balance is a setting that adjusts the color temperature of an image to match the lighting conditions, ensuring natural colors. The video describes how the presenter uses auto white balance and makes adjustments for specific film simulations to achieve warmer skin tones.

💡Tone Curve

The tone curve is a tool used to adjust the contrast and tonal range of an image. The script explains that the presenter sets the tone curve to match what they see in the camera viewfinder with what appears on their iPhone, using specific values for highlights and shadows.

💡Autofocus (AF)

Autofocus is a camera feature that automatically sets the focus on the subject. The video details various autofocus settings and custom settings the presenter uses, such as 'AF-C' for unpredictable moving subjects and the use of face and eye detection.

💡ISO

ISO measures the camera's sensitivity to light. The script discusses different ISO auto settings the presenter uses depending on the lighting conditions, with different top ISO limits and minimum shutter speeds to balance noise and exposure.

💡Bracketing

Bracketing is a photography technique where several shots of the same scene are taken at different exposures. The video describes how the presenter uses auto exposure bracketing to capture a range of exposures for high dynamic range (HDR) images or to choose the best exposure in post-processing.

💡Dynamic Range

Dynamic range in photography is the ratio between the brightest and darkest elements that can be captured in an image. The script mentions how the presenter adjusts dynamic range settings to '100%' for a flat profile suitable for color grading in video shooting.

💡Custom Settings

Custom settings on a camera allow users to save and quickly switch between different configurations of other settings. The video outlines specific custom settings the presenter uses, such as different versions of 'Classic Chrome' and a black-and-white preset, which can be quickly accessed as needed.

Highlights

Best settings for the Fujifilm X100V vary depending on the photographer's approach and needs.

The Fujifilm X100V is used for various photography scenarios including weddings, portraits, travel, and family documentation.

Image size is set to small 3 by 2 for quick transfer to mobile devices, with RAW for editing in Lightroom.

Film simulation is set to Classic Chrome for its aesthetic appeal, with adjustments for contrast and color saturation.

White balance is set to auto with specific adjustments for Classic Chrome to enhance skin tones.

Tone curve settings are customized to match what is seen in the camera with the iPhone display.

All image quality settings except for long exposure noise reduction are set to zero for natural image rendering.

Custom settings include warm and standard versions of Classic Chrome, a black-and-white preset, and a flat profile for RAW.

Autofocus settings are tailored for various scenarios, with a preference for 'all' focus mode for versatility.

Face and eye detection is enabled for portraits, with manual focus assist set to peak highlight for precision.

Auto exposure bracketing is set for seven frames with a one-stop interval for creative flexibility.

ISO Auto settings are configured for different lighting conditions, with a special setup for low-light scenarios.

Movie mode is set to 4K with specific film simulation and white balance settings for minimal post-production.

User settings include preferences for date, time, language, and menu customization for ease of use.

Bluetooth settings are configured for easy image transfer, with options to maintain camera time independence.

Button and dial settings are personalized for quick access to frequently used functions.

The presenter offers a downloadable configuration file to replicate his Fujifilm X100V settings for viewers.

Transcripts

play00:00

So you want to know what the best settings are for the Fujifilm X100V?

play00:09

What's up guys @reggiebphoto here, and welcome back to the channel. So for those

play00:13

of you who are new my name is Reggie Ballesteros and I'm a wedding

play00:16

photographer based in the San Francisco Bay Area. In this video I'm gonna go over

play00:20

the best settings for the Fujifilm X100V. OK, so I'm gonna level with you - there

play00:28

are no best settings for this camera or for any camera in general. The truth is

play00:33

in the world of photography there is no best anything each photographer has a

play00:37

different approach to their craft so the settings that are the best for me are

play00:41

not necessarily gonna be what's best for you would that set in this video I'm

play00:46

gonna go over how I personally set up my fujifilm X100V so I use this camera for

play00:51

a wide range of different type of situations including professional

play00:55

wedding photography portrait photography travel photography and of course

play00:59

documenting my family day-to-day I'm hoping that by sharing my settings for

play01:03

this camera and explaining exactly why I picked them will help you figure out

play01:06

what settings are gonna work best for you feel free to use my settings as a

play01:10

starting point but always do your own experimentation and test to see what

play01:14

setup will actually work best for you and your working style alright so first

play01:18

things first I'm gonna hold display back and turn the camera on so we can verify

play01:22

it what firmware I am on with the fujifilm X100V and that is version 1.0

play01:31

all right so turning it back on I'm going to navigate and reset all my

play01:36

settings so that we can stay on the same page as each other okay so I'm going to

play01:41

reset the camera right here okay so down that we have all the default settings

play01:45

we're gonna start off right from the beginning and for image size I

play01:49

personally pick small 3 by 2 so the main reason why I use the 3 by 2 in the small

play01:55

setting is because I use the JPEGs for my camera for setting to my phone for

play02:00

Instagram stories but I personally shoot in RAW all the time so I set this to

play02:07

fine plus raw this lets me send a JPEG to my phone

play02:11

I need to and still have the raw for editing in Lightroom later on and for

play02:16

the raw recording I'm gonna set this to lossless compressed as this save some

play02:20

file space on my memory card but doesn't really sacrifice anything as far as

play02:24

quality goes so my film simulation of choice is classic Chrome and that's what

play02:30

I'm gonna set up right here and I'm gonna leave the grain effect offer my

play02:34

personal film simulation setting so I actually like to use color chroma effect

play02:38

and turn that to weak this basically increases the contrast and some of the

play02:42

color saturation of the image for a color chrome effects blue I'm going to

play02:46

turn that off and for white balance I'm going to leave that to auto but for

play02:49

color chrome it does tend to have a little bit of a washed out cooler tone

play02:54

so I like to employ a white balance shift of negative 3 for the blues and 3

play02:59

for the red this gives a little bit more warmth to the skin tone as far as I

play03:04

never grain shows I always leave this at 100% because I'm shooting in RAW and for

play03:10

the tone curve I basically set this so that what I see in my camera is going to

play03:14

be the same that shows up on my iPhone when I transfer it over and I've come up

play03:18

with that being +1 for the highlights and +1 for the shadows and the rest of

play03:26

the image quality settings I set to color at zero sharpness at zero noise

play03:30

reduction at zero and clarity at zero I leave long exposure noise reduction on

play03:36

on and I leave the color space on srgb a lot of people think that you should be

play03:41

setting this to Adobe RGB but this only affects the JPEG image and if you're

play03:46

gonna send the JPEG images over to your phone then you should leave it at srgb

play03:50

or else you'll notice a color ship especially in the Reds when you transfer

play03:54

it to your phone so pixel mapping I don't mess with as this is more for hot

play03:59

pixels and now we're gonna go to editing my custom settings so here are the four

play04:05

custom settings that I personally use the first one is a warm version of

play04:09

classic Chrome the second is the standard version of classic chrome the

play04:13

third is my black-and-white preset based on a gross and my last is a raw custom

play04:19

setting that is based on negative standard for a very flat

play04:23

profile which has a very accurate histogram so going into that the warm is

play04:28

basically what I already showed you so we're going to go into the neutral and

play04:31

show you what I have there basically for this one I have classic chrome I have

play04:36

everything else the same so great effect off color chrome effect on week color

play04:41

Chrome FX blue on/off and I have the white balance to auto with no color

play04:45

shift and I have the same thing for dynamic ranges at 100% and they have D

play04:52

range priority on off with the highlight at +1 shadow at +1 color at zero

play04:57

sharpness at zero noise reduction and zero clarity at zero and so on as far as

play05:05

my black and white settings go I use a gross again and I have that set to a

play05:11

gross with no monochromatic color shifts at all

play05:14

I leave the great effect at weak and small I have the color chrome effect off

play05:20

the color chrome FX blue on off the white balance is on auto dynamic range

play05:26

is on 100% again the range of priority is off and I do have the tone curve to

play05:30

+1 on these shadows sharpness is at zero noise reduction is at zero clarity is at

play05:37

zero and the last one is my raw custom setting which is basically geared toward

play05:45

having a very flat profile just for raw purposes and has a very accurate

play05:50

histogram so I have that the film simulation on pro- standard great effect

play05:55

off color chrome effect off color chrome FX blue off white balances on auto

play06:00

dynamic range is 100% D range priorities on/off and for the tone curve I have

play06:05

this at negative two on the highlights and shadows at zero this gives me a very

play06:10

accurate highlight Ordnung as well as a very conservative shadow profile to make

play06:16

sure that i don't understant color is at zero sharp tests at zero noise reduction

play06:22

is at zero and clarity is at zero

play06:27

all right so now we get on to the autofocus settings and focus area is

play06:32

basically just how you pick the focus point so we're gonna move on to a fo and

play06:36

I like to set this to all basically what all does is lets you cycle through all

play06:44

the different auto focus types by just scrolling through the wheel rather than

play06:50

having to change the mode so for AF see custom settings I typically have this on

play06:57

set to for most situations the only other time is if I'm taking pictures of

play07:01

my kids I set it to set five which is for very unpredictable moving subjects

play07:06

but for now we're gonna leave it at set to our leave store AF mode by

play07:11

orientation on/off I have the AF point display for zone focus modes on and on

play07:17

and I leave the number of focus points at 425 because I like to have as many

play07:22

points to select from I use pre AF on/off and I suggest you leave pre AF

play07:27

on/off if you want to save battery life as if you leave it on it's going to be

play07:31

looking for focus even when you're not pressing down the shutter

play07:35

I leave the AF illuminator on/off and for any time that you use face and eye

play07:40

detection I leave that on I ought oh so for the auto focus man focus override I

play07:47

leave that on/off and for the manual focus assist I'm gonna set that to peak

play07:53

highlight and I'd like to have it on red hi alright moving on I have a focus

play07:58

check on off and I have interlocked the spot and auto exposure and focus area on

play08:04

off so for the instant AF setting I leave that on auto focus single and I

play08:09

have the depth of field scale to pixel alright so the release and focused

play08:13

priority I leave the auto focus single on focus priority because I want to make

play08:18

sure that always in focus before I shoot and then for the fast action for auto

play08:24

focus continuous I leave that on release priority as I want to make sure that

play08:27

they capture moments and no lag when I'm taking the photo as far

play08:32

as touchscreen modes I leave this usually on area as I just want to select

play08:36

the area and still have the half press be the autofocus acquisition and then

play08:42

here's the corrected AF frame I'm not quite sure what this is I think it's for

play08:45

the ouvea but I leave that on off for now so sports find the remote I leave

play08:50

that on/off self timer is on off at this point

play08:54

save self timer settings I'll leave that on on so that when I do set it will

play08:59

remember so for interval timer settings I like to leave this at zero minutes and

play09:03

one second and right when I go over here I like to leave that right at infinity

play09:07

and then we're going to just start it up just to save that I like to leave it

play09:11

there that way I can just let it go as long as I want to and then just cancel

play09:15

it to stop we also have interval timer shooting exposure smoothing on on I

play09:21

think this is a new feature for the X 100 V so now onto auto exposure

play09:25

bracketing I like to have this to give me seven frames total at one exposure

play09:31

stop each so it's going to be three frames overexposed and three frames

play09:34

underexposed and if you leave this on continuous so I like to leave this on

play09:39

underexposed first correctly exposed and then overexposed and I'll quickly

play09:44

demonstrate that for you what that looks like

play09:52

which is cool is because it does a continuous burst when it does that so

play09:57

for film simulation bracketing I like to set this at classic Chrome for the first

play10:02

one classic negative for the second one and a gross for the last one unfocused

play10:14

bracket setting I don't change anything on that because I don't really use that

play10:18

for multiple exposure I change this based on the type of photo that I'm

play10:23

taking at this point I'm going to use additive and for the shadow type I

play10:26

typically leave this at mechanical shutter so as of right now I have the

play10:31

flicker reduction on/off but if I do go into any type of settings with indoor

play10:35

artificial lighting sometimes I will turn this on so for the ISO Auto setting

play10:40

I'm going to set up the first one and I like to have this at 160 with a top ISO

play10:46

of 6400 and I like to have my minimum shutter speed at 1 over one sixtieth for

play10:53

the second one I'm going to do the same thing except I'm going to have this with

play10:56

a higher ISO limit at one over one sixtieth and this last auto ISO setting

play11:04

I'm going to set it for something when I need maximum low-light capability and

play11:09

that's gonna be one over a thirtieth of a second to do the one over focal length

play11:13

rule so I don't have the convergence lens so that's going to be on off and

play11:20

the ND filter I currently have on off and then we're gonna move over to the

play11:25

next thing which is the flash so currently I have the flash on off for

play11:29

now and the TTL mode is on last flash they have the built-in flash on on just

play11:34

in case I need to use it alright so onto the movie mode my

play11:38

default movie setting is at 4 K 16 by 9 and I like to have this at twenty three

play11:43

point nine eight and leave it that at 100 megabit per second alright now that

play11:48

way you got that setup I like to set this also to classic Chrome as well as

play11:53

it is very nice for minimal color grading

play11:58

and how the white balance set to auto but I do manually set this if I'm doing

play12:02

any type of studio shooting so the dynamic range I leave at a hundred

play12:06

percent and then for the highlights and shadows I leave these at negative two

play12:10

highlights and negative two shadows to have an ultra flat profile for color

play12:14

grading in post and here I also have the color set to negative four and the

play12:21

reason why I leave these things very flat and desaturate it is because video

play12:24

actually bakes in the color and tones into the video so I like to be able to

play12:30

add contrast and saturation in post rather than having to subtract it in

play12:34

post so I leave sharpness at zero and noise

play12:37

reduction at zero I have the interframe noise reduction on zero and f log

play12:42

recording is also at zero so the focus area is how you pick the focus point and

play12:47

I like to leave this on area as I like to manually select where I'm going to do

play12:51

focusing as far as the auto focus custom settings go I leave this at the default

play12:56

at +2 sensitivity and AF speed at zero and the face and eye detection again if

play13:02

I do use it it's gonna be on auto so for the manual focus assist again leave this

play13:08

on red hi and I leave focus check on on this is basically when you enable manual

play13:16

focus it's gonna punch in a little bit and the HDMI output info display really

play13:21

depends on what I'm doing if I'm capturing my EVF I will leave that on on

play13:24

if I'm using a out of most recorder or anything like that I'm going to use it

play13:28

on off if it's for creative footage and here I leave this at the default as well

play13:34

as the HD output as also on default and the 4k HDMI standby quality is at 4k I

play13:42

leave the HDMI record control on on as well so for zebra settings I like to

play13:48

leave this on and it really doesn't matter if you choose right or left and I

play13:52

like to leave this at 95%

play13:58

and on the audio settings I only have the mic level limiter and I turn

play14:03

everything else off and for the mic remote release I leave this at

play14:08

microphone because I don't typically use a remote release in the microphone port

play14:13

timecode settings I don't change and the tally light I have just on the solid

play14:17

rear light on and I leave the movie silent control on on because I like to

play14:23

have the exposure settings for movie mode decoupled from the still shooting

play14:27

settings all right on to the user settings we're gonna set the date here

play14:32

as twenty twenty three twenty nine eleven forty alright and the time

play14:36

difference I like to leave this on home as I when I go traveling I don't want

play14:41

the photos to be out of order language is that English and then the my menu

play14:45

setting I'm gonna add these items later

play14:49

so for this sound in the flash we're going to leave this on on this basically

play14:55

lets the flash be able to turn on we're gonna change the sound in a different

play14:58

area now we're going to go over to the sound settings and I'm gonna first thing

play15:02

gonna do is turn off the shutter volume to off this makes it a lot more silent

play15:08

than the previous that I had alright so now we're going to go in the sound some

play15:13

things we're gonna finish that right there and now we're gonna go into the

play15:17

EVF settings so for the View mode I'm gonna have the both the shooting and the

play15:23

playback on the I sensor and I have the EVF brightness at negative one and the

play15:32

EVF color I also like to leave at zero color adjustment is at zero and LCD

play15:37

brightness I like to have that at negative one the reason why I do this is

play15:41

because I find that negative one gives the closest brightness level to a mobile

play15:46

phone or an iPhone set at 75 percent brightness which is typically what I

play15:50

have my screen at so LCD colors at zero LCD image adjustments at zero image

play15:56

display I like to have that 0.5 seconds I have auto rotate display on on and

play16:02

preview exposure in mana mode I like to have that

play16:05

as well natural light view I leave that on/off and flaming guideline I like to

play16:10

have this at grid 24 as this is the only grid that has a center both horizontal

play16:15

and vertical line right so I have auto rotate playback on/off as I like to see

play16:22

the vertical photos in full-screen still I have the focus scale units on feet and

play16:29

then I have the OVF image display on full so as far as they display custom

play16:34

settings go for the EVF I pretty much have everything checked except for the

play16:37

framing guideline the auto focus distance indicator and the exposure

play16:46

compensation digit everything else I like to have on all right and then for

play16:54

the EVF LCD I have the framing guideline on electronic level on I leave the AF

play17:01

distance indicator on/off I have the histogram on and the live view highlight

play17:08

alert on these are very important for getting accurate exposures and then I

play17:13

just leave the exposure compensation digit off I like to have the framing

play17:20

outline on as well

play17:24

and just to show you basically what the highlight warning looks like that will

play17:29

show you when your highlights are blown out or not alright so back to these

play17:34

settings I usually leave the large indicators on/off on both things they

play17:43

don't really turn that on in general and then I have the information contrast

play17:47

adjustments to standard so now on to the button and dial settings which is really

play17:51

the fun stuff so I have the focus lever or setting on on and I have the Edit

play17:56

quick menu setting to 16 and here are my 16 slots that I use this basically

play18:03

custom setting out of the focus mode dynamic range white balance and then

play18:09

here I like to set this to the ND filter image size image quality film simulation

play18:21

highlight shadow colour sharpness timer face detection I have the flash here and

play18:31

the brightness and I have the Q menu set to the black background it's a next up

play18:38

we're gonna do the function button settings which is basically the way that

play18:40

you can personally customize your camera to be how you want it so I personally

play18:45

have the function 1 set 2 previews your white balance in mana mode on on and

play18:51

this is the top one right here and I have the function button in the front of

play18:55

the lever to be face and eye detection I like to use the swipe touch settings

play19:00

because I don't have the d-pad anymore so I have the top one set to performance

play19:05

swipe left set to white balance and I have the right one set to custom

play19:11

settings and the swipe down set to electronic level and then for the auto

play19:17

exposure lock and auto focus lock I set that to histogram this gives you a

play19:22

bigger histogram to look at which is displayed right there

play19:28

picking this back up and then I have the rear dial set to focus check and the

play19:33

selector set to ND and the Cuban set to Q so the command dial settings I have

play19:39

this set to f-stop ISO and none and I have the rear one set to shutter speed

play19:45

the cool thing is if you set the ISO dial to C and the shutter speed dial to

play19:50

T you can control the shutter speed with the rear wheel all the way and the ISO

play19:55

with the front wheel all the way so coming back here we're gonna go to the

play20:00

shutter AF is on on on both AFS and AF C and the shutter IE is also an on for

play20:07

both shoot without card I like to leave that on off so that my camera doesn't

play20:11

shoot without an SD card on it in focus ring is set to clockwise and the focus

play20:17

ring operation is on non linear and for the control ring setting I set that to

play20:21

the digital teleconverter the auto white balance and the AEA F locks I set to

play20:27

switch which is a toggle on and off and the aperture ring setting I have a two

play20:33

auto as far as the touch screen settings go I leave the touch screen setting on

play20:37

on double tap is on/off and I have the swipe touch functions on on as again I

play20:43

do miss the d-pad so I have the touch screen setting for playback on on and

play20:48

for the EVF OVF touch screen area I have this on right side only that way if I

play20:54

put my nose the camera right here it doesn't enable the touch screen so now

play21:02

going to the power management we have the two-minute default with the

play21:06

performance at to boost and the EVF performance set to brightness priority

play21:10

and here you can change the save data settings however you like and change the

play21:15

copyright and author information however for your name and now we go on to the

play21:21

Bluetooth settings which I have paired to my phone I have the Bluetooth on and

play21:26

the auto image trance are off as well as the smart phone sync settings off as I

play21:31

don't like it changing the cameras time based on my phone

play21:34

and the PC connection mode I set to the USB rock converters slash backup restore

play21:39

settings and the USB power supply set to on and for the general settings I like

play21:45

to leave the basically the resize for three megabytes to off as I like to

play21:51

dictate the file size of anything transferred my phone to the JPEG

play21:55

settings which I have two JPEGs small and now that pretty much completes my

play22:01

set up for my fujifilm x100t if this video was helpful be sure to give it a

play22:07

like and let me know down in the comments below if you have any questions

play22:10

about a particular setting or my overall setup in general and if you want to save

play22:14

some time I've uploaded my configuration file for all the settings shown in this

play22:18

video if you like to use Fuji films X acquire software's restore camera

play22:23

settings feature to duplicate my setup all you got to do is click the link

play22:27

below fill out the form and you'll get an email with a link to download the

play22:30

setting configuration file as always please be sure to subscribe if you

play22:34

haven't already as I make a new Fuji film or photography video every week and

play22:38

if that's too long for you go ahead and follow me on instagram at a try giri

play22:42

photo for new tips tricks and tutorials throughout the week all right that's it

play22:46

for me remember to get out go shoot and I'll catch you guys in the next one

Rate This

5.0 / 5 (0 votes)

Etiquetas Relacionadas
Fujifilm X100VCamera SettingsPhotography TipsReggie BallesterosWedding PhotographyPortrait PhotographyTravel PhotographyFilm SimulationRAW ShootingCustom PresetsPhotographer's Guide
¿Necesitas un resumen en inglés?