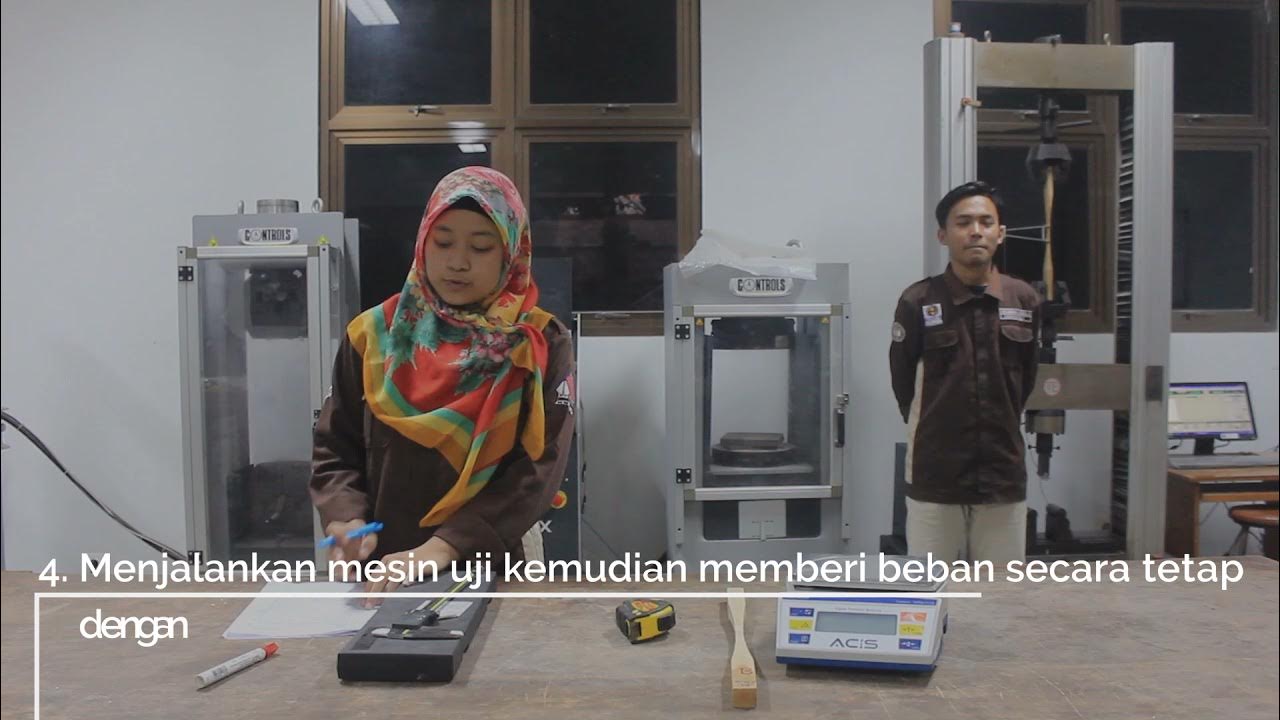
Lab 2 Rock tensile strength: Brazilian test

D Nicolas Espinoza
2 Oct 202008:41

Summary

TLDRThis video explains the process of performing a tensile strength test using the Brazilian density strength method. The procedure involves applying force to a cylindrical rock sample, measuring its diameter and length, and observing the fracture point. Key steps include sample measurement, setup of the loading frame, alignment checks, and data analysis. The video highlights how to calculate tensile strength based on the peak load and dimensions of the sample, emphasizing the importance of precision during both the testing and analysis phases.

Takeaways

  • 🧪 The focus of this lab (Laboratory 2) is on measuring tensile strength using the Brazilian tensile strength test.
  • 📏 The sample used in this test is a cylindrical rock with equal length and diameter, and force is applied along the cylindrical side.
  • 💥 The test generates tensile strength, causing a fracture in the rock, and the tensile strength is estimated from the peak load and sample dimensions.
  • 📊 Steps in the analysis include sample measurement, loading frame setup, fracturing, and data analysis—similar to Laboratory 1.
  • 📐 The diameter is measured in different directions to ensure the sample is as circular as possible, while length measurement is less critical compared to Lab 1.
  • 🔄 The alignment of the top and bottom parts of the frame is checked to ensure they are parallel using a level tool.
  • ⚙️ The control setup monitors two key parameters: the load and displacement, with displacement measurement being optional in this lab.
  • ⏩ Two speeds are used in the setup: one for movement and one for displacement, and the lower frame is raised until it touches the upper frame.
  • 🛡️ Protective plastic is placed around the sample in case the rock explodes during the test.
  • 📸 After the rock fractures, a force drop is observed, and data is captured for further analysis, including calculating tensile strength based on the peak load.

Q & A

  • What is the main focus of the laboratory experiment discussed in the transcript?

    -The main focus of the laboratory experiment is to measure the tensile strength of a cylindrical rock sample using the Brazilian Tensile Strength test method.

  • What shape is the rock sample used in the tensile strength test?

    -The rock sample used in the tensile strength test is cylindrical, with the diameter and length being the same.

  • How is the tensile strength generated during the test?

    -Tensile strength is generated by applying force along the cylindrical side of the sample, which causes a fracture in the rock.

  • What are the key measurements needed before starting the tensile strength test?

    -The key measurements needed are the diameter and the length of the sample. These measurements help in estimating the tensile strength once the peak load is known.

  • Why is it important to check the circularity of the sample during the preparation phase?

    -It is important to check the circularity of the sample to ensure that the sample is as close to a perfect cylinder as possible. An irregular shape may affect the accuracy of the tensile strength measurement.

  • How does bedding direction influence the tensile strength test?

    -Bedding direction can affect the tensile strength of the sample depending on how the stress is applied during the test. It is important to check for bedding direction before proceeding.

  • Why is it necessary to level the top and bottom parts of the frame before testing?

    -It is necessary to level the top and bottom parts of the frame to ensure that the load is applied evenly across the sample. Misalignment could result in inaccurate measurements.

  • What are the two main parameters controlled during the tensile strength test?

    -The two main parameters controlled during the test are the load and the speed of displacement.

  • What indicates that the sample has fractured during the test?

    -The sample is considered to have fractured when the load applied reaches a peak and then suddenly drops.

  • How is the tensile strength calculated after the test is completed?

    -Tensile strength is calculated using the peak load applied during the test, along with the sample's length and diameter measurements.

Outlines

00:00

🧪 Introduction to Tensile Strength and Brazilian Density Test

In this section, the speaker introduces the topic of tensile strength testing for cylindrical rock samples, specifically using the Brazilian Density Strength Test. The method involves applying force along the cylindrical side of the sample to generate tensile strength and fracture the rock. The tensile strength can be calculated using the peak load and by measuring the sample's dimensions (length and diameter). The procedure is similar to what was covered in a previous lab session, and involves sample measurement, loading frame setup, fracturing, and data analysis.

05:00

🧩 Importance of Sample Measurement and Quality Control

The speaker emphasizes the need for careful sample measurement and quality control. Two key factors are highlighted: ensuring the sample is as circular as possible, and considering the impact of bedding direction on tensile strength. Multiple measurements of the diameter and length are taken to ensure accuracy, although the length is less critical compared to the first lab session. Special attention is given to whether the sample has bedding, as this could affect the results of the tensile strength test.

🔧 Setting Up the Loading Frame

This section covers the setup of the loading frame used in the tensile strength test. The speaker explains that the top and bottom parts of the frame must be parallel, which is checked using a level. Once the frame is properly aligned, the sample can be positioned for testing. The speaker explains the control system, noting that while vertical displacement is not necessary for this test, it can still be measured if additional data is needed. Various functions on the control panel are described for adjusting the speed and monitoring the test.

🚀 Preparing for the Tensile Strength Test

The speaker discusses the final preparation steps before the tensile strength test begins. Two speeds (screen speed and displacement speed) are used to carefully position the sample in the frame. As the lower frame moves up and touches the upper frame, the force increases slightly, signaling that the sample is in place. Safety precautions are also mentioned, including the use of protective plastic around the sample to prevent injury in case the rock explodes during testing.

🔨 Conducting the Fracture Test

In this section, the speaker explains the process of conducting the fracture test. The lower part of the frame is moved up to increase the load on the sample. As the load increases, it will reach a peak before dropping when the rock fractures. The test is stopped once the force drops, and a picture of the fractured sample is taken. The data collected is stored for further analysis.

📊 Data Analysis and Tensile Strength Calculation

The final section covers data analysis and the calculation of tensile strength. Using the previously measured length and diameter of the sample, along with the peak load recorded during the test, the tensile strength of the rock can be calculated. The speaker concludes by mentioning that this data will be used for reporting and further analysis.

Mindmap

Keywords

💡Tensile Strength

Tensile strength refers to the resistance of a material to breaking under tension. In the context of the video, it is a crucial property being tested in rocks to understand their ability to withstand forces that pull them apart. The Brazilian test method, as discussed, measures this strength by applying a load to a cylindrical sample.

💡Brazilian Test

The Brazilian test, also known as the Brazilian tensile strength test, is a method for measuring the tensile strength of materials, especially rocks. In this video, the method involves applying force to the sides of a cylindrical sample to induce a tensile fracture. The results help in determining the material's strength under tension.

💡Cylindrical Sample

A cylindrical sample refers to the rock specimen used in the tensile strength test, characterized by having equal diameter and length. In the video, this sample is the subject of various measurements (diameter and length) before the tensile test is performed. Ensuring the sample is as circular as possible is important for accurate test results.

💡Fracture

Fracture refers to the breaking or cracking of a material when subjected to stress. In the video, a fracture is induced in the rock sample during the tensile strength test when the applied load exceeds the material's limit, leading to the failure of the rock. Observing the fracture helps in understanding the material's strength properties.

💡Load Cell

A load cell is a sensor or device used to measure force or load. In this tensile strength test, the load cell measures the force applied to the cylindrical sample until it fractures. The peak load recorded by the load cell is crucial for calculating the tensile strength of the material.

💡Sample Measurement

Sample measurement involves taking precise measurements of the cylindrical sample’s diameter and length before conducting the tensile test. These dimensions are critical for calculating tensile strength. As described in the video, measurements are taken in different directions to ensure the sample is circular and to account for potential irregularities.

💡Loading Frame

The loading frame is the apparatus used to apply force to the sample in the tensile strength test. In the video, the frame is aligned carefully, and adjustments are made to ensure that the top and bottom parts are parallel, which is necessary for consistent and accurate force application during the test.

💡Bedding Direction

Bedding direction refers to the orientation of layers within the rock sample, which can affect its strength properties. In the video, it is mentioned that the bedding direction must be checked because it may influence the tensile strength depending on how the load is applied to the sample.

💡Displacement

Displacement in this context refers to the movement of the sample within the loading frame as the force is applied. While vertical displacement is mentioned as less critical in this test compared to others, it is still measured in some cases to provide additional data regarding the movement of the sample during testing.

💡Data Analysis

Data analysis involves interpreting the results from the tensile strength test. After the sample fractures, the peak load and the measurements of the sample (length and diameter) are used to calculate the tensile strength. This process, as outlined in the video, includes recording the maximum force and analyzing the resulting fracture pattern to determine the material's behavior under stress.

Highlights

Introduction to tensile strength and the Brazilian density strength test.

Description of using a frame to apply force on a cylindrical sample.

Explanation of how force is applied along the cylindrical side to generate tensile strength and fracture.

Method to estimate tensile strength based on peak load, sample length, and diameter.

Steps for analysis: sample measurement, loading frame setup, fracturing, and data analysis.

Importance of quality checking the sample to ensure it is as circular as possible.

Impact of bearing direction on tensile strength depending on stress application.

Measuring sample diameter in different directions to check circularity.

Less criticality of parallel faces for length measurement compared to laboratory 1.

Checking for bedding direction in the sample.

Ensuring the frame's top and bottom parts are parallel using a level.

Setting the sample and controlling parameters: load and displacement.

Using two speeds: screen speed and displacement speed for the frame.

Protective measures: placing protective plastic around the sample during measurement.

Observing load increase and drop during fracturing to determine fracture.

Stopping analysis, capturing fracture data, and structuring the data file for the report.

Calculating tensile strength using sample dimensions and highest applied load.

Transcripts

play00:00

this talk is going to be

play00:03

for the laboratory number two in our

play00:06

attorney number two

play00:07

we are going to talk about tensile

play00:09

strength

play00:12

the method that we use to measure

play00:16

that inside strength is called brazilian

play00:19

density

play00:20

strength test in here

play00:23

we use a frame to apply a force on a

play00:27

cylindrical sum

play00:30

in this cylindrical sample diameter and

play00:33

length

play00:34

have the same length

play00:37

and the force that we are applying

play00:41

is along the cylindrical side

play00:44

of the sample in this case

play00:47

when we apply the load we generate

play00:51

a tensile strength generating the

play00:54

fracture

play00:55

in the rock we can estimate

play00:59

the tensile strength based on the

play01:02

peak load and by the sample and

play01:06

by knowing the length and the diameter

play01:08

of the

play01:10

ceiling

play01:12

the steps that we are going to

play01:14

[Music]

play01:15

use to for this analysis

play01:18

are the same that we already seen in

play01:21

laboratory 1

play01:23

which are sample measurement loading

play01:26

frame setup

play01:27

fracturing and data analysis

play01:34

what we observe is that again we need to

play01:37

measure and quality check the sample

play01:40

that we are going to use in our analysis

play01:43

the main points in here are two first

play01:47

samples are not going to be perfectly

play01:49

selenium

play01:50

this case we have to check that the

play01:52

sample

play01:53

or the cylinder is as circular as

play01:56

possible

play01:58

second that is

play02:01

if we have bearing bearing

play02:04

direction may affect the tensile

play02:06

strength

play02:07

depending on how we apply the stress on

play02:10

the sample

play02:14

to analyze the sample we are going to

play02:16

measure

play02:19

two values diameter

play02:22

d and length

play02:25

l in the case of the diameter

play02:29

we are going to measure in different

play02:31

directions

play02:32

just to check that the side that the

play02:35

sample is

play02:36

circular and we are going to use the

play02:39

address

play02:40

for the length we are going to measure

play02:43

at different directions

play02:45

in this case compared to our retina re1

play02:48

we don't need the sample to be to have

play02:52

parallel

play02:52

and faces so length

play02:56

measuring is not as critical as we

play02:59

observe

play03:00

in laboratory one however we have to

play03:03

check

play03:04

whether we have bedding and if we have

play03:08

bedding direction

play03:11

so now we are going to

play03:15

analyze and

play03:18

to check if the frame is

play03:21

a properly settled for the work

play03:25

first we have to check if

play03:29

the top and the bottom part of the frame

play03:32

are parallel or not to check that

play03:36

we use a level and what we check is

play03:38

actually is that

play03:39

the level at the top and the bottom are

play03:42

aligned one exit with each other

play03:46

then we can proceed to sit in the sample

play03:51

again as in our 31 we are going to

play03:55

have the the control

play03:58

where we check two main parameters first

play04:02

the load a second displacement

play04:06

in the laboratory two this vertical

play04:09

displacement

play04:10

is not going to be necessary however you

play04:14

can measure

play04:15

it in case that you need some additional

play04:18

information

play04:20

to measure whether we are moving

play04:23

the sample up or down we can use

play04:27

develops up or down and to control the

play04:31

speed

play04:32

we can check speed and go to the menu

play04:36

here f2 is going to you to be used

play04:40

to control the digits while f3 and

play04:44

f4 are going to check where to

play04:47

increase or decrease the digit that we

play04:51

are

play04:51

stepping on once we confirm the speed

play04:54

we just hit speed to go back to the menu

play04:57

before

play05:00

in this work again we are going to use

play05:03

two speeds

play05:04

screen speed and displacement speed

play05:08

using certain speed then we can

play05:12

sit ourselves it means that

play05:16

we are going to move up

play05:19

our lower frame until

play05:22

it touches the upper part of the frame

play05:26

when that happens we'll see that the

play05:28

force

play05:29

slightly increases now we are ready to

play05:32

do the measurement so

play05:34

we just have to place protective plastic

play05:36

around

play05:37

in case that the frag that the rock is

play05:41

so

play05:41

explodes during the measurement

play05:46

so now that we have the leveling check

play05:49

and that we see the sample we are going

play05:53

to go

play05:54

to a factory the fracturing what we are

play05:57

going to do is

play05:58

just we are going to keep moving up the

play06:01

lower part of the frame

play06:04

but we are going to observe an

play06:07

increase in the load that we are

play06:09

applying

play06:10

this load is going to reach a minimum

play06:13

and then

play06:14

it's going to have a drop when the

play06:17

fractal fades

play06:18

when the rock phase and

play06:22

by the end of the after the data

play06:24

analysis

play06:25

we can see a video where we are applying

play06:29

and strength on the sample until it

play06:32

fractures

play06:34

so as i mentioned before we have to move

play06:38

up

play06:39

we expect to see a forced rope and then

play06:43

we immediately stop the analysis

play06:46

take a picture of the fracture and

play06:48

struck the data file

play06:50

for our report finally

play06:53

we can proceed with our data analysis

play06:57

to calculate the tensile strength we

play07:00

already have the length

play07:02

and the diameter of the sample so we

play07:05

have to

play07:06

[Music]

play07:08

find which was the highest load

play07:11

that we are applied in our load cell

play07:14

and from this value we can calculate

play07:17

that inside strength

play08:39

you

Rate This

5.0 / 5 (0 votes)

Etiquetas Relacionadas
Tensile StrengthRock TestingLaboratory AnalysisFracture TestSample MeasurementData AnalysisBrazilian TestGeotechnical EngineeringMaterial StrengthTesting Procedure
¿Necesitas un resumen en inglés?