Tensorflow Lite with Object Detection on Raspberry Pi!
Summary
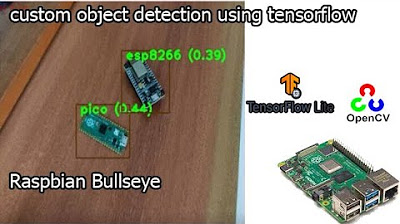
TLDRThis tutorial demonstrates how to install TensorFlow Lite on a Raspberry Pi for object detection. The presenter guides viewers through cloning a TensorFlow repository, setting up a virtual environment, and running an example script. A common issue with the 'glib' package is addressed with a solution from Stack Overflow. The video concludes with a live demonstration of object detection using a camera, showcasing the model's ability to identify various objects, despite some inaccuracies.
Takeaways
- 📷 The video is a tutorial on installing TensorFlow Lite on a Raspberry Pi for object detection.
- 🔍 The tutorial assumes the viewer has a Raspberry Pi set up and ready to use, with the option to use VNC for remote access.
- 🖥️ The process involves cloning a GitHub repository for TensorFlow examples to the Raspberry Pi's desktop.
- 🛠️ A virtual environment is recommended for the installation to keep code and packages separate.
- 📚 The 'virtualenv' package is used to create a virtual environment, which is then activated.
- 🔧 The 'setup.sh' script is executed to install necessary dependencies and set up the environment for TensorFlow Lite.
- 🔄 There might be a need to downgrade the 'tflite-support' package to resolve version conflicts.
- 🔎 The 'detect.py' script is used to run the object detection model with a specified TensorFlow Lite model.
- 📱 The tutorial demonstrates object detection with various objects like a cell phone, Xbox controller, and keyboard.
- 🛑 To stop the object detection process, the user can simply use 'Ctrl + C' in the command prompt.
- 🔄 The video mentions the possibility of converting standard TensorFlow models to TensorFlow Lite for use on the Raspberry Pi.
Q & A
What is the main topic of the video?
-The main topic of the video is about installing TensorFlow Lite on a Raspberry Pi and performing simple object detection.
What is the prerequisite for following the tutorial?
-The prerequisite is having a Raspberry Pi set up and ready to go. The tutorial assumes the viewer has basic familiarity with the Raspberry Pi and its setup.
How does the presenter access the Raspberry Pi in the video?
-The presenter is using VNC to remotely access the Raspberry Pi, which allows for easier screen recording without needing to connect a monitor.
What is the first step in setting up TensorFlow Lite on the Raspberry Pi according to the video?
-The first step is to clone a repository from GitHub that contains TensorFlow examples.
Why does the presenter recommend using a virtual environment?
-A virtual environment is recommended to keep the code and packages separated, which helps in managing dependencies and avoiding conflicts with other projects.
What command is used to create a virtual environment in the video?
-The command used to create a virtual environment is 'python3.7 -m venv TF', where 'TF' is the name of the virtual environment.
How does one activate the virtual environment created?
-To activate the virtual environment, the command 'source TF/bin/activate' is used, where 'TF' is the name of the virtual environment.
What is the purpose of the 'setup.sh' script mentioned in the video?
-The 'setup.sh' script is used to install the necessary dependencies and set up the environment for running TensorFlow Lite examples on the Raspberry Pi.
What is the name of the script used to run the object detection example?
-The script used to run the object detection example is named 'detect.py'.
What issue did the presenter encounter and how was it resolved?
-The presenter encountered an error related to the 'glib' package. It was resolved by downgrading the 'TF light-support' package to version 0.4.3.
How can one change the model used for object detection in the script?
-To change the model used for object detection, one needs to specify a different model file in the 'detect.py' script using the '--model' flag followed by the path to the new model file.
What does the presenter plan to cover in future videos?
-The presenter plans to make a video about converting standard TensorFlow models to TensorFlow Lite, which would be useful for using custom models on the Raspberry Pi.
Outlines

Dieser Bereich ist nur für Premium-Benutzer verfügbar. Bitte führen Sie ein Upgrade durch, um auf diesen Abschnitt zuzugreifen.
Upgrade durchführenMindmap

Dieser Bereich ist nur für Premium-Benutzer verfügbar. Bitte führen Sie ein Upgrade durch, um auf diesen Abschnitt zuzugreifen.
Upgrade durchführenKeywords

Dieser Bereich ist nur für Premium-Benutzer verfügbar. Bitte führen Sie ein Upgrade durch, um auf diesen Abschnitt zuzugreifen.
Upgrade durchführenHighlights

Dieser Bereich ist nur für Premium-Benutzer verfügbar. Bitte führen Sie ein Upgrade durch, um auf diesen Abschnitt zuzugreifen.
Upgrade durchführenTranscripts

Dieser Bereich ist nur für Premium-Benutzer verfügbar. Bitte führen Sie ein Upgrade durch, um auf diesen Abschnitt zuzugreifen.
Upgrade durchführenWeitere ähnliche Videos ansehen

tensorflow custom object detection model | raspberry pi 4 tensorflow custom object detection

On-device object detection: Introduction

Hack WiFi with a Raspberry Pi and Kali Linux

Image Classification App | Teachable Machine + TensorFlow Lite

TinyML: Getting Started with STM32 X-CUBE-AI | Digi-Key Electronics

Raspberry Pi AI Camera Module
5.0 / 5 (0 votes)
