Splitting the Tractor and More Surprises | Farmall 856 Restoration Episode 4
Summary
TLDRIn this home tractor restoration video, the narrator splits his Farmall 856 to inspect seals and determine if they are leaking. He discovers the engine rear main seal and transmission seals need replacing. While disassembling components, he finds damage to the clutch torque amplifier shaft, likely from a prior pilot bearing failure. He debates whether to fully split the transmission to replace the costly torque amplifier, seeking viewer input. Though not urgent, he leans toward doing a complete overhaul for long-term reliability rather than a quick fix.
Takeaways
- 😀 Pete is restoring an IH 856 tractor and splitting it to inspect seals
- 😊 Pieces fell out of the final drive case previously - likely from a broken detent spring
- 👷♂️ Pete is disconnecting parts like the pilot valve to prep for splitting the tractor
- 🔧 He uses splitting stands to separate the tractor and inspect the seals
- 🚜 The engine rear main seal and transmission seals are leaking and need replacing
- ⚙️ The clutch can be replaced while split - Pete will also have the flywheel machined
- 🔎 The clutch shafts show wear - the inner one is damaged and may need a new torque amplifier
- 💭 Replacing the torque amplifier would allow fixing it right but is a lot of extra work
- 😕 The clutch isn't worn out but since the tractor is split already it makes sense to replace it
- 🤔 Pete is unsure whether to replace just the clutch or go further and do the torque amplifier
Q & A
What fell out of the final drive case when the oil was drained?
-Some broken pieces fell out, including a spring and a roller that rolls around on the detent plate. It was determined they likely came from the broken spring in the range transmission cover.
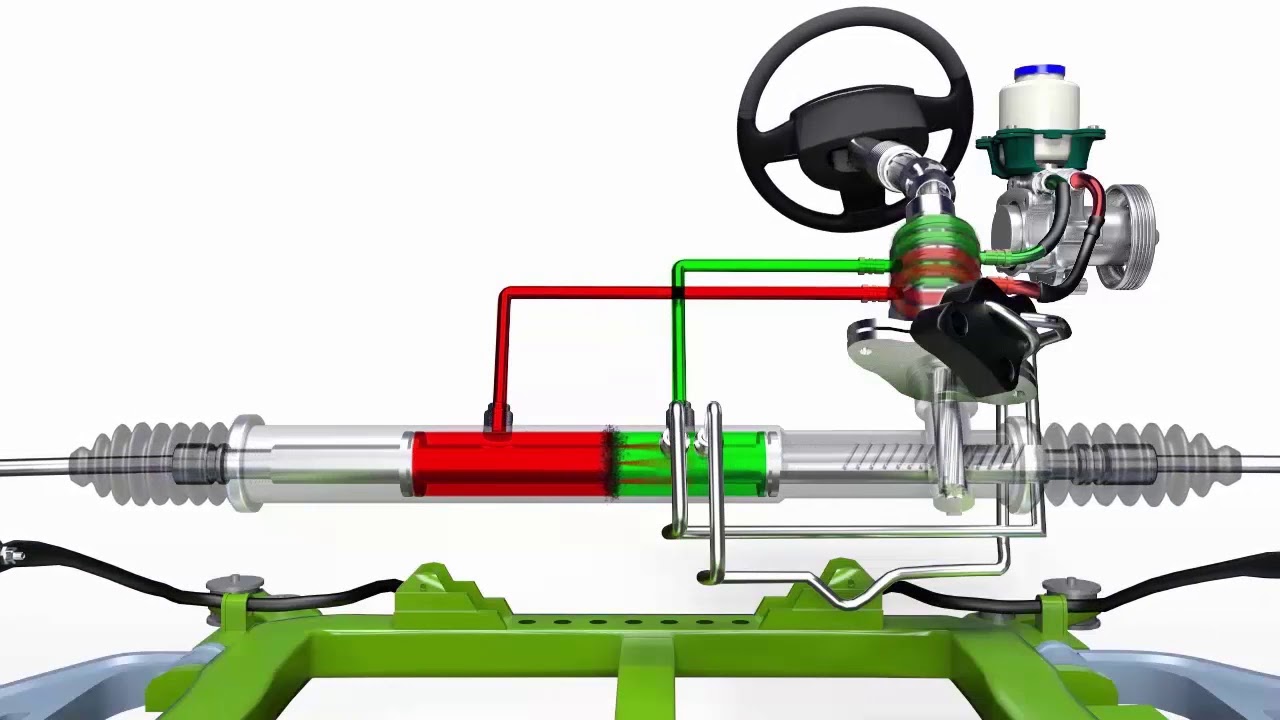
What is the pilot valve for?
-The pilot valve is part of the power steering hydraulic system. It provides hydraulic fluid to the power steering system when the steering wheel is turned.
How does the pilot valve work?
-It has a spool valve inside that is nudged off-center when the steering wheel is turned, allowing pressurized fluid from the MCV to flow to the power steering cylinder to provide power steering.
What needs to be done to split the tractor?
-Steps include disconnecting the power steering lines, removing some bolts from the clutch housing, putting the tractor on stands, and inserting dowel pins to keep the shaft plates aligned.
What was found when inspecting the split tractor?
-The rear main seal and possibly the gasket were found to be leaking. The engine main seal also showed signs of leaking.
What shaft was found to be worn?
-The live shaft splines that turn all the time were worn about a third of the way through.
What damage was found on the clutched shaft?
-The end of the clutched shaft was damaged in the past when a pilot bearing went bad. It had been dimpled with a punch to try to fix it.
What does the video creator debate doing?
-He debates whether to split the midsection further to replace the torque amplifier due to the damaged clutched shaft.
What would replacing the torque amplifier involve?
-It would require splitting the midsection off, pulling out the transmission guts, removing the MCV, and installing a new torque amplifier.
Why might it be advisable to replace the torque amplifier?
-Since the tractor is already disassembled, it may be worth the effort to replace it and ensure smooth shifting long-term.
Outlines
😀 Introducing the tractor restoration project
The narrator Pete introduces himself and the tractor restoration project. He explains that this is episode 4 where he will split the tractor to inspect the engine seals, clutch and transmission seals for leaks. He also solved the mystery of some metal pieces that fell out when he drained the oil.
🔧 How the hydraulic power steering works
Pete explains how the hydraulic power steering system works on the tractor. He describes the key components like the pilot valve, hand pump, multiple control valve and steering cylinder. He also explains how turning the steering wheel slightly provides hydraulic pressure to nudge the spool valve to activate power steering.
⛏ Splitting the tractor
Pete uses a screw jack to support the rear half of the tractor. He inserts studs in the bottom holes to prevent misalignment when splitting the tractor halves. He removes the top bolts last after loosening all others. The tractor splits open revealing leaks at the rear main seal and clutch housing.
🚜 Inspecting the parts
With the tractor split, Pete inspects the condition of parts like the clutch, pressure plate, flywheel, pilot bearing, throwout bearing and seals. He finds wear and leakage in many places. He decides to replace the clutch, pressure plate, flywheel bearing, throwout bearing and seals.
🤔 Debating whether to replace the torque amplifier
Pete finds damage on the clutch input shaft from a past pilot bearing failure. It was temporarily fixed by dimpling the shaft. He debates whether to undertake the major effort of splitting the transmission and replacing the torque amplifier to properly fix the issue.
😊 Conclusion and asking for feedback
Pete concludes by leaning towards replacing the torque amplifier for a long-lasting repair. He asks viewers for feedback on whether he should undertake the additional work of splitting the transmission case.
Mindmap
Keywords
💡restoration
💡splitting
💡clutch
💡shafts
💡torque amplifier
💡pilot bearing
💡seals
💡judgment calls
💡MCV
💡conventional wisdom
Highlights
Theorizes that the spring broke, allowed a roller to drop down, get chewed up by the gears, and the pieces migrated to the low point
Plans to split the tractor to inspect seals and determine if they are leaking
Explains how the hydraulic power steering system works, including the pilot valve
Notes need to replace worn spline shaft in transmission and debates replacing torque amplifier
Questions if it's best practice to repair slightly damaged clutch shaft or replace torque amplifier
Decides to replace clutch since the tractor is already split
Notes torque amplifier has some lag at high temperatures, so may need replacement
Debates if it's worthwhile to do more extensive repairs while split
Suggests convention to always replace clutch when splitting tractor
Unsure of age and condition of current torque amplifier
Wants feedback from viewers on decision to replace torque amplifier
Tractor not urgently needed, so has time for more repairs
Goal is to do a quality restoration job on this tractor
Replacing torque amplifier means full transmission inspection and rebuild
Extensive repairs now saves future work over life of tractor
Transcripts
hi I'm Pete and welcome to just a few
Acres Farm episode 4 of the farm all 856
Restoration in this episode I'm going to
split the tractor and we'll take a look
at the engine rear main seal the clutch
and the transmission front seal to see
what kind of shape they're in see if we
can see evidence of leaking but before I
get to that I have a mystery I think
that is solved remember these pieces
fell out of the final drive case when I
drained the oil and we figured out what
this BT is so remove that one and I
think I know where they came from this
is the underside of the range
transmission cover and there's a spring
that goes between these two arms here to
put pressure on the detent plates here's
the spring that goes there and here's
that spring against the broken piece
pretty exact match same cover this is
the roller that rolls around on the deta
plate and the width of these pieces
match the roller that cover sits right
here and I think what happened is the
spring broke and fell down inside and
then once the spring broke it allowed
one of the rollers to drop down because
the roller trapped by that silver
bracket I was showing you once it got
out of position the roller dropped down
the side hit the gears and was chewed up
theorizing that I looked at all these
gears very carefully at least the ones I
could turn I can't turn some of them
like that one but I didn't see any
damage
my hypothesis is that the gear teeth are
much harder than that roller material so
it got chewed in the teeth but it didn't
hurt the teeth coming around to the back
of the tractor and looking inside way up
in the forward end there behind that
hydraulic pump the silver thing there's
a passage that connects the range
transmission on the bottom to this rear
end so the pieces migrated back and came
to rest at the low Point down here after
that breakage happened Somebody went in
and replaced the broken
pieces but they didn't take the pieces
out of the back either they didn't drain
the oil when they did the work or they
were still stuck up in the bottom of the
case here where you can't see them
something like that I want to thank a
number of commenters that called that
that said they thought that was what it
was as I thought about it more and
looked through the parts book again and
again for spring that match set there
were no others besides that detent
spring so I'm pretty sure I'm 99% sure
that was what happened it's time to
prepare to
prepare to split the tractor I have to
disconnect the power steering lines that
go up front this here is the pilot valve
for the power
steering this is a funky little Gizmo
I'll tell you what it does in a
minute this is the front of these two
power steering lines that come up from
the pilot valve and they have banjo
fittings on them
you're kind of a pain a little bit guess
I should have got the socket wrench
[Music]
out those lines run inside this Channel
or alongside of it and sometimes there's
a clip to stabilize them but I don't see
one in
[Music]
here and actually I'm going to have to
put removal of these lines on hold till
the front end of the tractor comes off
cuz they're caught in the Cradle here by
the bends and the line so it's good
enough to just have them disconnected
and
back
I'm taking this pilot valve off so I can
clean it well and paint it I do that
with some things that don't require
fixing but have to come off to make a
job that I'm happy
with some moisture got under
there
this pilot valve is part of the steering
hydraulic system I could probably do a
whole video on the hydraulic systems in
this tractor because there's a lot to
them but this is the multiple control
valve down here and it provides
hydraulic fluid to the brakes the power
steering the transmission cooler and the
torque amplifier inside this housing
here it's a it's kind of like an
automatic transmission valve body that
sends oil to various places it sends oil
up through these two ports in the top to
the steering pilot valve which supplies
the whole power steering
system with pressurized fluid and it's
got four ports in it's got well it's got
six it's got two in the bottom that
supply and return for the oil from the
MCV and then it's got the two ports that
go up to the hand pump which is right
underneath the steering wheel and then
it's got two ports that run forward to
the power steering cylinder that's part
of the front bolster on the tractor and
the way this works is if you're sitting
in the driver's seat and you turn the
wheel a little bit there's a spool valve
in here remember spool valve from the
brake valve remote hydraulic valves have
spools in them well that spool valve has
a pretty light spring on the end of it
that holds it centered and when you push
the when you pull the steering wheel one
way or the other you provide just enough
hydraulic pressure running through these
lines from the hand pump to nudge that
spool valve one way or the other
depending on the direction you pull the
wheel and once that spool valve gets
nudged off center then the pressurized
fluid coming from the MCV can flow up
and through and out to the front of the
tractor to provide power steering so the
hand pump is like a hand hydraulic pump
it's moving fluid through the part of
the circuit from the steering wheel to
the pilot Val here and then in essence
it gets boosted out to the front of the
tractor to turn the
wheels an important part of the system
is when you have power steering you need
to maintain feel you know the feel of
the steering wheel is important it just
can't be the power comes on all the way
and so this is balanced so that you get
the feedback through the steering wheel
so you understand how the tractor's
turning and and how difficult of a train
you're going through and there's a lot
to it so this thing is a necessity as
are all things on this tractor I
recruited my lovely wife
Hillary to help me roll the tractor back
we need the room to split
it that's plenty of room you're not
going to hit me in the head of the
shovel again are you
is that what you told everybody I didn't
do
that thanks for your
help
these are the splitting stands my dad
originally made way back in the MD
project and they fit everything you just
have to redrill the holes and the plates
here the width is adjustable with a top
length to hook them together they're
real easy to adjust exact position of
the tractor CU you can jack both Jacks
one or the other they work
great I blocked the rear wheels both
sides both wheels and I'm using my good
old 10 ton screw Jack here to support
the rear half also as easy Insurance you
can lock the tractor in two gears at at
once and that way it won't roll at
all I made a couple of studs by cutting
off the head of a long bolt and I'm
going to put those in these bottom
holes with the idea that as you draw the
tractor apart this wants to Spring it'll
spring down because the weight of the
engine
uh makes it different than this and
these holes become
misaligned I haven't tried this before
but we'll see how it works other
side
put some weight on the
Jacks there's two bolts of the top of
clutch housing
here
more of those 12p Point
bolts we'll get on
[Music]
there other side I'm leaving the top
bold in both sides to take out
last
now the top
bolts and I'll just loosen them up on
both sides and don't take them all the
way out you can see it's starting to
come apart
here
[Music]
break the other one
loose yeah it's opening up there
too I think I'll Jack it up a little bit
and try and get that Gap
even make sure everything's
straight
bring the rear end up
too here we go I think we're ready to
pull it
apart
right now the rail and the plate are
joined by this dowel pin and this bolt
up here if I put a nut on this
bolt then I've got the two of them tied
together and I can slide it off the D
pens okay we should be good to go now
what are we seeing here well in the rear
half of the tractor we definitely have a
leaking seal here and maybe that gaskets
leaking too that's all fresh oil leaking
down from the bottom
there yep I'm sure it needs to be
replaced the engine main seal is a
little bit more difficult to see I don't
know if you can see it but down in there
is a lot of crusty stuff and some of
it's shiny like it's fresh so it's
definitely leaking
too
[Music]
this is fluid out of my parts
[Music]
washer this yellow color you see under
here is the primer on these tractors
they use the yellow primer underneath
the red paint
these days I use brake and carb cleaner
sparingly stuff's getting really
expensive this can go back in the parts
washer what drained
out now for the rear main seal it's got
this retaining ring on
it
this remain seal in my opinion this is a
heck of a lot nicer than the complicated
things they had on the older IH
tractors it's a rubber lip
seal just a big old rubber lip seal and
to make things even better they put a
wear ring on the end of the crankshaft
so this ring is applied to the
crankshaft you chisel that off take that
off and a new wear ring comes with the
new seal now on the rear half of the
tractor I got to get this clutch release
bearing out and to do that I have to
disconnect the yolk it rides
on on the other side of that cross shaft
is the transmission brake linkage down
here which of course is coordinate did
with the
clutch will you come out that way
yep whoops there's a snap ring
here holding this on
now this should come
out these woodf Keys need to come off
the Yol to get the shaft
out yeah I thought maybe it would be
easy since you're so
greasy
[Music]
there's a plate on the bottom of this
housing that's removable so that you can
reach up from the bottom and grease the
throwout bearing it's got a grease Circ
out the bottom of it I need to take it
off so I can wash out this cake
[Music]
nice there's no two ways around it this
one's going to make a mess there's a lot
of gunk in
here cake
on
crud
H I think 75% of tractor restoration is
this kind of
work taking off
[Music]
crud there we go that's a whole lot
better than it was taking a closer look
at this shaft the inside
shaft it's been worn in here where a
pilot bearing went bad in the past and
somebody dimpled it on the low Parts
with a punch to help the pilot bearing
seat in there we're going have to take a
look at that next I'm going to get the
seal out of
here somebody's been in here too we've
got two IH bolts on the seal retainer
and one regular
Bolt
here's a shaft I pulled out there is an
o-ring on the outside
here which was leaking you can tell and
then there's a lip seal on the inside
here both need to be
replaced I'm going to pull this lower
shaft and plate too because there's
shims under it and then a seal rather
than just a simple gasket so that seal
may be
leaking
yeah well come out of there there's a
shim right there so you can't make the
seal with a gasket instead there's an
O-ring around here that's the bearing in
there
time for parts evaluation and sometimes
that's not a cut and dry process in fact
I had to sleep on this one let's do this
in the order I disassembled things
here's the
clutch it's got quite a bit of life left
in it but I figure while I'm in
here I might as well replace it and
probably the pressure plate assembly
too since I have a hydraulic clutch
assist I can get a heavier Duty one and
since I'm replacing the clutch I'll have
the flywheel ground too it doesn't look
that bad there is some cracking in it
here but putting a new clutch in it's
safe to grind the surface here and grind
the step to match the ring gear on the
flywheel looks fine to me it's got some
weere on it but I consider that minimal
this is not a flippable ring gear where
you can heat it up and flip it over it's
got a relief cut here and not on the
other side pilot bearing in the flywheel
it's got roughness to it replace that
same with the throwout bearing or clutch
release
bearing place that just one issue with
grinding this The Machinist I use Dave
Richards who has his own YouTube channel
has gone to Florida for the winter so
I'm going to have to find somebody else
to do this engine rear main seal the
slip seal
we sleeve on the crankshaft replace
those International Harvester made a
special tool for installing them that
it's a ring-shaped tool that presses
first the sleeve and then this lip seal
on gets everything in the correct place
I don't have one they're expensive I
called my local dealer who I've done
business with for 20 years and they
flatly informed me that they will not
loan out any of their tools even for
half a day so I'm on hot to find
somebody fairly local to me that I can
borrow one from to install it as for the
rear half of the split I have
this Square shaped o-ring that goes on
the lower shaft and for the upper shaft
I have this o-ring and this seal in here
everything so far has been fairly
straightforward and here's where we get
to the tough part let me put this back
on where do I start well a little short
explanation there's a spline shaft
within a spline shaft here and the
inside smaller shaft is the clutched
shaft so when you press in the clutch
this shaft stops this end of it seats
into the pilot bearing in the fly wheel
just for reference and as a refresher
the pilot bearing is right here on the
flywheel this outer shaft is the live
shaft so this
turns whether the clutch is in or not
this Powers the PTO in the Hydraulics to
give you live functions on the clutch
The Driven disc here has that smaller
diameter spline in it so it stops when
the clutch is disengaged or engaged
however you want to think about it when
you've got the pedal pressed in and then
on the pressure plate you've got the
larger spline so the pressure Plate's
spinning all the time because it's
hooked directly to the flywheel on the
tractor and it provides constant
rotation no matter the position of the
clutch if I pull this back out remember
this is the live shaft turns all the
time it's worn which is not uncommon
from what I've read on these the splines
are worn probably a third of the way
through it's no problem to find a
replacement it's just this shaft and
this gear is part of the shaft this
clutched shaft goes straight back and
into the torque amplifier I'm mentioned
it's got damaged at some point in time a
pilot bearing went bad that this seats
into in the flywheel and it chewed up
the end of this shaft and to sort of fix
it they dimpled the shaft with a punch
to make its diameter come back out close
to where it was in spots so that the
bearing inter race would stay fairly
tight to it it's really not a permanent
solution
I always run into these things when I
tear into an old tractor remember the
Super C I'm just going to give her a
little freshen up and then you run into
something that makes you think twice
about your original plan this shaft made
me think
twice I believe that the only way to fix
this issue is to pull out the torque
amplifier it's an integral part of the
torque amplifier
so probably looking at a new torque
amplifier will it run all right the way
that it is maybe I'll dimple it a little
more put a new pilot bearing in the
flywheel
probably is it right to do
that I don't know it depends on your
circumstances I guess the reason it
could be okay is because most of the
time that shaft on this side is rotating
along with this the engine crank shaft
except when you have the clutch pushed
in when you want to stop the tractor and
it's not like an old style bushing in
the old letter series tractors
where you've got more friction happening
if this shaft isn't rotating quite right
that is a ball bearing in the pilot
bearing and it's got an inner race that
rotates and if they're a little
different you know as far as rotation if
they don't fit together quite as tight
as Factory spec it's only for the
momentary time you have the clutch
pushed
in it's not the end of the world it's
one of those judgment calls what am I
going to do I don't
know the more I got to thinking about
this Dopey little thing the end of the
shaft the more I thought about should I
go
further going further means splitting
this midsection C off this housing here
splits off the rear
end pulling it off you got to pull the
guts out of the transmission you got to
take the multiple control valve off to
pull the torque amplifier out put a new
torque amplifier in it and not have to
worry about it for the rest of my life
and to know what I've
got I'm debating it last night when I
went to bed I said no way I'm going to
do that it is a lot of work and then as
I thought about it more I thought you
know
it's something that's good to show on
YouTube and it's something that will
give me a nice shifting longlasting
tractor with a good torque amplifier in
it a Snappy torque amplifier that I'll
never have to worry about for the rest
of my life giv the hours I put on this
tractor it'll give me a chance to look
at the MCV and make sure everything's
all right in there the gentleman I
bought the tractor from had said that
the MCV had been gone through but I
don't know how long or how many hours
ago that
was should I do it I guess now I'm
leaning 6040 toward doing it but I think
I'm going to have to sleep on it some
more conventional wisdom is that when
you split a tractor for any reason you
replace the clutch because it's enough
work just to split the tractor you might
as well do it while you're in there and
I'm in that boat my clutch isn't
completely worn out it's got a lot of
life left in it but I'm replacing it
because I split the tractor to fix leaks
the same can probably be applied to the
torque amplifier in this case because
I've stripped down the tractor so far
I've taken a lot of difficult to remove
things off it's right there you might as
well do it I have no idea how old this
torque amplifier is it works fairly well
I ran it hot when I was haying with this
tractor and it does have a little bit of
lag at high transmission oil
temperatures when the tractor is really
warm so it's a judgment call and I
really want to hear what you think I
don't need this tractor for work on the
farm right now or this season I pulled
it in here to do a good job and this is
probably part of doing a good job but I
want to hear what you think thanks for
watching this
video and I'll see you next
time
Weitere ähnliche Videos ansehen
SISTEM TRANSMISI MANUAL, PART 1: Komponen dan Fungsi Komponen
新マーク2の作業開始 エンジン下ろします
How to Replace a Transmission (Full DIY Guide)
내 아우디가 '대포차'였다. -경매차 아우디 A7 복원기 ep.9-
I'll Stop At Nothing To Do This Right // '74 2UZ V8 Celica
Billigster Audi RS6: ich zerlege das Getriebe und finde den Grund für den Getriebeschaden
PERBAIKAN KEBOCORAN OLI FULL HONDA CITY 2009 DARI TUBAN..
5.0 / 5 (0 votes)