After Effects Tutorial: Stroke Logo Reveal Outline Effect

SonduckFilm
17 Oct 201606:52

Summary

TLDRIn this tutorial, Josh Noel teaches how to create a stroke logo reveal effect using Adobe After Effects. Starting with a PNG logo, he guides through auto-tracing to create an outline, then adds a stroke and animates it using trim paths for a dynamic reveal. Further, he enhances the animation by adjusting scale and opacity, and suggests experimenting with color transitions for visual interest. The video concludes with a quick render of the final effect and an invitation for feedback.

Takeaways

  • 🎨 The tutorial focuses on creating a stroke logo reveal effect in Adobe After Effects.
  • 📁 Ensure your logo file is in PNG format with a transparent background, or use a vector file like an Illustrator file for better control.
  • 🖱️ If using a vector file, you can create shapes from the vector layer to simplify the process.
  • 🧰 For PNG files, use 'Auto Trace' to generate an outline, ensuring the channel is set to Alpha and the tolerance is around 2-4.
  • ✏️ Instead of using the 'Generate Stroke' effect, copying the mask path and pasting it into a shape layer gives more control over the stroke.
  • 🔧 Add 'Trim Paths' to animate the stroke, setting keyframes for 'Start' and 'Offset' to control the stroke’s appearance.
  • ⏱️ Use easy ease (F9) on keyframes to smooth out the animation, making transitions more fluid.
  • 🔍 Adjust the scale of the shape layer to match the logo, ensuring everything aligns properly.
  • 🎨 You can play around with color animations by adding keyframes for color and transitioning the stroke to different colors during the reveal.
  • ✅ The final effect reveals the logo with a smooth stroke animation and color transitions, as demonstrated at the end of the tutorial.

Q & A

  • What is the main focus of the tutorial presented by Josh Noel?

    -The tutorial focuses on creating a stroke logo reveal effect, which involves outlining a logo and then revealing the full logo.

  • What file formats are suitable for the logo in this tutorial?

    -The tutorial suggests using PNG or JPEG files for the logo, ensuring the logo is on a transparent background.

  • How can vector files be utilized in the tutorial's process?

    -If you have a vector file like an Illustrator file, you can right-click the logo and create shapes from the vector layer to save time.

  • What is the purpose of using 'Auto Trace' in the tutorial?

    -Auto Trace is used to create an outline of the logo on a white solid, which is necessary for the stroke effect.

  • What settings are recommended for the 'Auto Trace' channel and tolerance?

    -The channel should be set to Alpha, and the tolerance is recommended to be between two to four, with three being a good starting point.

  • Why is it better to convert the traced outline into a shape layer instead of using the 'Generate Stroke' effect?

    -Converting the traced outline into a shape layer provides more control over the stroke properties compared to using the 'Generate Stroke' effect.

  • How does the tutorial suggest animating the stroke reveal?

    -The tutorial suggests using the Trim Paths effect to animate the stroke reveal, starting at 100% and animating to 0% over time.

  • What additional animation technique is shown to make the reveal more interesting?

    -The tutorial shows how to animate the offset of the Trim Paths effect to make the stroke rotate as it reveals.

  • How is the final reveal of the logo achieved in the animation?

    -The final reveal of the logo is achieved by keyframing the opacity of the logo layer to go from 0% to 100% as the stroke animation completes.

  • What additional tip is given for enhancing the animation?

    -The tutorial suggests playing with the color of the stroke to add more interest to the animation, such as transitioning the color to black towards the end.

  • What is the final step to ensure the logo scales correctly with the animation?

    -The final step is to adjust the scale of the logo layer to match the size of the shape layer after the stroke animation.

Outlines

00:00

🎨 Creating a Stroke Logo Reveal Effect in After Effects

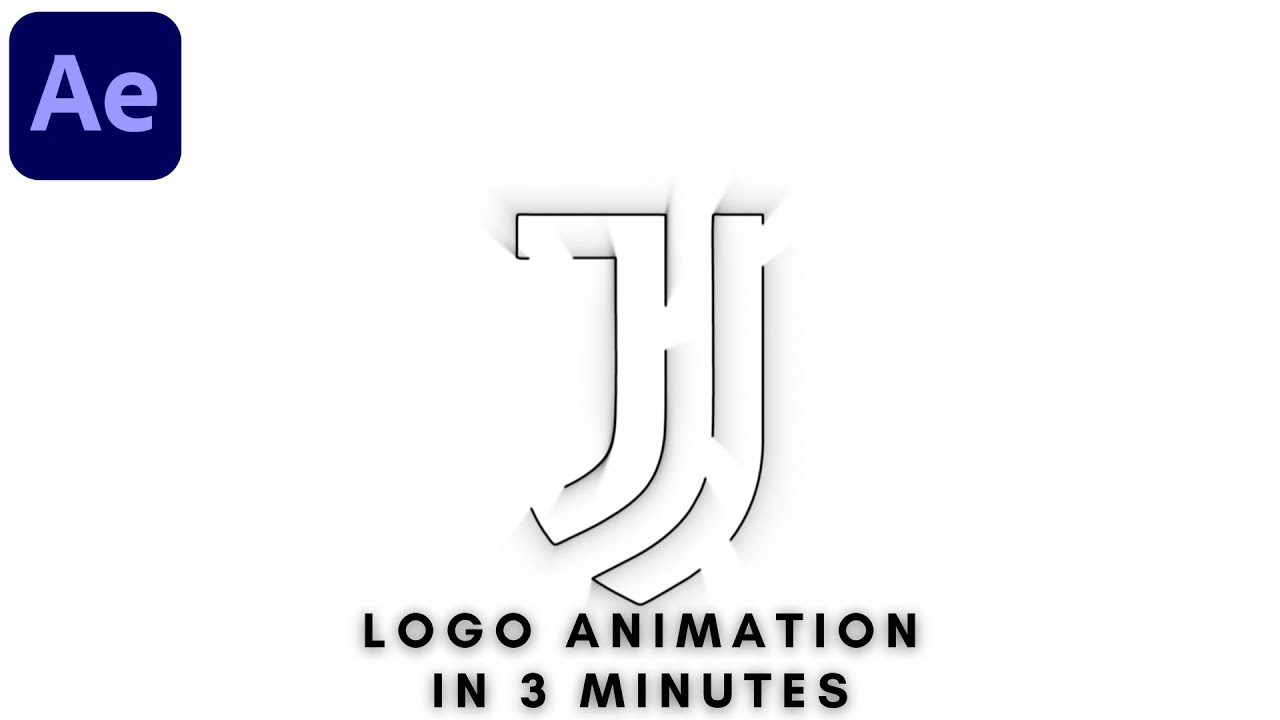
In this tutorial, Josh Noel introduces how to create a simple stroke logo reveal effect using Adobe After Effects. He explains that it's a widely requested technique, which involves taking a logo, outlining it with a stroke, and then revealing the full logo. He briefly plays with colors, changing the stroke to black for added dimension, before walking through the detailed steps to begin the process. Starting with importing a PNG logo file, Josh stresses the importance of a transparent background. For those with vector logos, he suggests converting them to shape layers for easier manipulation. This segment sets the stage for building a stroke animation around the logo.

05:00

🖌️ Preparing the Logo and Auto Trace Setup

Josh continues by selecting the PNG layer and using the Auto Trace tool to outline the logo. He emphasizes setting the channel to Alpha and adjusting tolerance, suggesting a range of 2-4 for best results. Once the outline is generated, instead of using the built-in stroke effect, which offers limited control, Josh shows how to manually create a shape layer. He opens the mask, copies the mask path, and pastes it into a new shape layer, hiding the original traced layer. This approach provides greater flexibility in controlling the stroke effect, allowing for more customization.

✍️ Adding and Adjusting the Stroke Path

With the shape layer set up, Josh adds a stroke to the path and demonstrates how to adjust its width to achieve the desired look. He explains how to handle additional elements in the logo, such as inner paths, by copying and pasting them into the same shape layer. After configuring the stroke, Josh introduces the Trim Paths feature to animate the logo's outline. He adds keyframes to control the start, offset, and end of the stroke animation, creating a dynamic effect where the logo is revealed through a rotating stroke animation. This process adds visual interest to the stroke reveal.

🔄 Fine-Tuning Animation and Keyframes

Josh delves into refining the animation by adjusting keyframes to smooth out transitions. He uses the Easy Ease feature (F9) to make the animation more fluid at the start and end. After scaling down the logo to better match the shape layer, he reverses the keyframes to make the animation go in reverse, enhancing the overall visual appeal. This step ensures that the logo's reveal is smooth and synchronized with the stroke outline.

🌈 Customizing Colors and Finalizing the Animation

In the final stages, Josh activates the logo layer and aligns it with the animated stroke. He tweaks the opacity settings, making sure the logo reveals itself at the right moment. Additionally, Josh suggests playing with the stroke colors by keyframing color changes—transitioning from one color to another (e.g., white to black) to enhance the effect. After a quick render, the full stroke and logo reveal animation is completed. Josh encourages viewers to experiment with different color variations, wraps up the tutorial, and invites viewers to engage with his social media and YouTube channel for more content.

Mindmap

Keywords

💡Stroke

In the context of the video, 'stroke' refers to the outline or line that defines the shape of a graphic element, such as a logo. The video tutorial focuses on creating a stroke effect for a logo reveal, which is a popular animation technique. The stroke is used to add depth and dimension to the logo animation, as mentioned when the instructor changes the stroke color to black to enhance the effect.

💡Logo Reveal

A 'logo reveal' is a type of animation where a logo is gradually unveiled to the viewer, often as part of an introductory sequence in videos or presentations. The video script describes creating a logo reveal with a stroke effect, which involves animating the stroke of the logo to build anticipation and then revealing the full logo.

💡PNG

PNG stands for Portable Network Graphics, a file format used for high-quality images with transparency. The video script mentions using a PNG file for the logo to ensure that the logo has a transparent background, which is crucial for the stroke effect to work correctly without a background.

💡Auto Trace

Auto Trace is a feature in graphic editing software that automatically converts a bitmap image into a vector shape. In the script, the instructor uses Auto Trace on a PNG logo to create a path that can be used for the stroke effect, which is a key step in the tutorial.

💡Mask

A 'mask' in video editing is a tool used to hide or reveal parts of a layer. The script describes using a mask to copy the path from the traced logo, which is then pasted into a shape layer to create the stroke. Masks are essential for isolating the logo's outline for the animation.

💡Shape Layer

A 'shape layer' is a type of layer in Adobe After Effects that allows for the creation of vector shapes and paths. The video script instructs viewers to convert the traced logo into a shape layer to have more control over the stroke effect, as opposed to using the 'generate stroke' effect.

💡Trim Paths

Trim Paths is an effect used to animate the reveal of a shape or path. In the tutorial, the instructor applies the Trim Paths effect to animate the stroke of the logo, creating a dynamic reveal that starts at 100% and animates to 0%, showcasing the logo in a creative way.

💡Key Framing

Key framing is the process of setting the start and end points of an animation to define how properties change over time. The script describes key framing the start and end of the Trim Paths effect to control the animation of the logo reveal, as well as key framing the scale and opacity for further refinement of the animation.

💡Opacity

Opacity refers to the transparency level of an object or layer. In the video, the instructor sets a key frame for opacity to make the logo start fully transparent and then become fully opaque as part of the reveal animation.

💡Easy Ease

Easy Ease is a type of animation easing that makes the motion of an object start slow and then speed up or vice versa. The script mentions using Easy Ease (F9) on key frames to smooth out the animation, making the logo reveal appear more natural and less mechanical.

💡Render

Rendering is the process of generating a final video or animation from the edited project. The video script concludes with a mention of rendering the final animation to see the logo reveal with the stroke effect, which is the end goal of the tutorial.

Highlights

Tutorial on creating a stroke logo reveal effect

Stroke effect adds dimension to the logo

Logo should be on a transparent background like PNG

Using vector files like Illustrator can simplify the process

Auto trace feature to create an outline from a PNG logo

Setting the channel to Alpha and tolerance between 2 to 4 for auto trace

Converting the traced outline into a shape layer for more control

Adding a stroke effect to the path for the logo outline

Using trim paths to animate the outline reveal

Adjusting the start and offset for a dynamic animation effect

Key framing the end of the trim path to close up the animation

Scaling the shape layer to match the logo size

Revealing the logo by key framing its opacity

Fine-tuning the scale for a precise logo reveal

Animating the stroke color transition for added visual interest

Rendering the final animation to showcase the effect

Invitation for questions and engagement on social media

Encouragement to subscribe for more tutorial videos

Gratitude expressed for watching the tutorial

Transcripts

play00:00

[Music]

play00:06

hey what is going on internet Josh Noel

play00:08

from suuck film so today we have a

play00:11

tutorial on creating sort of a stroke

play00:13

logo reveal and this is what we'll be

play00:16

creating in this tutorial and you know

play00:19

it's pretty simple but I think it's a

play00:20

great concept because I know like a lot

play00:22

of you guys requested like how to do the

play00:24

sort of stroke effect where you can take

play00:25

like a logo and do an outline on it and

play00:28

then we can reveal in our full logo and

play00:31

I was playing around with the color here

play00:32

like I changed the stroke to Black there

play00:34

just to kind of add a little bit more

play00:36

Dimension to this effect so anyway I'll

play00:39

go ahead and show you guys how you can

play00:40

do this so what we'll do is we'll have

play00:42

our new composition here is we'll drag

play00:43

in our logo which is a PNG file um and

play00:47

basically a lot of your logos will

play00:48

probably be you know a PNG or some sort

play00:51

of jpeg just make sure that you don't

play00:52

have the background uh you know on your

play00:55

logo just make sure you just have your

play00:56

logo on a transparent sort of background

play00:57

like a PNG however if you do have say

play01:00

like a vector file like a illustrator

play01:02

file kind of like this um and you can

play01:05

kind of skip ahead here but what you can

play01:06

do is right click your logo here and you

play01:09

can create shapes from vector layer so

play01:11

right click layer and then you have this

play01:13

all in the shape layer which will save

play01:14

you a tremendous amount of time but I'm

play01:17

going to assume that a lot of people do

play01:18

not have you know Vector files of the

play01:20

logo or something so I'm going to assume

play01:22

that you guys have PNG so what we're

play01:23

going to do is we're going to make sure

play01:25

our PNG layer is selected and we're

play01:27

going to go up to layer and we're going

play01:29

to go ahead and click on on auto trace

play01:31

and what we need to be aware of is the

play01:32

channel which this needs to be set to

play01:34

Alpha and the tolerance which I have set

play01:37

at three um but you don't really want to

play01:39

go too low or things can get a little

play01:41

Jagged um and I think a good number is

play01:43

usually between two to four so two three

play01:46

or four should be fine so I'll so go

play01:47

ahead and set it the three you might

play01:49

have to experiment with it but uh once

play01:51

you're done here uh just click okay and

play01:54

as you can see we have kind of have a

play01:56

outline of our logo on a white solid and

play01:59

is exactly what we need now typically

play02:01

what you would do is go to effect you

play02:03

know uh generate stroke but I'm not

play02:06

going to do that because you don't have

play02:07

a lot of control over that you have a

play02:09

lot more control if you can put this

play02:10

into a shape layer so what I'm going to

play02:12

do is I'm going to go ahead and open up

play02:14

the mask here for our Trac layer and

play02:18

under mask one open that up and then I'm

play02:20

going to go to the mask path and I'm

play02:22

going to go ahead and just copy this

play02:23

okay and I'll close off the key frame

play02:26

there then I'm go to layer new shape

play02:28

layer and we'll go ahead and open up

play02:31

this and go to add and we'll go ahead

play02:33

and add a path and we'll open up path

play02:36

one and we'll just paste in our mask and

play02:40

as you see we kind of have a mask here

play02:42

go ahead and hide our Trace layer and

play02:44

then what I'm going to do is go to add

play02:46

and click on stroke and if we open up

play02:49

the stroke say set the stroke width to

play02:50

like five or something maybe we'll do 10

play02:54

as you can see we kind of have the uh

play02:56

path of our logo here and then if you

play02:58

want to do a little something extra

play03:00

maybe we can also copy like if you have

play03:02

any like extra sort of outlines in your

play03:04

logo like I have my ey here I just have

play03:06

to basically just copy the path go back

play03:08

up to add and add another path and I can

play03:11

just paste that right into there and now

play03:13

I have my eye into uh my shape layer

play03:16

here so now what we can do since we have

play03:20

the you know the outline of our logo in

play03:21

our shape layer here is I can go to add

play03:24

and click on trim paths and let me go

play03:26

ahead and put that uh underneath our

play03:29

stroke

play03:30

and you know if I click here I can see I

play03:32

can start to you know animate this

play03:34

outline and it looks pretty cool so uh

play03:37

you know instead of just doing like from

play03:39

like you know from 100% to 0% I wanted

play03:41

wanted this to be a little bit cool so

play03:43

I'm going I want to show you guys kind

play03:44

of how we can add make this a little bit

play03:46

interesting so what I'll do is I'll set

play03:48

the start to

play03:50

100% and we'll go ahead and we'll key

play03:52

frame the start and the offset here and

play03:55

we'll move forward to like say 1 second

play03:57

and we'll set the start to 0%

play04:00

and you see just comes on like that and

play04:03

we'll go ahead and you know maybe

play04:04

increase the offset to like maybe you

play04:06

know 100° or something so as this comes

play04:08

on it'll kind of like rotate and then

play04:10

what I'll do to kind of like close up

play04:11

this animation is I'll key frame the end

play04:14

here and we'll move forward in time to

play04:16

like you know 1 second and 11 frames and

play04:19

we'll set this to 0% so now uh basically

play04:22

this will kind of come on and then it'll

play04:24

kind of just close up towards the end

play04:26

and what I'll do is for the offset I'll

play04:28

kind of just make sure that key frame

play04:29

kind of touches the our end key frame

play04:31

here so it'll kind of always animate and

play04:34

then when I'm done here I'm going to go

play04:35

ahead and select all of my key frames

play04:36

here and hit F9 on my keyboard for easy

play04:38

as key Fram so things will kind of just

play04:39

smooth out um at towards the beginning

play04:42

and the end of our animation and let's

play04:46

go ahead and go ahead and hit s on our

play04:47

keyboard uh to bring up scale for our

play04:49

shape layer make sure it's selected and

play04:50

we can just scale this down by a little

play04:52

bit and what I'll do is I'll take both

play04:53

of our offset key frames here I'll

play04:55

select both of them and I'll right click

play04:57

them and click key frame assistance and

play04:58

time reverse key frame

play05:00

so now things will kind of just uh go in

play05:02

the same motion and what I'm going to do

play05:04

is I'm going to turn on our logo layer

play05:06

and I'm going to hit s on the keyboard

play05:07

to bring up the scale and I'm going to

play05:08

go ahead and kind of just like put this

play05:10

um you know kind of try to match this up

play05:11

to where it should be our shape layer

play05:13

and that should be fine for now or

play05:14

actually should be good uh in total and

play05:16

you can see uh we kind of just ruined

play05:18

everything so what we're going to do so

play05:19

hit t on our keyboard to bring up the

play05:20

opacity and we'll hit U on our keyboard

play05:22

to bring up all the key frames on our

play05:24

shape layer one here and let's see we

play05:26

want our uh logo to be revealed on like

play05:28

right here % so we'll do so click a key

play05:31

frame for uh opacity and we'll move

play05:34

forward in time a little bit and we'll

play05:35

set the opacity to 0% so now we have our

play05:38

full stroke and then our logo kind of

play05:40

just reveals on kind of like that maybe

play05:43

we need to scale this down just by like

play05:44

maybe to like 68% or something maybe

play05:48

69% yeah that should be that's good so

play05:51

now our logo kind of just comes on and

play05:54

things look really good and then uh you

play05:56

know to add just a little bit more

play05:57

interesting animation to this um maybe

play05:59

you can play with the colors a little

play06:00

bit you know I don't know if it worked

play06:01

for me but maybe it can work for you

play06:03

what I would do is I would go to the uh

play06:06

stroke here and I will click the key

play06:08

frame for color and then you know

play06:10

towards the go to like the end key frame

play06:12

here and set the color to

play06:15

Black and make both of these key frames

play06:17

easy as key frames by hitting F9 on your

play06:18

keyboard and this thing will kind of

play06:20

just transition the black you know

play06:22

towards the you know end there so looks

play06:25

pretty cool I think and after a quick

play06:26

render this is what we have and pretty

play06:28

much what I showed you guys at the

play06:28

beginning so if you guys have any

play06:30

questions please drop a comment down

play06:31

below and be sure to hit me up on my

play06:32

social media networks those links in the

play06:34

description of this video and if you

play06:35

guys are new to the Channel Please

play06:36

Subscribe for more after fact videos

play06:38

just like this and if you guys enjoyed

play06:39

the video please drop a like because it

play06:40

helps me out tremendously and as always

play06:42

guys thank you so much for watching this

play06:44

video and I hope you have a good day

play06:51

[Music]

Rate This

5.0 / 5 (0 votes)

Ähnliche Tags
Logo DesignAnimation TutorialGraphic TutorialStroke EffectAfter EffectsDesign TipsVideo EditingCreative ProcessBranding TipsDigital Art
Benötigen Sie eine Zusammenfassung auf Englisch?