FULL ILMU GRATIS !! INILAH CARA MEMBUAT LAMPU TANPA LISTRIK PLN TERMUDAH !!
Summary
TLDRThis instructional video from Business Inspiration guides viewers on crafting a simple lamp circuit powered by solar energy. The presenter details the process of assembling a battery pack using affordable lithium batteries, connecting a solar panel, and wiring up LEDs in parallel for optimal brightness. Additional components like a TP4056 charging module, a diode for protection, and a switch are included for a complete setup. The video promises a hands-on project that's both eco-friendly and cost-effective, with a potential for further enhancements like light sensors for automatic operation.
Takeaways
- 🌞 The video demonstrates how to create a simple lamp circuit using solar panels instead of traditional electricity.
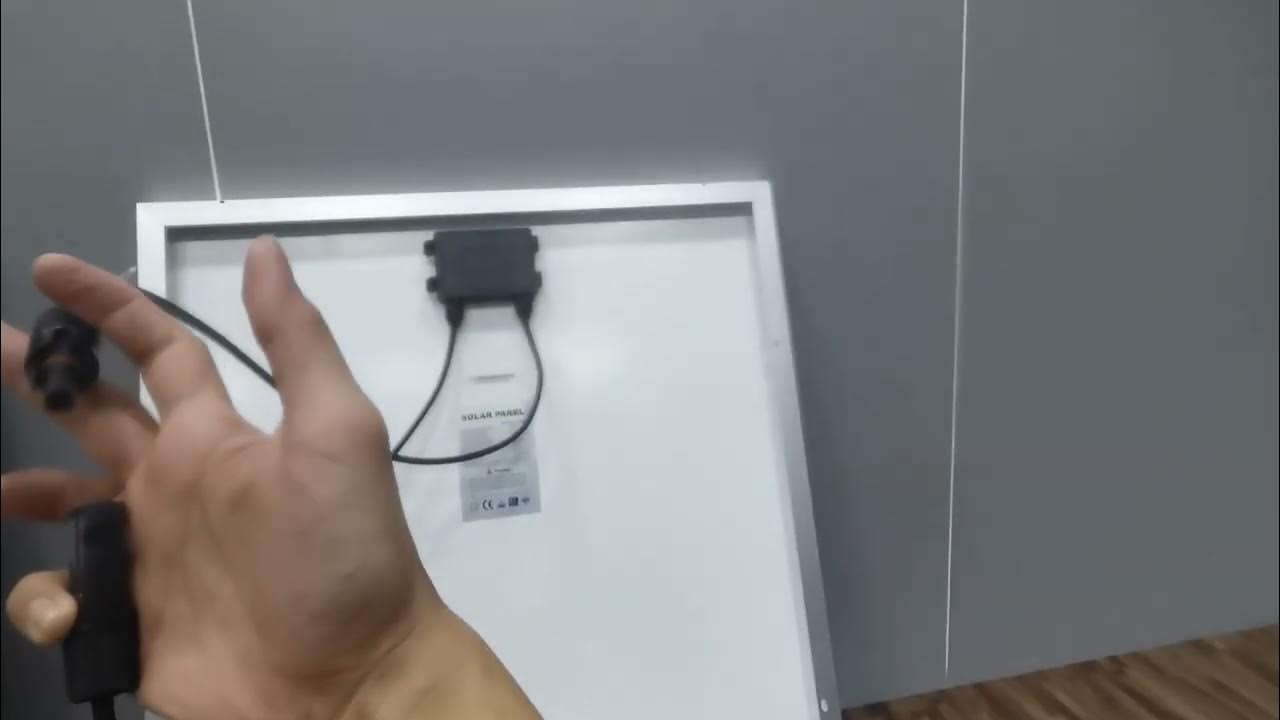
- 🛠️ Solar panels for this project are affordable, costing around 15 thousand, and can be purchased online or at electronic stores.
- 🔋 A 3.7-volt lithium battery, also known as a battery charge, is used as the power source and can be sourced from old emergency lamps.
- 🔌 The assembly of the battery involves connecting multiple batteries in parallel or series, depending on the desired voltage output.
- 🔆 The solar panel has two pins, positive and negative, which are connected to the battery for charging.
- 💡 For the lamp, a damaged emergency lamp can be repurposed, using the middle light that can be powered by a battery or phone charger.
- 🔦 LED lights are used for the lamp, with the number of lights and their arrangement depending on personal preference, but must be in parallel to maintain the voltage.
- 🔄 A TP4056 charge module is used for charging the battery, featuring input for both solar panel and USB connections, and indicator lights for charging status.
- 🛑 An IN4001 diode is added for protection against current leakage from the battery to the solar panel, ensuring the solar panel is not damaged.
- 🔄 The final circuit allows for automatic charging when the solar panel is exposed to sunlight, with indicator lights showing charging status.
- ⏱️ A single battery can last approximately 2 hours with 4 LED lights, suggesting a total runtime of around 8 hours for the setup.
Q & A
What is the main topic of the video?
-The main topic of the video is creating a simple lamp circuit using solar panels without relying on PLN (Public Lighting Network) electricity.
What are the approximate costs of the solar panels mentioned in the video?
-The solar panels mentioned in the video are quite affordable, with a price of around 15 thousand, which can be purchased online or at electronic equipment stores.
What type of battery is used in the video for the lamp circuit?
-A 3.7-volt lithium battery, commonly referred to as a battery charge, is used in the video for the lamp circuit.
Where does the video suggest sourcing the lithium battery from?
-The video suggests sourcing the lithium battery from an old emergency lamp found in a junkyard, as they are affordable and can be easily repurposed.
How can the battery life be extended in the lamp circuit?
-The battery life can be extended by using multiple batteries in parallel, which will provide a longer runtime compared to using a single battery.
What is the purpose of the diode in the circuit?
-The diode, specifically the IN4001 diode, is used to provide additional protection to the circuit by preventing current leakage from the battery to the solar panel.
What component is used to convert the solar panel's energy into a usable form for the battery?
-The TP4056 charge module is used to convert the solar panel's energy into a usable form for charging the battery.
What is the function of the switch in the lamp circuit?
-The switch in the lamp circuit is used to control the power supply to the LEDs, allowing the user to turn the lamp on and off.
How does the video suggest testing the lamp circuit without using PLN electricity?
-The video suggests using a normal cellphone charger with a 5-volt output to test the lamp circuit without using PLN electricity.
What type of LEDs are used in the lamp circuit, and how many can be used according to the video?
-3-millimeter LEDs are used in the lamp circuit, and the number of LEDs that can be used depends on individual preferences, but they must be connected in parallel to maintain the input voltage of 3 volts.
What is the estimated battery life when using four 3-millimeter LEDs?
-The estimated battery life when using four 3-millimeter LEDs is approximately 8 hours, based on the video's claim that one battery can last about 2 hours with such a setup.
Outlines
🛠️ DIY Solar-Powered Lamp Circuit
The script introduces a tutorial on creating a simple lamp circuit using solar panels as an alternative to traditional electricity. It emphasizes the affordability of the necessary components, such as the solar panel and lithium battery, which can be sourced from online stores or electronics shops. The tutorial will guide viewers through assembling the battery, connecting it to a solar panel, and using a salvaged lamp from an emergency light. The importance of correctly identifying the positive and negative terminals on the battery and ensuring a secure connection is highlighted. The video promises a step-by-step explanation for optimal results.
🔆 Assembling the Solar Lamp with Repurposed Components
This paragraph details the process of assembling a solar-powered lamp using a repurposed emergency light and 3mm LEDs. It explains how to select the correct wires for the positive and negative connections and how to create a parallel circuit to maintain a consistent voltage output. The tutorial also includes a demonstration of using a cellphone charger as a power source and provides guidance on purchasing and connecting the necessary components, such as the solar panel, LEDs, and a TP4056 charging module. The script mentions the use of a diode for protection against current leakage and concludes with the final assembly steps, including the installation of a switch and the connection of the solar panel to the charging module.
🌙 Automatic Operation and Charging Process of the Solar Lamp
The final paragraph of the script discusses the automatic functionality of the solar lamp, which turns on when it gets dark and off when it's light, thanks to an optional light sensor or LDR. It also describes the charging process, indicating that the TP4056 module has built-in protection and features indicator lights for charging status. The video demonstrates the charging process, showing the transition from a red light (charging) to a blue light (full charge). The script wraps up with a test of the fully charged battery's performance and suggestions for practical applications, such as placing the lamp in sunny locations. It also provides an estimate of the lamp's runtime based on the number of LEDs used and concludes with a reminder to check the video description for materials and specifications.
Mindmap
Keywords
💡Solar Panels
💡Battery Assembly
💡Lithium Battery
💡Parallel Circuit
💡Series Circuit
💡LED Lights
💡TP4056 Module
💡Diode
💡Switch
💡Emergency Lamp
💡Renewable Energy
Highlights
Introduction of a simple lamp circuit without using PLN electricity, utilizing solar panels.
Affordability of solar panels, priced around 15 thousand, available online and in electronic stores.
Detailed steps and materials list provided in the video description for easy replication.
Battery assembly step using 3.7 volt lithium batteries, sourced from an emergency lamp.
Use of a parallel circuit to maintain 3.7 volts output, or a series circuit for higher voltage.
Sourcing affordable solar panels with simple connection to the positive and negative pins.
Repurposing a damaged emergency lamp for the lamp circuit assembly.
Identification of positive and negative cables in the lamp assembly process.
Demonstration of the lamp working with a cellphone charger as a power source.
Use of 3mm LEDs for the lamp, with a discussion on the number of lights and parallel circuitry.
Assembly of the solar panel with a small switch for manual control.
Inclusion of an in4001 diode for protection against current leakage from the battery to the solar panel.
Use of a TP4056 charge module for charging the battery with indications for charging status.
Automatic charging process demonstrated with a change in indicator lights.
Testing the fully charged battery and its ability to power the lamp.
Discussion on the battery life and the duration of light operation with multiple LEDs.
Recommendation to protect the circuit with hot glue to prevent short circuits in wet conditions.
Final assembly and testing of the complete solar-powered lamp circuit.
Encouragement for viewers to create their own solar-powered lamps for home or school projects.
Conclusion and invitation to like, subscribe, and follow for more inspiring videos.
Transcripts
Hello friends See you again with me at Business Inspiration. On
this video opportunity, I will make a simple lamp circuit without using PLN electricity and this time
we are using solar panels or solar panels like this, actually this tool is not too
expensive, only around 15 thousand. only in online stores or in electronic equipment stores
later. If you want to make the tools that I practice in the video this time,
I will include the names of the tools and also the names of the items and specifications in the description column below
this video so that later when you buy at an electronics store you don't I'm confused, OK, I'm going to go straight ahead. What's the
way to make it, if this video is useful, help press like and subscribe, thank you.
In this video, there are several steps that I will explain in great detail so that
later when you want to practice the results are more optimal, the first here is
the battery assembly step. here you guys prepare some batteries it can be 12 or so on
for the use of the battery it's up to you friends if you use
quite a lot of batteries it will last longer if you only have one battery Of course this
will run out quickly more or less like that this is a 3.7 volt lithium battery or battery
charge, commonly called a battery charge, I got from this former emergency lamp.
I got it from a junk there, the price is very affordable, because it costs a kilo,
you just collect emergency lights like this, there are lots of them from junk, then
here there is one battery that can you collect it and the result will be like this this is
a battery removed from an emergency lamp, friends. If you want to look for an emergency lamp
in a junkyard, the main feature is that in the middle there are holes like this
and this is an example of an ordinary lamp that is not there is a vent in the middle and
for this emergency light ce tends to be heavier because there is one battery inside, okay,
let's go straight to the circuit process here, you can compare it first for the
positive and negative poles for the positive photo of this charge battery or
this 3.7 volt lithium battery, the positive one is the one you can see the holes have 4 holes or 5 holes on
it and for the negative there are no holes at all so you just
wire it positive to positive and negative to negative Okay this is an example when I assembled
this I assembled it using insulation and also the cable Yes, friends, I wrapped the cable
using insulation, the result will be like this, why did I make it like this because not
everyone has a good soldering iron to solder the battery because when we
solder this battery using ordinary solder, it will be difficult to stick to the lead, so it's here positive to
positive all negative to negative all these are examples of ra parallel circuit. If a parallel circuit
is like this, the output will still be 3.7 volts. If you connect it with a series circuit,
positive to negative, positive to negative, positive to negative, and so on, you multiply it by 3.7 volts
X4, which means that the output will be very large when it's like this have it will still be 3.7 volts for
the second step, you prepare 1 piece of solar panel or this solar panel, the price is quite affordable
online, the price is only 15 thousand or you can buy it at an electronic equipment store,
here there are two pins, there are positive positive and you don't need to pay attention to this positive, you
just take one from the positive pin and one from the negative pin. This means that the positive one is the
negative cable.
yes, friends, for the third step, the process of
assembling the lamp for the lamp, you can just buy one that has been made like this or
you can Utilizing this emergency lamp is a lamp from an emergency that was damaged
earlier. When you use the battery, you take advantage of the engine, you throw it away and
for this lamp we can still use it, in fact many don't know tricks like
this for lights that are 2 on the side on the side of the whole We can turn this
on with PLN electricity, so we don't use this. What we use is the lamp in the middle
because we can still turn it on using the battery earlier or using
a cellphone charge. Here, there are three cables, just choose two. positive
and also negative negative usually the black one here is the negative and for the positive
You are looking for this one that is the path from the middle Light means this one here is the
positive one if you don't believe that we can turn this on by using the
HP charge here I will give an example by using this normal cellphone charge voltage yes, it is 5 volts, yes,
friends, I will immediately practice it here. This plug is PLN electricity, the
adapter does not electrocute, friends, because this is DC voltage
.
Okay, more or less like this, you can see it's on, right, friends,
that's great, isn't this an emergency light, it's very versatile, but this time, if
you want to make it yourself or if you want to make the series of lights yourself, you can
use these 3 millimeters, you can buy them at the store. electronics the price is very cheap
this one costs about 200 silver here for the one with the longer leg is
the positive leg the shorter is the negative If you look at it from a close distance
this small plate is the positive the large plate is the
negative plate for the amount the lights are up to you. If you want to use
quite a lot of lights, bus a according to individual tastes, but you need to
remember that the circuit must be parallel, friends, so that later the input will still be 3 volts, here
we connect the positive to the positive and so on and for the negative or short legs, we connect
everything to negative, more or less like that's here I will assemble the lights first
here are the results after I strung the middle PIN is the negative PIN and the outer PIN
This is the positive PIN meaning the blue cable is the negative cable the black cable is
the positive cable the last step we just have to assemble prepare the solar panel first
then here there is one additional fruit in the form of a small switch, the price is
very cheap at an electronics store then here I need one diode for
the diode this time I use the in4001 diode, just one piece the price is very affordable Yes
friends only 200 silver in the electronics shop and the last one here is me use the tp4056 cas module
, the price is Rp. 5,000 at an electronics store, you can see that it says positive input and
also negative input, we will plug it into the positive and negative from the solar panel or
you can also plug it into the HP charger, there is a usb socket for it to charge the cellphone and here it
says positive battery and negative battery. We will attach it to the positive battery and
also the negative battery that we have assembled, okay, we will immediately assemble it one by one
for the diode, we will first attach it to the positive pole of the 4056 KTP module here
You can see that there is white on it, don't turn it upside down like this, friends.
Then we prepare a solar panel to cover the positive, we
solder it here and for the negative, we solder it here
, then we install the battery. To install this battery, you can't. Upside down, friends,
for the solar panel to be upside down, it doesn't matter, you can change it later. But if the battery
is upside down k between the positive and also the negative for the tp4056 it will be damaged immediately so try
to be careful to connect this negative to negative positive to positive
after that we attach the light here I will install double tip insulation first
negative cable We solder to the battery I moved the negative
for the positive cable from this lamp because I will install a switch
on this side. To install the switch, it can be reversed. It's up to friends.
Just solder it here
and after all the processes above, the results are more or less like this. so a
simple lamp circuit using solar panels so this is for charging it doesn't need to use
PLN electricity this is just an example of the circuit yes friends the simplest circuit example
Actually there is a more complicated circuit using a light sensor or LDR sensor like
this maybe later if lots of requests, I'll make a series in addition to
this tool later in the evening or when it's dark the light will automatically turn on by itself and
when it's bright it will automatically turn itself off more or less the simple way it works like that here
I have added additional protection in the form of this in4001 diode to overcome if there is a
current leakage problem from the battery to the solar panel so the solar panel won't be damaged,
friends, the way we add additional protection here, but if
you don't add it, it doesn't matter because the tp4056 already has additional protection and for the
simple way it works, it will be automatic charging the battery when charging here later there will be a
blue light and also red when charging it will automatically turn red and when
it is full the light will automatically turn blue the light is very small right here there
are two of them Okay Let's go ahead Let's try turning this on ok friends and the position of the light doesn't
turn on because it's a battery I really have cleared it, you can see that there is no
engineering,
there is no additional switch or anything else
. outside this room, the switch is on and the light doesn't turn on,
the indicator light is still off, friends,
it hasn't turned on, right
? in a few hours it will be
fully automatic because this time I used 4 pieces so this charging process also takes quite a
long time , it's really good,
friends. Let's go back. it's really
full, I'll just turn it off, we'll wait until the battery is completely full,
this video ak I speed it up and I don't skip it
so that it proves that there is nothing engineered.
Okay, after I've waited for about 20 minutes, we'll just test it or check
if the battery is fully charged, we'll turn it back first, we'll turn it off
. hold on, friends,
let's just turn it on 1 2 3 Can the light turn on, well, the result is more or less
like this, it's no longer charging because I'm back and the light is on very well
, friends, that means the tool we made in this video it works And this is great if you
later want to make a tool like this maybe later you can put this on top of the house or in
areas that are exposed to the sun and for this part here Wow Sorry this is dislodged
later I will solder it back and for this part here Can you give hot glue or
hot glue so that a short circuit does not occur when it is exposed to rain, I turn it off first ulu
, great, I'll reconnect this later. If you want to
make your own at home or for school assignments, I will include the materials and
specifications in the description column below this video so that later
if you want to buy at an electronics store, you won't be confused, that's great. OK , friends,
I hope this video is useful, if you like videos from
Business Inspiration, you can click the like button below and don't forget to also press the
subscribe button so you don't miss the latest interesting videos from other Business Inspirations
. OK, thanks for watching, I hope this is useful See you next video, it's really great.
Oh yes, friends, one battery can last for about
2 hours using 4 3 millimeter LED lights. So when I use
4 pieces, 2 hours times 4 equals 8 hours more or less like that steady
تصفح المزيد من مقاطع الفيديو ذات الصلة
Model Traffic Lights Circuit | 555 Timer Project #15
DIY Guide: 8 Essential Sensors to Give Your Smart Home Superpowers
DIY Gravity Battery: Unexpected Results!
How to use sensors with Arduino
Simple Fire Alarm Circuit
Making Traffic Lights with Arduino Uno - Beginner Level (algorithm, coding, circuit design)
5.0 / 5 (0 votes)