Audacity Tutorial For Beginners
Summary
TLDRIn this Audacity tutorial for beginners, Mike Russell walks viewers through the basics of using the free open-source software for audio editing. He covers key features such as setting up audio devices, recording, playback, and editing tracks. Viewers learn how to work with multiple tracks, adjust volumes, apply effects like compression, and use tools for precise audio manipulation. Mike also demonstrates how to mix audio, adjust timing, and use the auto-duck feature for smoother transitions. The tutorial concludes with instructions on saving projects and exporting files in different formats for podcasts or other uses.
Takeaways
- 😀 Audacity is a free, open-source audio editing software available for Mac, Windows, and Linux.
- 🎙️ Setting the project rate to 44100 Hz is recommended for recording audio to ensure good quality.
- 🎧 Before recording, select the correct audio device and ensure the levels are set correctly (between -12 and -6 dB).
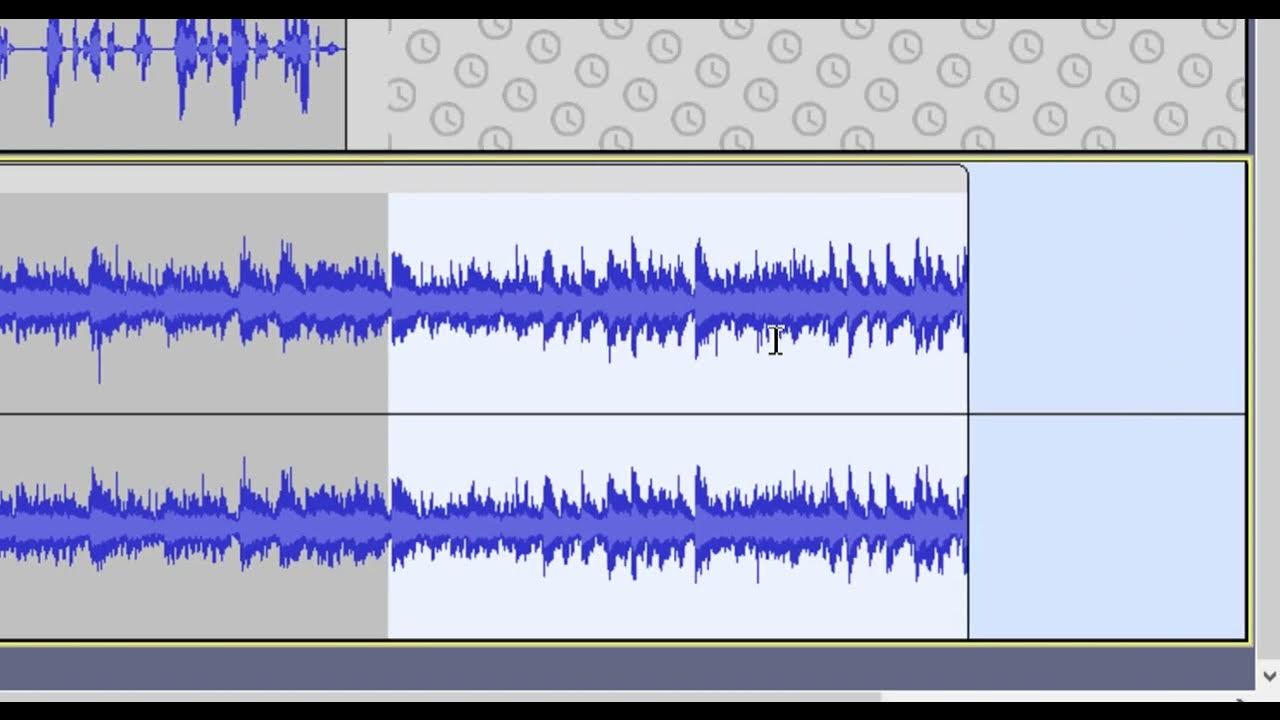
- 📝 Audacity provides a simple interface with basic tools, including the ability to zoom in/out on waveforms to edit with precision.
- 🔴 To start recording, simply press the red record button or use the 'R' key on your keyboard.
- 🎶 You can import music or other audio files into Audacity by dragging and dropping them into the workspace.
- 🔊 Use the 'Envelope Tool' to adjust audio levels and control the volume of tracks individually.
- 🎚️ The 'Compressor' effect can be applied to voice tracks to level out volume differences and improve clarity.
- ⏩ The 'Time Shift Tool' (F5) helps you reposition tracks, allowing you to align audio tracks with beats or specific moments.
- 💾 Audacity allows you to save your project as an Audacity file (.aup3) for future editing, or export it as a finished audio file in formats like WAV or MP3.
Q & A
What is the purpose of Audacity presets mentioned in the video?
-The Audacity presets mentioned in the video are designed to help users quickly enhance the quality of their recordings. These presets can be particularly useful for beginners working on projects like radio shows, podcasts, or voiceover work.
What project rate is recommended for recording audio in Audacity?
-The recommended project rate for recording audio in Audacity is 44100 Hz. This provides a good balance between quality and file size, and is standard for most audio recordings.
How do you set up your audio device in Audacity?
-To set up your audio device in Audacity, go to the device menu and choose the appropriate audio interface. For example, you can select the internal microphone on a laptop or a dedicated audio interface like a Focusrite USB interface.
What is the purpose of the level meters in Audacity?
-The level meters in Audacity help you monitor the volume levels of your audio while recording. It's important to keep the levels between -12 and -6 dB to avoid distortion or clipping.
How can you select and loop a part of your recording in Audacity?
-To select a part of your recording, simply click and drag your mouse over the desired section. To loop playback, hold down the Shift key and press the Spacebar, allowing you to listen to that section repeatedly.
How do you zoom in and out on the waveform in Audacity?
-To zoom in on the waveform, press F4 or click the magnifying glass tool, and then left-click to zoom in. To zoom out, right-click on the waveform. This allows you to work more precisely on specific sections of your audio.
How can you mix two tracks together in Audacity?
-To mix two tracks, simply drag and drop the second audio file into Audacity. This will create a new track, and you can adjust the volume and positioning of both tracks to mix them together effectively.
What is the 'Envelope Tool' used for in Audacity?
-The Envelope Tool in Audacity allows you to adjust the volume levels of specific sections of your track. You can visually drag the volume up or down by adding points to the envelope and adjusting the audio dynamics.
What is the purpose of using compression in Audacity?
-Compression in Audacity helps to even out the volume levels of your audio. It reduces the gap between the loudest and softest parts of the recording, making it clearer and more consistent, which is especially useful for voiceover and podcasting.
How do you export your project as an audio file in Audacity?
-To export your project, go to the 'File' menu and select 'Export'. From there, you can choose the format you want (e.g., MP3, WAV, or OGG). WAV is a lossless format, providing the highest audio quality for final mixes.
Outlines

هذا القسم متوفر فقط للمشتركين. يرجى الترقية للوصول إلى هذه الميزة.
قم بالترقية الآنMindmap

هذا القسم متوفر فقط للمشتركين. يرجى الترقية للوصول إلى هذه الميزة.
قم بالترقية الآنKeywords

هذا القسم متوفر فقط للمشتركين. يرجى الترقية للوصول إلى هذه الميزة.
قم بالترقية الآنHighlights

هذا القسم متوفر فقط للمشتركين. يرجى الترقية للوصول إلى هذه الميزة.
قم بالترقية الآنTranscripts

هذا القسم متوفر فقط للمشتركين. يرجى الترقية للوصول إلى هذه الميزة.
قم بالترقية الآنتصفح المزيد من مقاطع الفيديو ذات الصلة
Audacity Basics (NEW in 2023): Recording, Editing, Mixing

How To Make ANY Mic Sound PROFESSIONAL (Audacity)
Learn Video editing in Just 20 Minutes ! - Adobe Premiere pro Masterclass- NSB Pictures
The Guy R Cook Report

Diagrams.net Tutorial For Beginners - How To Use Draw.io

What Is OBS Studio & what can you do with it?
5.0 / 5 (0 votes)
