APRENDA O ESTILO DE EDIÇÃO DO CANAL MAGNATES MEDIA (O maior canal dark do mundo)
Summary
TLDRThis tutorial showcases the editing style of the Magnet channel, one of the world's largest Dark channels, by creating an intro for a video about Henry Ford's life story. The process involves preparing scenes in Photoshop, converting text to editable format, and animating them in After Effects with 3D transformations and camera movements. The tutorial guides through creating a compelling narrative with smooth camera transitions, text effects, and scene composition, ultimately teaching viewers how to produce visually engaging and dynamic video content.
Takeaways
- 🎥 The script is a tutorial on creating an intro for a video channel similar to 'Magnet Media', one of the biggest 'Dark' channels in the world.
- 📈 The channel has recently reached 1000 subscribers, and the creator encourages viewers to subscribe and like the video to help the channel grow.
- 🛠️ Preparation in Photoshop is the first step, where the main scenes are organized into groups for the intro video.
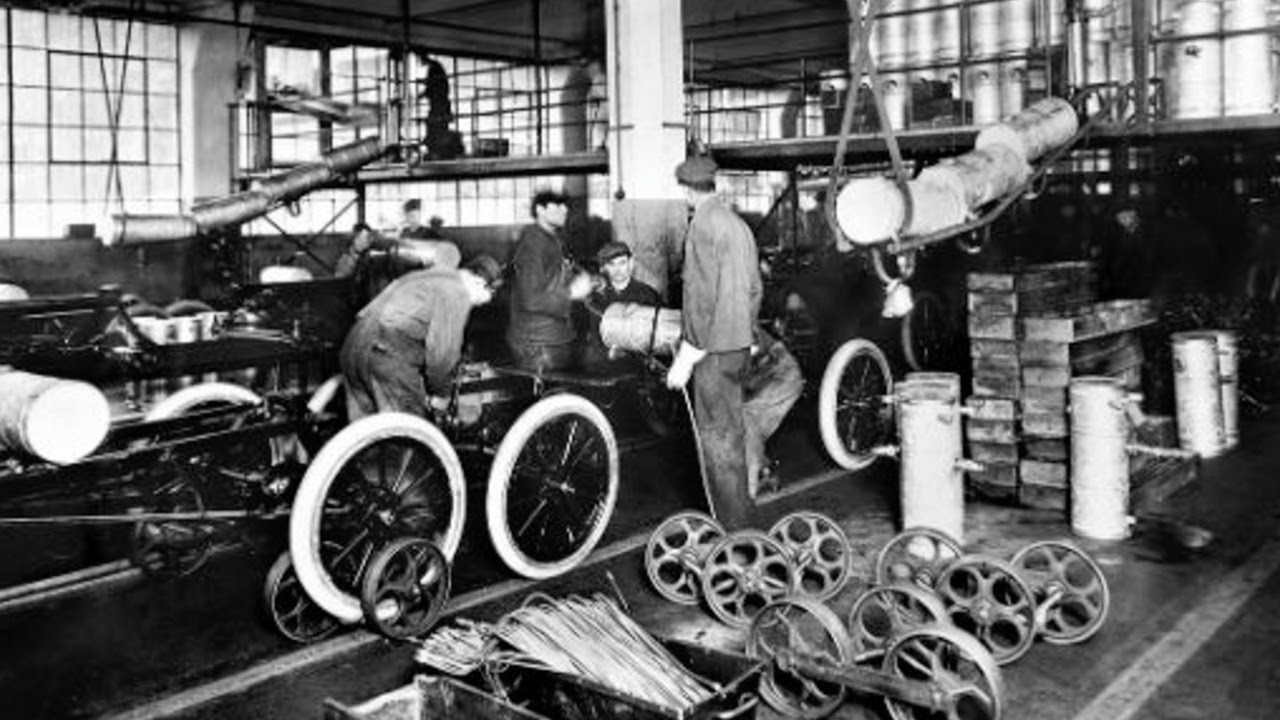
- 🌟 The intro video features the story of Henry Ford, a historical figure known for revolutionizing the car industry.
- 🖼️ Scenes are brought into After Effects from Photoshop, where they are animated and transformed into 3D.
- 📝 Text layers are converted to editable text for effects like a typewriter animation.
- 📹 A camera is created in After Effects to add depth and perspective to the scenes, starting with the background and moving forward.
- 🔍 Keyframes are used to animate the camera movement and the appearance of text and objects within the scenes.
- 🎨 Transitions between scenes are smooth, with effects like 'Glow and Blur' used to add depth and focus.
- 📚 The tutorial covers the creation of multiple scenes, each with its own animation and camera movement.
- 🔧 Final adjustments are made to the main camera layer to ensure smooth and natural movements, mimicking a person holding a camera.
Q & A
What is the main topic of the video being discussed in the script?
-The main topic of the video is the editing style of the Magnet channel, specifically focusing on an intro of a video that tells the life story of Henry Ford.
What is the significance of reaching 1000 subscribers mentioned in the script?
-Reaching 1000 subscribers is a milestone for the channel, and the script encourages viewers to subscribe and like the video to help the channel grow further.
What software is used for the initial preparation of the scenes in the script?
-Adobe Photoshop is used for the initial preparation of the scenes, where the main scenes are organized into groups.
How are the objects in the video transformed into 3D?
-The objects are transformed into 3D within Adobe After Effects by selecting the layers and using the 3D options available in the software.
What effect is applied to the title text in the video?
-A typewriter effect is applied to the title text, which is created by converting the layer into editable text and then animating it to simulate the typing action.
What is the purpose of creating a new camera in After Effects for each scene?
-Creating a new camera for each scene allows for better control over the perspective, depth, and movement of the objects within the scene, enhancing the overall 3D effect.
How is the position and rotation of the camera set in the script?
-The position and rotation of the camera are set by marking the point of interest, adjusting the position to align with the scene, and setting the rotation to create a specific angle or perspective.
What is the significance of the typewriter effect in the script?
-The typewriter effect is used to animate the text in a way that mimics the action of typing, which adds a dynamic and engaging element to the video.
How are transitions between scenes created in the video?
-Transitions between scenes are created using various techniques such as changing the position and rotation of objects, applying effects like 'glow' and 'blur' for depth, and using elements like a burning paper to reveal the next scene.
What is the final scene of the video about, according to the script?
-The final scene of the video is about the cars and the hand, with multiple cars appearing and a focus on depth and detail, possibly symbolizing Henry Ford's impact on the automobile industry.
How are the final adjustments made to the video in the script?
-The final adjustments include fine-tuning the camera movements to create smooth transitions, applying lighting effects for transitions between scenes, and adding a 'Deep Glow' effect to enhance the visual appeal.
Outlines
🎬 Introduction to Video Editing Style
This paragraph introduces the video tutorial on how to replicate the editing style of Magnet, Media, a prominent Dark-themed YouTube channel. The focus is on creating an introduction similar to one of their videos, which tells the story of Henry Ford. The video script provides a step-by-step guide on preparing the scenes in Photoshop, importing them into After Effects, and animating each scene. It covers 3D transformation, creating a writing machine effect for text, and camera movement for a dynamic introduction. The tutorial also emphasizes community engagement, encouraging viewers to subscribe and like the video to support the channel's growth.
🌟 Scene Animation and Camera Techniques
The second paragraph delves into the detailed process of animating each scene in the video. It describes the transformation of layers into 3D, the arrangement of elements like cityscapes, keys, and cars, and the creation of camera movements to enhance the storytelling. The paragraph also covers the animation of appearing and disappearing objects, such as keys and cars, to create a sense of depth and flow. Additionally, it explains the use of background elements, transitions between scenes, and the application of final adjustments like camera movement and lighting effects to polish the video. The narrative emphasizes the importance of continuous camera motion to mimic the natural movement of a person holding a camera.
🚀 Henry Ford's Journey and Impact
The third paragraph shifts the focus to the content of the video itself, which tells the story of Henry Ford. It highlights Ford's journey from a teenager leaving his family's farm to seek work in the city, facing initial failures, to eventually building an empire that revolutionized the car industry and business practices. The paragraph underscores Ford's pioneering spirit and his significant impact on the industrial and business landscapes. However, the paragraph ends abruptly, suggesting an incomplete narrative that might be continued in subsequent parts of the script or video.
Mindmap
Keywords
💡Editing Style
💡Intro
💡Photoshop
💡After Effects
💡3D Transformation
💡Camera
💡Keyframes
💡Typewriter Effect
💡Scene Composition
💡Transition
💡Depth of Field
💡Lighting Effects
Highlights
Tutorial on creating an intro for a video about Henry Ford's life from the popular channel Magnet.
Channel Magnet has reached 1000 subscribers and thanks viewers for their support.
Introduction to the first phase of video editing in Photoshop, preparing the main scenes in groups.
Importing the Photoshop file into After Effects and starting with scene one.
Transforming objects into 3D within After Effects.
Creating a typewriter effect for the title text.
Setting up a camera view with a 50mm lens for the background scene.
Animating the scene by adjusting the depth and position of characters and objects.
Smoothing the camera movement with keyframes and speed graph adjustments.
Moving on to scene two with similar 3D transformation and layer distribution.
Creating a city background and animating keys appearing from left and right.
Animating scene transitions with zoom and rotation effects.
Simplifying the process for scene three with straightforward animations.
Adding a JPEG image at a specific moment for a close-up effect.
Integrating images of cars appearing from the bottom with accompanying text.
Duplicating elements in the final scene to create multiple cars and hands.
Using the Gaussian Blur effect to add depth and focus to certain elements.
Creating transitions with a burning paper effect and adjusting light transitions.
Final adjustments to the main camera layer for smooth and dynamic movements.
Applying Deep Glow effect to enhance the visual appeal of all scenes.
Henry Ford's story of leaving his family's farm to revolutionize the car industry.
Transcripts
nesse vídeo você irá aprender como é
feito o estilo de edição do canal magnet
media um dos maiores canais Dark do
mundo esse tutorial é de uma intro de um
dos vídeos dele onde fala a história de
vida de Henry Ford esse mesmo vídeo que
você está vendo aí na tela Henry
Ford Quero aqui agradecer a você que já
é inscrito no canal essa semana batemos
1000 inscritos então se você gosta dos
meus vídeos dos meus tutoriais e quer
ajudar o canal a crescer cada vez mais
por favor se inscreva e já deixe seu
like a primeira etapa Então pessoal é
fazer a preparação dentro do fotoshop já
fiz aqui a preparação das principais
cenas né tudo dentro duns grupos aqui a
cena cena um cena dois cena 3 cena 4 e
cena 5 vamos arrastar então o nosso
arquivo do Photoshop para dentro do
After Effects aqui vamos deixar nessa
terceira opção composition Retail L
Styles duplo clique no arquivo aqui do
Photoshop e aqui está todas as cenas
vamos primeiro aqui animar a cena um
vamos transformar todos os objetos aqui
em 3D o título aqui vamos transformar
ele em texto aqui vem como camada normal
seleciona os dois botão direito do mouse
Create converte para texto editável que
depois a gente vai fazer um efeito aqui
de máquina de escrever nele Vamos criar
aqui uma nova câmera pode deixar em 50
mm mesmo onde tem um View eu gosto de
deixar em dois views vamos começar pelo
cenário do fundo que é a fazenda vamos
levar lá pro fundo aperto a letra s
escala aumentar os textos mais atrás um
pouco também aqui a mulher e o homem a
gente vai deixar à frente esse Icone
Zinho aqui é a câmera pessoal então a
gente vai deixar eles o homem e a mulher
aqui mais à frente um pouco da da câmera
mais um pouco próximo beleza aí o menino
aqui o jovem né a gente vai deixar lá
próximo do do nome vamos selecionar
então aqui a câmera que é o ponto
inicial dela Vamos marcar aqui ponto de
interesse posição e a rotação aqui vamos
deixar um pouco inclinada assim ela vai
iniciar um pouco inclinada com uns 2
segundos a gente vai levar a câmera aqui
pra frente onde que tá 9 gra aqui a
gente vai deixar em zero para alinhar
aqui a gente já consegue mexer um pouco
aqui no menino que ficou bem próximo
aqui da câmera a gente consegue deixar
lá mais perto do texto lá mais ou menos
aqui um isso então ele já faz essa
rotação aqui ó da cena inicial noos
textos então a a vai deixar colocar um
efeito de máquina de escrever então aqui
conforme a câmera for aproximando a
gente vai deixar um pouquinho mais à
frente o texto aparecendo aqui quando
termina esse texto inicio o outro então
dessa maneira aqui pronto vamos dar um
suavizar aqui no no movimento da câmera
seleciona os keyframes F9 vamos no
gráfico de velocidade vou puxar um
pouquinho para cá porque eu quero esse
final aqui e ele chegando um pouquinho
mais lento dessa maneira assim posso
deixar até um pouquinho mais essa parte
aqui ela vai vir mais rápida
e afinar um pouquinho mais lento Beleza
então essa animação já da cena um já foi
feita agora vamos então para a cena dois
cena dois então praticamente o mesmo
processo pessoal transformando aqui em
3D as camadas Vamos Fazer a distribuição
a cidade vamos levar lá pro fundo
aumentar a escala para preencher melhor
o homem aqui vamos levar um pouquinho
mais a frente lá também e as chaves aqui
então Vamos colocar as duas mais próximo
da câmera uma chave que vai vir pela
direita e a outra chave que vai vir pela
esquerda aqui vamos criar nossa câmera
aqui também para essa cena posição e
aqui com uns 2 segundos a gente vai
levar até a frente ali um pouquinho para
não ficar só dando no Zoom também mexi
na rotação aqui e rotacionando um pouco
marcando aqui em menos se e lá na frente
chegando em C e as chaves a gente vai
fazer elas aparecendo né a chave da
esquerda e a chave da direita então aqui
vamos marcar a posição delas deixar mais
à frente ali posição delas e o início
delas vamos tirar de cena
aqui pronto aí vai ficar aparecendo
Então dessa maneira E aí dando Zoom e
depois elas vão saindo de cena cena dois
também animado vamos agora então para
cena
[Música]
3 pronto beleza essa aqui a cena foi
mais simples agora então vamos para a
próxima
[Música]
cena
[Música]
[Música]
Beleza então cena 1 cena 2 cena 3 cena 4
concluída então aqui depois da cena 4
vai ter apenas aqui ó um JPEG num
determinado momento D um zoom no rosto
dele né a gente pode marcar aqui uma
posição e um que à frente mais próximo
da da câmera aqui a outra imagem e
também dá um efeito de zoom também na
posição é só a gente colocar aqui ele
depois um pouquinho mais à frente na na
posição para dar o o zoom na nossa
próxima cena então onde que aparece os
carros Vamos colocar aqui a imagem dos
carros ele vem aparecendo então de baixo
para cima né pessoal a posição final a
gente coloca aqui mais à frente vindo de
baixo só avisando os keyframes o
movimento e conforme a imagem vai
aparecendo tem um texto que vai
aparecendo aqui né falando sobre o
império dele então aqui conforme a
imagem vai aparecendo E aí também
aparece o nome ali bem então chegamos
aqui na nossa última cena então lá no
Photoshop eu fiz apenas o carro e a mão
mas aqui a gente vai distribuir
duplicando essa parte da mão aqui e
também do carro também né que lá na cena
lá aparece mais carros não é só não é só
um que aparece no carro aqui pessoal
vamos criar a composição duplo Clique na
composição do carro e aí eu vou expandir
um pouco mais aqui a a tela dele e eu
vou deixar aqui três carros né pode
transformar todos em 3D ele aqui e na
mão vamos fazer da mesma maneira vou
criar uma precomp nela vamos fazer ela
aparecendo de baixo para cima vindo
assim então de baixo para cima vamos
distribuir aqui os objetos essa mão aqui
fica um pouquinho mais à frente aqui vem
aparecendo assim vou duplicar ela vou
colocar uma outra mão mais lá atrás do
carro o conjunto aqui do carro vou
duplicar ele vou deixar um outro
conjunto lá atrás da outra mão e vou
duplicar essa outra mão aqui que tá aqui
atrás e deixar no atrás o outro conjunto
de carros Vou colocar aqui uns carros um
pouco mais à frente Pronto agora vamos
fazer aqui uma movimentação com a câmera
então aqui é o ponto final da câmera e o
ponto inicial vamos levar ela lá pra
frente um pouco de rotação aqui no
movimento então ela vai ficar assim e
aparecendo as mãos ali né pronto essa
parte aqui do carro esse conjunto que tá
à frente aqui eu vou dar um desfoque
nele para dar uma profundidade no campo
com g and Blur colocar 15 pontos de
desfoque esse gus and Blur também vou
desfocar os outros objetos ali do fundo
um pouco para dar mais destaque aqui
nesse dinheiro aqui que tá a frente né
aqui beleza pessoal para não ficar
aparecendo tudo junto eu posso colocar
aqui um pouquinho mais à frente esses
outros dinheiro lá do fundo lá
aparecendo depois né aparece o primeiro
segundo e o terceiro bem então aqui
agora é só a gente acrescentar o
background E aí está Então a nossa
última cena concluída também então pra
transição dessa cena para a última cena
pessoal tem a parte do de um papel
queimando né então peguei nevat
elementos mesmo uma cena dessa E é só
tirar aqui o o fundo verde dela com a
ferramenta de klight a aqui dessa cena
muda pra outra vai revelando a cena ao
fundo ali agora Aqui começa Claro vou
deixar ela escuro ferramento de ru
saturation vou marcar aqui ponto final
dela Claro e aqui eu vou deixar o início
aqui mais mais escuro aqui pronto então
essa transição foi feita e vai
aparecendo a nossa última cena aqui
beleza agora então aplicar aqui os
ajustes finais do nosso vídeo Vamos aqui
na nossa camada de câmera principal
mexer na posição dela que como vocês
podem ver no exemplo do magnet m a
câmera nunca fica parada n Ela fica
dando uns suaves movimentos então aqui
em posição segurando Alt Vamos colocar
aqui umle
2,6 que aí ela vai mexendo também fica
parao para cim como se fosse uma pessoa
segurando a câmera mesmo né sem ficar
aquele negócio totalmente estático Vou
colocar aqui também dessa cena PR outra
tem uma transição né de luz vou aplicar
aqui uma luz aqui nos efeitos colocar em
screen então aqui de uma pra outra aí já
aparece ali a entre essa cena e a outra
que eu vou colocar aqui também uma
transição de luz aqui vamos criar agora
aqui adj layer e colocar um Deep Glow em
todas as
[Música]
cenas
hen Ford had built an Empire and
completely revolutionized not just the
Car Industry but Business as we know it
he
pioneered a teenager abandons his Life
on his family's Farm and Heads to the
City in search of work only to get fired
Within just Days he dropped out of
school and was Now Alone with seemingly
no prospects however Fast forward a few
decades and Henry Ford Had buil an
Empire andely Revolution Not The
Carry we know it he pioneered at
تصفح المزيد من مقاطع الفيديو ذات الصلة
Cartoon 3D Text Effect in Photoshop Tutorial
Car Logo Flip Animation Tutorial in After Effects in Hindi
Edit Viral 3D Videos on Mobile 🔥🔥
PHOTOSHOP TRICK #01 : POTRAIT TEXT PHOTO (Bahasa Indonesia)
CapCut Tutorial: How to Create EPIC FILM with Ai
React Three Fiber | Kamera, Obje ve Işık Kullanarak İlk Sahnemizi Yapıyoruz
5.0 / 5 (0 votes)