Como crear un Blog en Blogger GRATIS ✅ Paso a paso, fácil y BONITO 😊 🔥 Tutorial español 2022

Compartiendo saberes digitales
10 Jan 202219:45

Summary

TLDREste tutorial detalla cómo crear un blog utilizando Blogger, una herramienta gratuita integrada en la cuenta de Google. Se explica el proceso de inicio de sesión con una cuenta de Gmail, la elección de un nombre para el blog, la creación de una URL y la confirmación del nombre visible para los lectores. Seguidamente, se muestra cómo personalizar el tema del sitio, añadir publicaciones con texto, enlaces, imágenes y videos, y cómo etiquetar y programar la publicación de las entradas. Finalmente, se invita a los usuarios a suscribirse al canal para recibir futuras tutoriales.

Takeaways

  • 🖥️ Inicia sesión en Blogger utilizando tu cuenta de Gmail para crear un blog.
  • 🌐 Puedes elegir una URL única para tu blog, que debe estar en minúsculas y sin espacios.
  • ✏️ Elige un título para tu blog que puede cambiarse más adelante si lo deseas.
  • 🎨 Personaliza el tema visual de tu blog y pruébalo antes de aplicarlo definitivamente.
  • 📄 En la interfaz, puedes añadir una nueva entrada con un título y contenido personalizado.
  • 🔗 Es posible insertar enlaces en las publicaciones para redirigir a otros sitios o páginas.
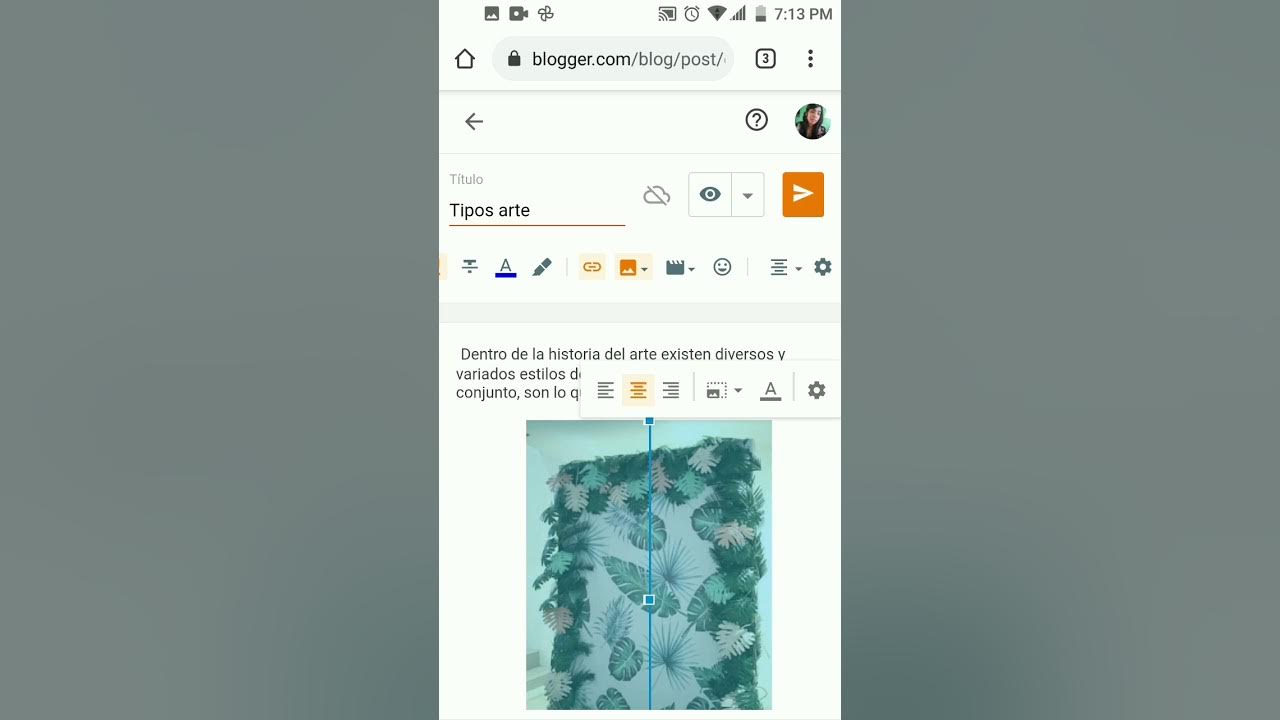
  • 🖼️ Añade imágenes a tus publicaciones subiéndolas desde tu computadora o URL.
  • 🎥 Los videos también se pueden insertar desde YouTube o desde tu computadora.
  • 🏷️ Usa etiquetas en las publicaciones para organizar el contenido por temas específicos.
  • 📅 Programa la fecha y hora de publicación de tus entradas para organizar su orden cronológico.

Q & A

  • ¿Qué herramienta gratuita se utiliza en el tutorial para crear un blog?

    -El tutorial utiliza Blogger, una herramienta gratuita integrada en nuestra cuenta de Google.

  • ¿Cuáles son las formas de iniciar sesión en Blogger según el tutorial?

    -Puedes iniciar sesión en Blogger haciendo clic en 'crear tu blog' o en la pestaña 'iniciar sesión'. Ambas opciones te redirigen a la misma ventana para ingresar los datos de tu cuenta de Gmail.

  • ¿Es obligatorio poner un nombre al blog inmediatamente?

    -No, no es obligatorio. Puedes asignar un nombre al blog al momento de crearlo o hacerlo más tarde.

  • ¿Qué formato debe tener la URL del blog?

    -La URL debe estar en minúsculas y sin espacios.

  • ¿Cómo puedes personalizar la apariencia de tu blog en Blogger?

    -Puedes personalizar la apariencia de tu blog eligiendo un tema, el cual puedes previsualizar, personalizar y aplicar. También es posible cambiar el diseño posteriormente.

  • ¿Qué opciones tienes al insertar texto en una entrada de blog?

    -Puedes personalizar el texto cambiando la fuente, el tamaño, el color, y aplicando estilos como negrita, cursiva, subrayado y alineación.

  • ¿Cómo se inserta un enlace en una entrada de blog?

    -Para insertar un enlace, seleccionas las palabras deseadas, haces clic en 'insertar o editar enlace', pegas la URL, y puedes elegir abrir el enlace en una nueva pestaña.

  • ¿Qué opciones tienes al agregar una imagen en una entrada?

    -Puedes insertar una imagen desde tu computadora, Google Fotos, Blogger o una URL. Además, puedes cambiar su tamaño, alineación y agregar texto alternativo o título.

  • ¿Cómo se añade un video a una entrada de blog?

    -Puedes añadir un video subiéndolo desde tu computadora o insertando un video de YouTube usando su URL o buscando directamente en YouTube.

  • ¿Qué son las etiquetas en una entrada de blog y para qué sirven?

    -Las etiquetas son palabras clave que organizan las entradas por temas, lo que facilita la búsqueda de entradas relacionadas dentro del blog.

Outlines

00:00

🌐 Creación de un Blog en Blogger

El vídeo comienza explicando cómo crear un blog utilizando Blogger, una herramienta gratuita integrada en la cuenta de Google. Se menciona que para acceder a la interfaz de Blogger, se puede abrir una nueva pestaña en el navegador y buscar 'Blogger'. Para crear un blog, se debe iniciar sesión con una cuenta de Gmail, y se ofrecen tres métodos para hacerlo. Una vez que se ha iniciado sesión, se procede a dar un nombre al blog, crear una dirección web (URL) y confirmar el nombre visible para los lectores. El tutorial también muestra cómo personalizar el aspecto del sitio web y cómo acceder a diferentes pestañas como estadísticas, comentarios, ingresos, páginas y cómo ver el blog en vivo.

05:03

🎨 Personalización del Blog y Elección de Temas

En este segundo párrafo, se explica cómo personalizar el aspecto del blog seleccionando temas. Se menciona la posibilidad de cambiar el diseño inicial en cualquier momento y se destaca la importancia de que el blog pueda ser educativo, comercial o sobre un tema específico. Se muestra cómo previsualizar y aplicar temas, así como cómo cambiar la tipografía, los colores y los títulos. Además, se detalla cómo crear una entrada en el blog, utilizando herramientas similares a un procesador de texto para dar formato al texto, añadir enlaces y publicar la entrada.

10:04

📸 Añadir Multimedia a la Entrada del Blog

El tercer párrafo se centra en cómo añadir imágenes, logos y videos a una entrada del blog. Se describe el proceso de subir una imagen desde el ordenador, ajustar su tamaño y posición, y añadir una leyenda o título. También se explica cómo insertar un video desde YouTube, hacer que el reproductor sea más grande y cómo se visualizará en la entrada una vez publicado.

15:07

📅 Publicación y Organización de Entradas

El último párrafo del vídeo guía al usuario en cómo etiquetar una entrada con palabras clave (etiquetas) para facilitar la organización y búsqueda de contenidos similares. También se muestra cómo cambiar la fecha y hora de publicación de una entrada. Finalmente, se describe el proceso de预visualización y publicación de la entrada, y cómo ver la entrada publicada en el blog. Se menciona que en futuras tutoriales se explorarán otras pestañas del menú principal como páginas, diseño y configuración.

Mindmap

Keywords

💡Blogger

Blogger es una plataforma gratuita de publicación de blogs que se integra con la cuenta de Google. En el vídeo, se usa Blogger para enseñar cómo crear un blog desde cero. Se menciona que para acceder a la interfaz de Blogger, se debe iniciar sesión con una cuenta de Gmail, y se detalla el proceso de registro y creación de un blog, destacando Blogger como herramienta central para la creación de contenido digital.

💡Interfaz

La interfaz es el conjunto de elementos gráficos y de usuario que permite interactuar con una computadora o aplicación. En el vídeo, se describe cómo navegar por la interfaz de Blogger para crear un blog, destacando la importancia de comprender el diseño y la disposición de los botones y opciones para poder usar la herramienta de manera efectiva.

💡Cuenta de Gmail

Una cuenta de Gmail es una dirección de correo electrónico y cuenta de usuario de Google. En el vídeo, se indica que se necesita una cuenta de Gmail para iniciar sesión en Blogger y crear un blog, mostrando la integración entre los servicios de Google y cómo se puede usar una sola cuenta para múltiples propósitos.

💡URL

La URL (Localizador Uniforme de Recursos) es la dirección web que identifica de manera única un recurso en Internet. En el vídeo, se explica cómo elegir y verificar la disponibilidad de una URL para el blog, lo cual es crucial para que los visitantes puedan encontrar y acceder al sitio web del blog.

💡Tema

Un tema en el contexto de Blogger es una plantilla de diseño que se puede aplicar al blog para personalizar su apariencia. El vídeo detalla cómo seleccionar y aplicar temas en Blogger, y cómo estos afectan la estética y la experiencia del usuario que visita el blog.

💡Publicación

La publicación en el vídeo se refiere al acto de hacer un contenido disponible en el blog. Se describe el proceso de crear una entrada o 'post' en Blogger, y cómo publicarla para que sea visible para los visitantes del blog, lo que es el fin último de la creación de contenido en una plataforma como Blogger.

💡Entrada del Blog

Una entrada del blog, o 'post', es una publicación individual en una línea de tiempo del blog. El vídeo enseña cómo crear una entrada, añadir texto, imágenes, enlaces y videos, y cómo cada una de estas entradas contribuye al contenido y al propósito general del blog.

💡Etiquetas

Las etiquetas son palabras clave que se asocian con una entrada del blog para facilitar su búsqueda y organización. En el vídeo, se menciona cómo asignar etiquetas a una entrada para categorizar el contenido y hacer que sea más fácil de encontrar tanto para el creador del blog como para los visitantes.

💡Texto enriquecido

El texto enriquecido es texto que se ha modificado para resaltar o mejorar su presentación, como cambiar el tamaño, la fuente, el color o hacer que sea negrita, cursiva o subrayada. En el vídeo, se muestra cómo aplicar estas modificaciones en Blogger para mejorar la apariencia visual de las entradas del blog.

💡Enlace

Un enlace es una conexión a otra página web o recurso en la red. En el vídeo, se explica cómo insertar un enlace en una entrada del blog para dirigir a los lectores a otra página relevante, como el canal del creador en este caso, lo que aumenta la interacción y la navegación dentro del contenido del blog.

💡Multimedia

La multimedia hace referencia a la incorporación de contenidos como imágenes y videos en una entrada del blog. El vídeo muestra cómo agregar imágenes y videos a una entrada en Blogger, lo que enriquece la experiencia del usuario y puede ayudar a transmitir la información de manera más efectiva.

Highlights

Bienvenido al canal Sharing Digital Knowledge.

Tutorial para crear un blog utilizando Blogger.

Blogger es una herramienta gratuita integrada en la cuenta de Google.

Acceder a Blogger a través de una nueva pestaña en el navegador.

Iniciar sesión con una cuenta de Gmail para crear un blog.

Opción de hacer clic en 'crear tu blog' o ir a la pestaña de inicio de sesión.

Acceder a Blogger desde la bandeja de aplicaciones de Gmail.

Se puede elegir el nombre del blog en este momento o más tarde.

Paso siguiente: Crear la dirección web del sitio (URL).

La URL debe estar en minúsculas y sin espacios.

Confirmar el nombre visible del blog, que es el que verán los lectores.

Se puede elegir el tema del sitio en la pestaña 'tema'.

Posibilidad de预览 y personalizar el tema antes de aplicarlo.

Crear una entrada en el blog a través de la interfaz de creación de publicaciones.

Añadir texto, cambiar el formato y añadir enlaces a la entrada.

Incluir imágenes y videos en la entrada utilizando las herramientas de inserción.

Agregar etiquetas a la entrada para organizar el contenido del blog.

Establecer la fecha y hora de publicación de la entrada.

Previsualizar la entrada antes de publicarla o publicarla directamente.

Visualizar la entrada publicada en el sitio web del blog.

El blog mantiene las entradas en orden cronológico, con las más recientes arriba.

Se planea un futuro tutorial para explorar otras pestañas como 'páginas', 'diseño' y 'configuración'.

Invitación a dejar comentarios, visitar el canal y suscribirse para recibir notificaciones.

Transcripts

play00:00

Hello how are you? Welcome to my channel Sharing Digital Knowledge.

play00:06

In this video tutorial, I'm going to show you how to create a blog using

play00:14

Blogger, which is a free tool integrated into our Google account.

play00:21

In order to get to this interface we can click on a

play00:26

new tab in our browser and put Blogger

play00:34

and this interface will appear.

play00:38

In order to create a blog we have to log in with our

play00:42

Gmail account and we can do it in two ways.

play00:46

Or we click here where it says create your blog,

play00:51

this window will open and here we have to put our account data.

play00:56

And another option is to go here to this tab that says login, we click

play01:04

and it takes us to the same window.

play01:06

Another possibility is to have our email open and here in the nine points

play01:14

where the applications are, we click, they are displayed and we look for the Blogger option.

play01:23

See what's down here? By pressing the left mouse button I can go

play01:30

up and place it in the space that is most comfortable for me so that

play01:35

it is visible once I click, see? in all nine points.

play01:40

If I select the Blogger application,

play01:45

the same interface that we were seeing in the previous example opens.

play01:50

We are going to start then located in this interface we can click on create

play01:58

your blog or we can click on start session pressing any of these two

play02:05

tabs redirects us to the window so that we can put the data of our Gmail account.

play02:13

Once we put our data we will be redirected to this space.

play02:19

The first thing it asks us is that we put a name to our Blog.

play02:24

We can do it right now or we can skip this step because

play02:30

we may not have thought of it and we can do it later.

play02:35

Anyway if we put the name at this time we can also change it later.

play02:41

I am going to put the title of my channel Sharing Digital Knowledge,

play02:54

I click on next

play02:58

The next step is to create the web address of this site,

play03:03

that is, the URL with which the recipients are going to enter.

play03:09

I'm also going to put the name of my channel and here I'm going to have to see if that

play03:16

name is available or I'm going to have to change it until I find a possibility.

play03:23

The URL is lowercase and without spaces.

play03:28

I put the name of my channel again Sharing Digital Knowledge and here

play03:34

below I see an inscription that says this blog address is available.

play03:41

So in this case, since I don't have any restrictions, I'm going to put next .

play03:48

A new window opens where I have to confirm the

play03:53

visible name, that is, the name that readers will see when they enter my Blog.

play03:59

I re-enter Sharing Digital Knowledge and click on finish

play04:09

A process is done and once the blog is created it says the Blog was created here,

play04:15

the tab just went there, this work interface appears.

play04:22

Positioned in this space, I am going to start showing you the main menu.

play04:28

The name of the blog appears at the top, then the possibility of creating an entry appears,

play04:36

different tabs appear, I am going to slide statistics, comments,

play04:43

income, pages and at the end it appears to see the blog,

play04:48

that is to say that when I am editing it I can also see how am i doing

play04:55

At this moment that we are starting our blog I am going to show you the "theme" tab

play05:03

. Here I can choose the appearance of my site.

play05:07

I click, I'm going to start swiping and options are going to appear,

play05:19

I keep swiping...

play05:22

I can choose a design that I like at this

play05:27

moment, which doesn't mean that my Blog is going to be like this definitively,

play05:32

I can try it and I can change it according to the intention that I have of use.

play05:40

Our Blog can be educational, but our Blog can also be

play05:45

commercial or our Blog can be about a certain topic.

play05:50

I am going to click for example on this option that appears here and when we select one

play06:00

of the themes it appears below the option: "preview", "customize" or "apply"

play06:10

If I put apply my blog will have this initial appearance that as

play06:16

I told them just later I can change it.

play06:18

Before applying, I can click on preview to see how it looks and

play06:25

on the customize tab, which we will surely see in another video tutorial, I

play06:32

can change the letter, the font, the color of the letter, the titles, etc.

play06:39

I'm going to click on preview

play06:44

. My site loads. Do you see that it says preview here? My title appears,

play06:49

I put Sharing Digital Knowledge.

play06:51

A central column appears and columns that are going to be fixed on the right side.

play06:58

Also notice that a menu appears showing me what it would look like

play07:04

on a computer, tablet, or phone.

play07:10

Here I have the two tabs customize or apply,

play07:15

if I customize I can make color changes for example to the titles, I

play07:21

change the font of the letter etc. and if I apply my design would be like this.

play07:29

I'm going to click apply, it redirects me back to the interface,

play07:35

it shows me that my theme is this one that appears here.

play07:39

I click on this inverted arrow and you see options appear or what

play07:46

I can also do is view the blog from this tab.

play07:52

I open in a new tab and here I have it and I'm seeing how it's going to stay.

play08:00

I go back to the editor again and what I'm going to show you now is how to create a post

play08:08

. I'm going to click on create a post.

play08:12

When I click on create an entry, I am redirected to this interface. At

play08:20

the top, the space appears to put the title of the entry and here, in the

play08:26

central panel, the space appears to start editing or adding content.

play08:33

Here, in this space below the title, there is a toolbar that contains many

play08:41

elements similar to those contained in a word processor, for example the font

play08:48

of the letter, the size, bold, italics or italics, underlining, colors, etc.

play08:57

Let's start by putting the title of this entry, I'm going to put Welcome to my Blog.

play09:06

The second step is to click here on the interface and start typing.

play09:12

In this virtual space I will be sharing

play09:16

educational tool tutorials to optimize our pedagogical practices.

play09:21

I can paint this text and make it bold,

play09:26

look for a font other than the default one and also what I can do

play09:33

is change the color I click on the color palette and I could put blue in this case.

play09:43

I can also paint I go to these three little dots and I could center,

play09:49

align right, align left.

play09:52

All the changes as I am doing in a word processor.

play09:56

I keep adding text... if you want to visit all the tutorials on my channel, click here.

play10:03

What I am going to show you here is how to make a link, I am going to paint click here and I am going to add

play10:12

the link that will redirect me to my channel so that when the user clicks on those

play10:19

two words it will take him directly to all the tutorials that I have inside my channel.

play10:25

So once I paint the word or words or a phrase,

play10:32

I click on this space that says insert or edit a link.

play10:38

A tab opens, it shows me that this link is going

play10:43

to be in these two words and here I am going to paste the address of my channel

play10:51

Once I paste the address I can choose to open this link

play10:56

in a new tab, I click and click apply.

play11:01

Note that where there is a link or a link, the letter is in another color.

play11:08

I am going to continue adding elements, in this case I am going to add the image or the logo of my channel

play11:15

and I can do that from this tab that is here that says insert image.

play11:22

I click

play11:25

options appear: upload from the computer, upload from photos,

play11:32

from Blogger or put a URL because I can search for an image that is in the cloud.

play11:38

In this case I am going to put upload from the computer because I

play11:43

already have it saved in a folder on my computer.

play11:46

I click, this window opens, I click choose files.

play11:52

It redirects me inside my machine. I am positioned in the images folder,

play11:59

I have a folder called Blog.

play12:01

I click and here I have the logo of my channel, I select it, I put open it will load here in

play12:12

the window that I just showed you and once it is already visible I will put select

play12:21

We can already see it in this entry if I click outside the image

play12:27

appears the background color you can display what is written.

play12:33

And if I click on the image again, what I do is that a menu is displayed that,

play12:41

among other things, centralizes the image for me, I can put it on the left, I click again,

play12:47

I centralize it again, I click again and what I can do is put a legend or

play12:56

what I can do is click on this wheel in the settings and I can change the size.

play13:03

Do you see a window open? I can put an alternative text, a title,

play13:11

I can also change the size of the image.

play13:14

In this case the size is medium, I can put large,

play13:18

I can put extra large, original or small.

play13:22

I update and see? How was the image enlarged in this entry?

play13:28

I click outside and there I can see it.

play13:32

In this entry we already have several elements: I added text that I customized, that is,

play13:40

I changed its color, I changed its font, I added the text and I put a link to it, I

play13:47

added an image and now the next step is to add a video.

play13:54

To add a video I click on this tab that says insert video

play14:02

and two options appear... upload from the computer if

play14:08

I have the video downloaded and saved on my computer or upload the video from YouTube.

play14:13

This is the option that I am going to use, I click

play14:19

, a window opens, I click on search and...

play14:25

Here I can do a search with a name, for example, as we do when we enter

play14:32

the YouTube platform or in this case I already have the URL of a video on my channel.

play14:39

I'm going to copy it, when I copy it, see? that the search is activated here. i

play14:45

click,

play14:47

a video appears explaining how to use gmail i selected it and i click the select tab.

play14:58

This makes my video embed inside the post if I want I can grab the edges and

play15:06

stretch it to make my player a little bigger see?

play15:12

I click outside the video and here is the player.

play15:16

I have already finished my entry with text, with a link,

play15:21

with an image and finally I added a video.

play15:25

What I can do is put labels on this post. Why labels? because I can

play15:34

organize my blog with themes so that when searching it is easier for me to identify

play15:43

the entries that talk about the same thing, for example I am going to call this entry Gmail

play15:55

I can put a comma and continue adding labels that are close entries I am also

play16:01

going to put Gmail so that the labels are grouped.

play16:08

Also what I can do is change the day and time of publication.

play16:13

In this case the day is 3 of 1, 2022 2:34 p.m. but if I click on this

play16:23

inverted arrow, do you see? a menu is displayed where I can set a different date and time.

play16:32

I could put

play16:36

January 2 and I can also change the time I could put I search in this menu and I put eight hours

play16:49

I can do this in each of the entries.

play16:53

Once my entry is finished I can

play16:56

go to the preview to see how it turned out or directly publish.

play17:01

I am going to click on publish, this window appears because it tells me

play17:10

that the post publication time will be changed to 2 from 1 to 8 o'clock.

play17:15

I'm going to click confirm

play17:21

the entry was published.

play17:23

We're back to the home interface where it's here, see? The main menu

play17:29

shows me that I already have an entry and now what I am going to do is go to

play17:37

the blog to see how this entry was published on my site.

play17:43

I'm going to right click, open links in a new tab so as not to close this

play17:50

space and here we can already see my first entry with the title, with the text,

play17:59

with the link, see if I click here where the little hand appears,

play18:07

click opens a new tab that shows me my channel because that is the link that I put.

play18:13

I return to the blog again, the image that we also put

play18:20

appears and here the video that we inserted appears that if I click it is reproduced

play18:28

here, see? It appears on Sunday, January 2, 2022, which was

play18:34

the date we set for publication of this entry.

play18:37

Here the title appears and if we are adding new entries depending on the

play18:45

date that we put, they will appear above it or below it because the blog is a log

play18:52

like a diary, it keeps the oldest entries and the newest one is positioned on top.

play19:01

In a future video tutorial we are going to work on other tabs of the main menu

play19:07

that are going to be pages, which is going to be the design, which is going to be the configuration.

play19:13

I hope that this tutorial has been useful for you to create

play19:18

a virtual space that we will continue to enrich in future videos.

play19:24

If you have any questions, opinions or suggestions,

play19:29

I invite you to leave them in the comments space.

play19:32

I invite you to visit my channel and subscribe so you receive

play19:38

notifications of upcoming tutorials. Thank you! see you in the next video

Rate This

5.0 / 5 (0 votes)

الوسوم ذات الصلة
BloggerBlogTutorialGoogleDiseñoContenidoSEOPublicaciónTecnologíaEducativo
هل تحتاج إلى تلخيص باللغة الإنجليزية؟