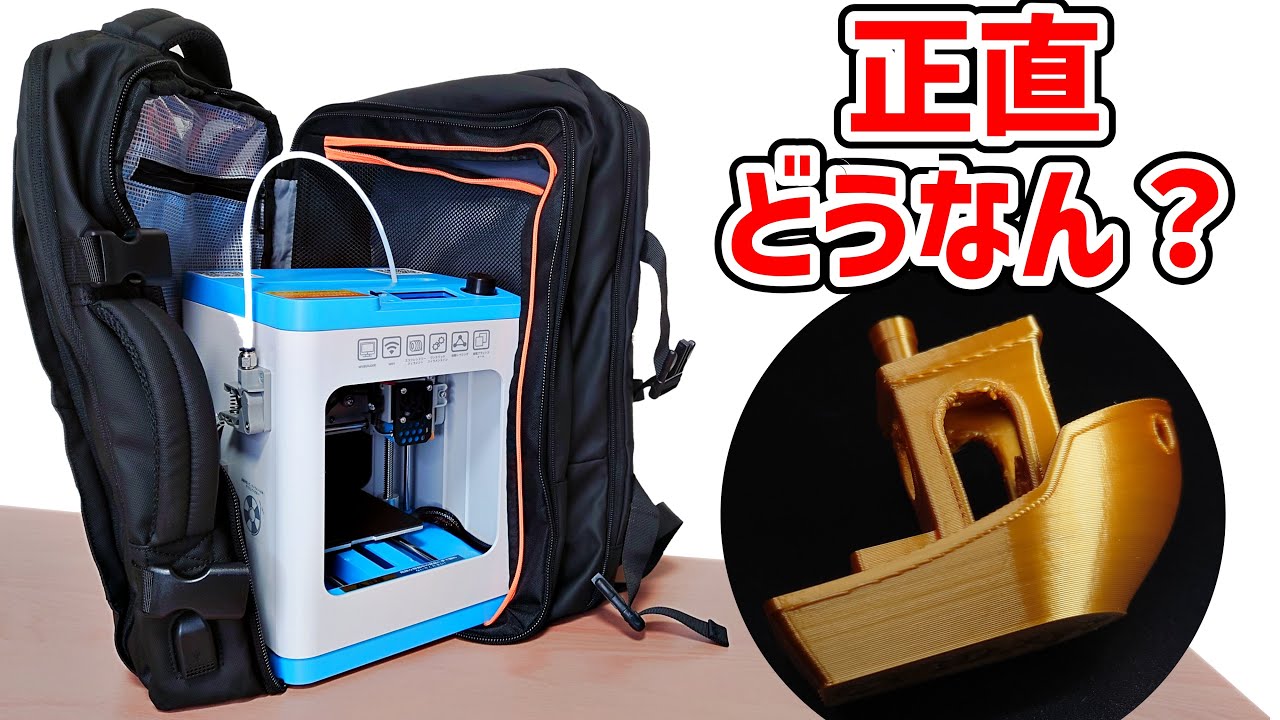
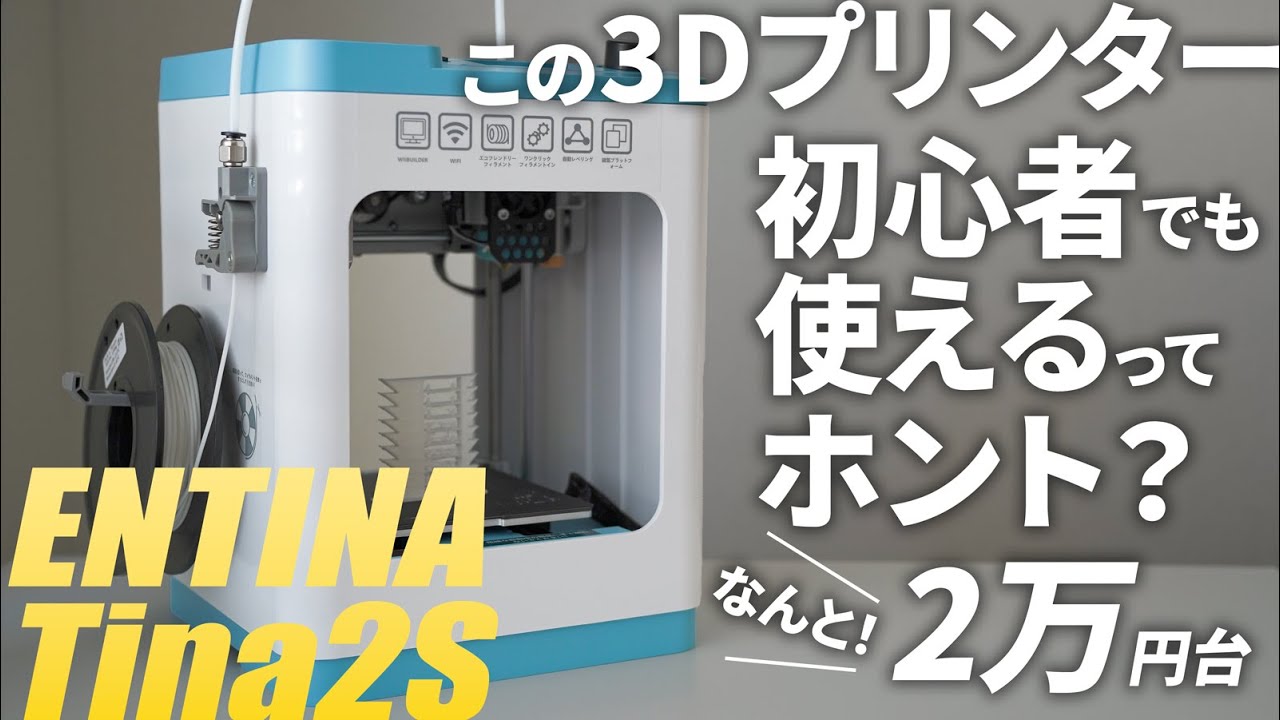
SO EASY! Tina2S 3D Printer Review, Setup and Test

TechfulGoodies
4 Aug 202418:18

Summary

TLDR本视频介绍了Tina 2s 3D打印机,适合初学者和孩子们使用。视频展示了开箱过程、组装步骤以及如何使用。Tina 2s易于设置,配备Wi-Fi连接和TF卡槽,支持通过云应用直接打印或从存储卡打印。还包括了自动调平功能和LED照明,便于夜间操作。尽管打印面积较小,但打印质量与更昂贵的打印机相当。视频还演示了如何使用云应用下载模型并进行打印。

Takeaways

  • 😀 视频介绍了一款适合初学者的3D打印机Tina 2s,适合孩子、学习者和初学者使用。
  • 📦 包装内包含了PLA材料卷轴,这是3D打印的基本材料,方便用户开始使用。
  • 🔧 Tina 2s打印机的设置相对简单,减少了DIY组装的复杂性,用户可以快速开始打印。
  • 📏 打印面积相对较小,不适合打印大型物品,但可以通过分割打印后拼接的方式制作大型模型。
  • 📲 提供了云应用,用户可以通过手机直接发送3D模型到打印机,无需使用外部存储卡。
  • 🔗 打印机支持Wi-Fi和蓝牙连接,方便用户通过手机应用进行操作。
  • 🔩 打印机配备了快速更换喷嘴和清洁工具,方便用户维护和更换喷嘴。
  • 🛠️ 打印机具有自动调平功能,减少了手动调整打印床水平的麻烦。
  • 🔥 打印平台是加热的,有助于模型在打印过程中更好地粘附。
  • 🎥 视频展示了打印机的实际打印过程,包括打印前的准备和打印中的监控。

Q & A

  • 问题 1: Tina 2s 3D 打印机适合哪些用户?

    -Tina 2s 3D 打印机适合初学者、儿童和想要轻松入门 3D 打印的人。

  • 问题 2: Tina 2s 3D 打印机的主要特点是什么?

    -主要特点包括 Wi-Fi 连接、自动调平、加热打印平台、TF 卡插槽、快速更换喷嘴和内置 LED 灯。

  • 问题 3: Tina 2s 打印机在打印面积上有什么限制?

    -Tina 2s 的打印面积较小,无法处理大尺寸的打印任务,但可以将大模型分成多个部分打印后拼接。

  • 问题 4: Tina 2s 的安装和设置是否复杂?

    -安装和设置相对简单,几乎不需要额外的操作,用户只需连接打印机管道和安装打印材料。

  • 问题 5: 使用 Tina 2s 进行打印时,需要使用哪些材料?

    -Tina 2s 使用 PLA(聚乳酸)打印材料,其他类型的耗材也可以使用,但 PLA 是最常见的材料。

  • 问题 6: Tina 2s 的 Wi-Fi 连接功能有什么优势?

    -Wi-Fi 连接允许用户通过手机应用程序从云端库中选择 3D 模型并直接发送到打印机进行打印,而不需要手动传输文件。

  • 问题 7: Tina 2s 打印机遇到断电时会发生什么?

    -Tina 2s 具有断电续打功能,打印过程中断电时,打印机会记住位置并在恢复电力后继续打印。

  • 问题 8: Tina 2s 的打印质量如何?

    -打印质量不错,打印层次可以调节,尽管默认设置下可能会看到明显的打印线条。

  • 问题 9: Tina 2s 附带的应用程序提供了哪些功能?

    -应用程序提供了一个 3D 模型库,用户可以从中选择各种模型并直接发送到打印机,此外还支持手动加载存储卡中的模型。

  • 问题 10: 使用 Tina 2s 打印后需要进行哪些后期处理?

    -打印完成后,通常需要用美工刀去除多余的细丝,并打磨底部以获得更光滑的表面,用户还可以对模型进行涂装。

Outlines

00:00

🤔 探索3D打印入门:Tina 2s 3D打印机开箱

本段介绍了Tina 2s 3D打印机,这是一款面向初学者、儿童和学习者的入门级3D打印机。视频作者分享了自己对3D打印的兴趣,并提到自己现有的3D打印机使用起来较为复杂。Tina 2s打印机的包装内包含了PLA材料,这是一种常用的3D打印材料,并且提供了一个小型的打印卷轴。作者强调了Tina 2s打印机的易用性,因为它几乎不需要用户进行复杂的设置,这与作者之前使用的需要大量DIY设置的3D打印机形成对比。此外,作者还提到了打印机的尺寸,指出其打印面积相对较小,可能不适合打印大型物品。

05:00

🔧 Tina 2s 3D打印机的设置与初步使用

视频作者详细介绍了Tina 2s 3D打印机的设置过程。首先,他展示了如何安装打印材料PLA,并解释了打印机的构造和工作原理。作者提到了打印机的两个QR码,一个用于支持服务,另一个用于连接云应用,后者允许用户直接从手机发送3D模型到打印机,而无需使用外部存储卡。此外,作者还展示了如何通过Wi-Fi和蓝牙将打印机配置到网络中,并使用应用程序进行操作。在尝试打印一个模型时,作者遇到了一个小问题,即需要插入TF卡才能使用打印机,因为应用程序会将文件下载到存储卡上。

10:01

🐉 3D打印实践:测试Tina 2s打印机

在本段中,作者通过实际打印一个小型模型来测试Tina 2s打印机的性能。他展示了如何从打印机的库中选择模型并发送到打印机进行打印。作者还讨论了3D打印的一些基本知识,比如PLA材料的颜色和打印后的处理,例如打磨和上色。在打印过程中,作者注意到了打印机的一些高级功能,如自动调平、Wi-Fi连接和热床,这些功能使得打印过程更加精确和便捷。作者还提到了打印机的LED灯和快速更换喷嘴等特性,这些设计使得Tina 2s打印机在易用性和功能性方面表现出色。

15:02

🎁 Tina 2s 3D打印机的总结与未来计划

视频的最后部分,作者总结了Tina 2s 3D打印机的特点和优势。他强调了打印机的Wi-Fi连接能力、自动调平功能、热床、LED灯和快速更换喷嘴等特点,这些使得Tina 2s非常适合初学者使用。作者还提到了打印机的静音性能和几乎为零的设置时间。最后,作者分享了他未来的计划,包括为打印机打印一些配件,以及探索3D打印社区提供的资源和工具。

Mindmap

Keywords

💡3D打印

3D打印是一种将数字模型转换为物理对象的技术,通常通过熔融塑料或其他材料逐层构建物体。视频的主题围绕一台名为Tina 2S的3D打印机展开,强调它适合初学者使用。

💡Tina 2S

Tina 2S 是视频中的主角,一款专为初学者设计的3D打印机。它的优点是使用简单,开箱即用,且不需要复杂的组装步骤。视频详细介绍了这款打印机的功能和适用范围。

💡PLA

PLA是一种常用的3D打印材料,全称为聚乳酸(Polylactic Acid),由可再生资源制成。视频提到Tina 2S打印机随附了一些PLA,适合初学者进行3D打印实验。

💡自动校准

自动校准是Tina 2S的一项功能,用来确保打印平台平整,使每一层的打印精度更高。视频中指出这一功能可以帮助用户避免手动调整打印床的繁琐步骤,提升打印质量。

💡TF卡

TF卡(TransFlash卡)是一种小型的存储设备,Tina 2S可以通过它直接读取并打印3D模型文件。视频中提到用户可以通过TF卡传输模型,避免了Wi-Fi连接的复杂性。

💡打印平台加热

打印平台加热是Tina 2S的功能之一,通过加热平台来增强打印物体与平台的粘附力,确保打印物体在打印过程中不会移动或脱离。视频强调了这一功能对提升打印质量的重要性。

💡Wi-Fi连接

Wi-Fi连接允许用户通过无线网络将3D模型从手机或电脑发送到Tina 2S进行打印。视频中演示了如何使用Wi-Fi连接进行远程控制和模型传输,这使得打印操作更加便捷。

💡模型库

Tina 2S支持一个包含大量3D模型的云端模型库,用户可以从中选择并下载模型进行打印。视频演示了如何通过手机应用程序访问并打印这些模型,展示了该功能的便利性。

💡打印暂停与恢复

打印暂停与恢复是Tina 2S的一项功能,允许用户在打印过程中暂停,并在电源中断或其他意外情况后继续打印。视频中介绍了这项功能如何帮助用户避免因意外中断而浪费材料或时间。

💡打印喷嘴更换

打印喷嘴是3D打印机中用于挤出加热后的材料的关键部件。Tina 2S支持快速更换喷嘴的功能,以应对喷嘴堵塞或更换不同材料的需求。视频提到这一设计为打印机的维护提供了便利。

Highlights

介绍了Tina 2s 3D打印机,适合初学者、儿童和学习者使用。

Tina 2s 3D打印机被认为是一种入门级打印机,适合那些想要轻松开始3D打印的人。

Tina 2s 3D打印机开箱即用,减少了安装和设置的复杂性。

包装内附带了PLA材料,这是3D打印的基本材料。

Tina 2s 3D打印机的打印面积相对较小,适合打印小型模型。

打印机顶部有两个二维码,一个用于支持,另一个用于云应用。

通过云应用可以直接将3D模型从手机发送到打印机,无需使用外部SD卡。

打印机还提供了一个TF卡插槽,可以直接从存储卡打印。

打印机的安装和设置过程非常简单,适合初学者。

打印机的自动调平功能减少了手动调整打印床水平的需要。

打印机的加热打印床有助于模型在打印过程中的粘附。

打印机内部的LED灯有助于在打印过程中观察打印机内部情况。

打印机的快速更换喷嘴功能使得在喷嘴堵塞时可以轻松更换。

打印机在使用过程中几乎无声,操作简单。

Tina 2s 3D打印机支持Wi-Fi连接,可以通过应用程序下载模型。

打印机支持暂停打印功能,即使在打印过程中断电也能从断点继续打印。

提供了一个TF卡适配器,方便用户将3D文件直接存储在卡上。

打印机的打印质量与更昂贵的打印机相当,适合个人使用。

Tina 2s 3D打印机是一个即开即用的解决方案,适合作为圣诞礼物。

3D打印社区有大量的资源和配件可供用户下载和使用。

Transcripts

play00:00

so have you ever wanted to get into 3D

play00:01

printing but you're not sure how

play00:04

everything seems a little complicated

play00:05

there's so many options out there well I

play00:07

might have something you might be

play00:09

interested

play00:11

[Music]

play00:14

in so in this box I have the Tina 2s 3D

play00:18

printer now when they contacted me and

play00:20

wanted to send this for me to check out

play00:22

I thought to myself it might be pretty

play00:24

interesting for you all because it is

play00:27

kind of considered a beginner printer it

play00:29

it's good for kids for learners for

play00:32

beginners so anyone who hasn't gotten

play00:34

into 3D printing but would like to start

play00:37

that process in an easy way I personally

play00:40

have a 3D printer that I have used and

play00:44

the issue that I have sometimes is that

play00:46

it's kind of difficult to use sometimes

play00:48

it'll mess up things will go wrong it's

play00:50

a little more complicated and so getting

play00:53

something like this opening it up

play00:55

checking it out and seeing how it works

play00:58

I think will be a real benefit to me and

play01:00

to you so let's go ahead and take a look

play01:02

at what's in the box then we'll put it

play01:04

together then we'll try it out and we'll

play01:05

print some stuff all right

play01:09

so obviously this is a big box and I

play01:12

usually use my overhead camera but I'm

play01:15

not sure I will be able to do that too

play01:17

much so in the Box you do get some pla

play01:19

so pla is basically the substance you

play01:22

use to 3D print with so they give you a

play01:25

nice little spool of that which is nice

play01:28

you can always buy more and you can

play01:30

always get more different colors

play01:31

whatever you want but it's nice that

play01:34

they kind of provide some for you to

play01:37

start with so let me set this off to the

play01:40

side and it looks like it is packaged

play01:43

very nicely in this foam wrapped up with

play01:45

Saran Wrap

play01:46

here and the good thing about this is

play01:49

that with my current 3D printer there

play01:50

was a lot of setup there was a whole DIY

play01:54

aspect to it where you had to do a whole

play01:55

bunch of setup and my understanding with

play01:57

this is that when it comes

play02:00

it is basically all set and ready to go

play02:04

now the plus side to that is that you

play02:05

don't have to really do a lot of install

play02:07

or set up I guess we'll see that here

play02:09

but the downside of it is that it is a

play02:11

little bit of a smaller print surface so

play02:13

if you're looking to do larger prints

play02:14

this might not be for you uh but we'll

play02:17

do a test and I'll show you how big it

play02:19

is and how big of the prints you can

play02:21

actually get so this is the printer

play02:24

itself and as you can see it's not too

play02:25

big if you look at kind of like my hands

play02:27

or like the size of a water bottle you

play02:29

can see that a standard water bottle is

play02:31

pretty much bigger than the printing

play02:33

surface itself so again like I said if

play02:35

you're planning to use uh larger prints

play02:38

uh it won't work but a lot of times you

play02:40

can take prints and sort of cut them

play02:42

part into pieces that go together with

play02:44

glue or other methods so that you can

play02:47

make larger prints on smaller devices

play02:50

like this now this is one of those

play02:52

things that I am going to use

play02:55

the instruction manual for because I

play02:58

don't know how to set it up but I'm

play03:00

pretty sure it's fairly easy and if

play03:02

you'll notice on the top here there is

play03:05

two QR codes one is for support but the

play03:07

other is for their Cloud app what

play03:09

they've done is they've made basically a

play03:11

whole Marketplace full of 3D models that

play03:13

you can actually use with your phone and

play03:16

send directly to this without having to

play03:18

put it on like an external SD card bring

play03:20

the SD card over and print with it which

play03:22

is normally what I have to do now just

play03:24

because they have the app doesn't mean

play03:25

that you have to use the app you can

play03:27

actually uh put your stuff on a memory

play03:30

stick and put it into the TF slot right

play03:32

here on the top and then you can print

play03:34

directly from that so it gives you that

play03:36

advanced option while keeping the

play03:38

opportunity to use the app in a simple

play03:41

mode always there for you so that you

play03:42

can kind of do prints do whatever you

play03:44

want now it looks like we have to remove

play03:46

some of the packing material also some

play03:48

tape here that we need to pull off one

play03:50

of the steps that they have you do here

play03:52

that I had a a little bit of a difficult

play03:53

time with was the fact that they have

play03:55

this what they call the shaft coupling

play03:57

shell so it's basically this yellow

play03:59

piece piece right here um not sure if

play04:02

you can see it too well but basically

play04:03

there's a yellow piece right down here

play04:05

so make sure that you do remove that and

play04:08

that's what it looks like right there

play04:10

it's basically just a protective cover

play04:12

for the uh shaft that moves the 3D

play04:14

printer up and down and what we're going

play04:15

to do right now is hook up the printer

play04:18

filament so this is pla I believe

play04:20

there's different types of filament but

play04:22

pla I think is more common all right so

play04:24

this took a few seconds to figure out so

play04:26

the way that this works is on the side

play04:28

here you have have a spool holder and

play04:31

you have a filament motor here so this

play04:33

pulls the filament up and into the tube

play04:35

so what you do is you bring the tube up

play04:38

through the top here and then this needs

play04:41

to plug

play04:43

into this right here so this is where

play04:46

the filament will go into so what we

play04:48

want to do is we want to push down on

play04:49

this little plastic piece right here and

play04:51

insert the tube until it stops okay so

play04:54

that feeds the filament up through there

play04:56

and then once we do that we can plug it

play04:57

in so what we want to do now now is go

play05:00

ahead and take the filament here and put

play05:02

it up through the

play05:04

bottom so this right here and I'm not

play05:07

sure if you'll be able to see it but

play05:08

there's like a little engaging uh motor

play05:10

here you have to push this up in order

play05:13

to put the filament

play05:15

through and into the

play05:20

tube so you can see here I've brought

play05:23

the filament up to the motor itself and

play05:25

then it's going to go up into this tube

play05:28

and into the 3D printer area down here

play05:30

so now what we want to do is pick

play05:32

English for our language or whatever

play05:34

your language is load filament hit next

play05:37

now what that'll do is basically pull

play05:39

filament all the way through this tube

play05:41

and get it prepped so it's going to heat

play05:43

the nozzle and bring that filament

play05:45

through to get ready for printing I'm

play05:46

noticing now that you're actually

play05:48

supposed to take and push this filament

play05:50

all the way through until it enters the

play05:53

nozzle so that's going to be quite a bit

play05:55

of filament that you're going to push

play05:57

through but you can kind of see it

play05:58

through the little tube Tu and then it

play06:00

should hard stop on you all right so

play06:02

we're still heating the nozzle here we

play06:03

have the filament put up through the

play06:05

tube into the nozzle where it prints and

play06:08

we should be able to go let me go ahead

play06:11

and download this app while that's

play06:12

heating up so all I have to do is scan

play06:15

the QR

play06:20

code and I'm going to kind of tilt this

play06:23

up a little bit what what you'll see is

play06:24

you can see a small bit of filament sort

play06:27

of coming down out of the nozzle that's

play06:29

because it's heating it up to a plastic

play06:31

to a melting point and then you'll get a

play06:34

small little sliver like this letting

play06:35

you know that you have the filament in

play06:37

the right place now that the filament's

play06:39

in I'll go ahead and load hit the load

play06:42

filament and it's basically going to

play06:43

purge a little bit and I'll turn this

play06:46

here a little bit for you to see so you

play06:47

can see it's purging out that filament

play06:50

kind of getting prepped for the first

play06:51

print and it is kind of pulling some of

play06:53

the filament through here and purging

play06:55

out there and this is all just in

play06:56

preparation for the first print all

play06:58

right so it looks like they want me

play06:59

configure the 3D printer via Wi-Fi and

play07:01

Bluetooth so I'll hit configure okay so

play07:03

it wants me to scan the QR code that is

play07:06

shown right here in the in the Wi-Fi

play07:08

network

play07:12

menu and it's going to scan for the

play07:14

device scanning for Wi-Fi hotspots and

play07:16

now if you're just printing from the TF

play07:18

card or the storage card you don't have

play07:20

to do this part and once that's set up

play07:22

set up we want to add an online

play07:25

device scan the QR code

play07:28

again and it's now now online and ready

play07:30

to go super easy to set up just a couple

play07:32

steps with the app uh now we should be

play07:35

able to print some stuff all right so I

play07:37

want to pick something from their

play07:38

library that will fit in this device let

play07:40

me go ahead and try this here uh it's

play07:43

just a little dragon I'm going to pick

play07:45

it's going to be work it'll work for the

play07:47

Tina 2s which is good so we will go down

play07:50

here and we will click print and that'll

play07:53

pull up this menu we pick our printer

play07:55

the Tina

play07:56

2s and hit start and there it goes I

play08:00

suppose oh nope I got an error so this

play08:02

is good this is why I kind of set these

play08:03

things up and test them with you guys

play08:05

there is no TF card and what this system

play08:08

does here with the app is it actually

play08:11

takes and downloads to the storage card

play08:14

okay so the storage card they actually

play08:17

provide one they provide a couple things

play08:18

in here and I'll show you what they are

play08:20

this one here is going to be a TF

play08:22

adapter with a usba a so you can plug it

play08:26

into your machine and put 3D files

play08:28

directly on

play08:30

here it also comes with a usba a to a

play08:33

USB C adapter and that might be for you

play08:36

know your computer depending on if you

play08:38

want to hook up the USB cable that they

play08:41

gave to

play08:42

you they give you a couple tools here to

play08:45

be able to adjust the nozzle and replace

play08:47

the nozzle and clean the

play08:49

nozzle and that's what this is here this

play08:51

is for cleaning the

play08:54

nozzle and a glue stick and a lot of

play08:56

times what a glue stick is for is the

play08:59

issue with a lot of 3D printing is that

play09:01

it won't go ahead and it won't stick

play09:03

very well to this small printer pad down

play09:05

here and you can put some glue stick on

play09:07

there and it'll help it stick but what

play09:09

I'm interested in here is this little

play09:11

fella right here which is the TF card so

play09:13

we it's nice that they provide that so

play09:15

you don't get to this point and go oh no

play09:17

I can't even use the device all right so

play09:19

here's the TF slot I went ahead and put

play09:21

that in there make sure you follow this

play09:24

little tiny note right here telling you

play09:26

to put it in the correct direction it's

play09:28

going to look like there's something in

play09:29

there but you can fit it in so let's go

play09:31

ahead and give this a try again just so

play09:33

you know there are things already on

play09:35

this TF card if I click this uh there's

play09:38

a ship a rabbit a terrasaur a hand all

play09:42

sorts of stuff but I'm going to go ahead

play09:43

and just try this one from the 3D site

play09:47

here go ahead and pick my device again

play09:50

and hit start let's see how that

play09:55

works all right good so you can see here

play09:58

that the Dragon has now been sent over

play10:01

to the Tina 2s printer so now what's

play10:05

happening is that the 3D printer here

play10:07

and you can maybe see it on the screen

play10:09

I'll go ahead and pull this back a

play10:10

little bit is that it's actually

play10:12

downloading that file to the TF card and

play10:16

while it's downloading let's take a look

play10:17

at some of the things that are in uh

play10:20

their Library so they have a huge

play10:22

Library they not only have a just

play10:26

general library of things that you can

play10:27

print now these are just kind of funding

play10:29

KN knacks whether or not you want to do

play10:31

like a Christmas ornament a little dog a

play10:33

little cat here now one of the things to

play10:36

remember when you're 3D printing is that

play10:38

you have pla that's a specific color a

play10:41

lot of times you're just with something

play10:42

this basic and beginner you're going to

play10:44

get one Color Prints and you can then

play10:47

sand them down and paint them as you

play10:48

like a lot of people like to paint sort

play10:50

of the Miniatures uh so if you print

play10:53

this one here you won't actually see the

play10:56

different colors it'll just be all white

play10:58

and so there's a ton there tons of

play10:59

things that you can go ahead and

play11:00

download these are just sort of uh the

play11:02

recommended

play11:04

ones uh there's

play11:09

toys um one of the things that I

play11:10

actually like here is the fact that

play11:13

sometimes you can get uh these little

play11:15

put together things you remember those

play11:16

little plastic things where you break

play11:17

off each piece and assemble it I like

play11:20

those type of things and it looks like

play11:22

oh looks like we're going does show a

play11:23

lot of good stuff here on this screen

play11:25

I'm really hoping that it does show up

play11:27

but you can see here that your estimated

play11:29

time is about an hour and 26 minutes for

play11:31

this particular print uh it does show

play11:34

your IP address uh it shows your Wi-Fi

play11:37

signal connection uh the temperature of

play11:39

the

play11:40

pla um the temperature of the nozzle

play11:42

which is

play11:43

183° now what it needs to do is it needs

play11:45

to heat up the to about 215 which you

play11:49

can actually see above there it's going

play11:51

to heat up to 2115 and once it gets to

play11:53

that proper temperature it's going to

play11:54

start to print and again 3D printing is

play11:57

all about melting plastic and putting

play12:00

melted plastic in specific spots based

play12:02

on your printer and when it dries it's

play12:04

back to plastic again and you got a

play12:06

little 3D printed item all right we're

play12:08

at about 213 so we should start to see

play12:10

this go here any minute now when you're

play12:13

printing these types of things you can

play12:14

actually change the layer height and the

play12:16

layer size you can adjust different

play12:18

settings to get the better quality uh

play12:20

I'm just doing this on the default

play12:22

quality so you'll definitely see some of

play12:24

the printing lines now I'm going to set

play12:26

up a quick little time lapse here so we

play12:28

can hopefully see the whole thing print

play12:30

and you'll be able to watch the whole

play12:31

process I'll speed it up in post so

play12:33

you're probably watching it now

play12:35

[Music]

play13:04

[Music]

play13:20

[Music]

play13:33

[Music]

play13:41

all righty so here is the print the

play13:43

final print that we just did and you're

play13:45

saying to yourself but Carl that's not a

play13:47

dragon you downloaded a dragon you're

play13:49

right when I started printing the dragon

play13:51

it was going to take a day and a half to

play13:53

actually print that Dragon because it

play13:55

was a pretty detailed model so I went

play13:57

ahead and just picked one that was

play13:59

already installed on the TF card cuz I

play14:01

knew that it would print quickly but I

play14:03

just kind of wanted to give you a bit of

play14:04

a closeup on the quality of the print um

play14:07

if you're familiar with 3D printing

play14:09

you'll know that a lot of these small

play14:12

little I would get I would say like

play14:13

filament Marks here and in the window um

play14:17

and around can be sort of you just take

play14:19

an X-Acto Knife and kind of trim those

play14:21

off every 3D print you do there's some

play14:23

cleanup that has to be done and

play14:25

including this bottom part so this

play14:27

bottom part here is called a raft almost

play14:29

all 3D models you create if you add a

play14:31

raft to it it'll help it to adhere to

play14:33

the bottom and then this just kind

play14:36

of pulls off of the bottom just like

play14:39

that and then if you want to use

play14:40

sandpaper you can sandpaper this down

play14:42

make it a little bit smoother uh paint

play14:44

this but yeah as far as the Fidelity of

play14:47

the print it looks pretty good um I

play14:49

think you can change the settings to do

play14:51

smaller layer lines to make the quality

play14:53

a little bit better but yeah I mean this

play14:56

is on par with any of the more expensive

play14:58

printers that I've used used and I would

play15:00

definitely lean towards using this for

play15:02

my personal prints if they're going to

play15:04

fit within the printable area I also

play15:06

just wanted to make sure to sort of

play15:07

highlight a couple of the features that

play15:09

really help this kind of Step Above the

play15:11

beginner level even though it is a very

play15:13

small printer and there's some tradeoffs

play15:15

there there are some really nice

play15:17

features that make this worth it first

play15:20

thing is that it is uh Wi-Fi connectable

play15:22

so you basically connect this to your

play15:23

Wi-Fi you can connect to it with the app

play15:25

download models from their Library so

play15:29

having that ability to sort of get

play15:31

things on to here through Wi-Fi I think

play15:33

is important and it also has the TF slot

play15:36

that allows you to basically put all

play15:38

your models onto that card and pop it

play15:41

into the device and print from there

play15:43

automatic leveling so basically all 3D

play15:45

printers have a printing bed and that's

play15:48

this down here and this printing bed

play15:52

needs to be level because it's printing

play15:55

out layer by layer by layer on the one

play15:58

that I had previously you have to

play16:00

actually do that manually and it's a

play16:02

long tedious process this has automatic

play16:04

leveling so you don't have to deal with

play16:06

it so your prints should be pretty

play16:08

precise every time it also has the

play16:10

ability to pause printing I think mine

play16:13

does too but this one has the ability

play16:15

that if the power goes off mid print or

play16:17

something happens mid print you can

play16:19

actually just start it back from where

play16:21

it was so it knows where it was and

play16:22

it'll continue that's super important

play16:25

that same platform that needs to be

play16:26

leveled is also heated so that helps

play16:28

helps the 3D model adhere to the base

play16:31

while it's being printed there is a nice

play16:33

LED light inside of here which I didn't

play16:35

notice at first because it just kind of

play16:37

felt natural but then when I noticed

play16:38

that I realized it's very helpful to

play16:40

have that led light in there that that

play16:42

sort of lights up everything and lets

play16:44

you see exactly what's going on it has a

play16:46

quick change nozzle in here so that you

play16:48

can change out the nozzle in case it

play16:49

gets plugged or you can unplug it and

play16:51

it's fairly silent when I was using it

play16:53

it was quick easy to use there almost

play16:56

zero setup time except for plugging this

play16:58

tube in here and getting the filament

play16:59

set up other than that I I've been

play17:02

pretty impressed so that's about it uh

play17:06

again this is the Tina 2s 3D printer

play17:09

thanks to them for sending this over for

play17:11

me to share with you again I thought it

play17:13

was unique because it's a outof thee box

play17:15

solution Christmas is coming up it's

play17:18

something you could easily pick up and

play17:19

get started with figure out what you

play17:21

like what you don't like and upgrade

play17:23

later not that everyone wants to upgrade

play17:25

from this uh this is perfectly fine but

play17:28

it really depends on what you're trying

play17:29

to print my next step is actually going

play17:31

to be to print out some accessories for

play17:33

this I'd like to get maybe a little tray

play17:35

on the side here that kind of holds that

play17:37

little accessory pack I'm not sure where

play17:39

that went that's one of the fun things

play17:41

about these 3D printers is that there's

play17:43

a huge community of people making things

play17:45

who have the same thing as you and um

play17:48

you can get accessories or little tools

play17:50

or things that help you with the 3D

play17:52

printer itself if this helped you out at

play17:53

all give me a like subscribe I'd love to

play17:57

see you back but until next time time

play17:59

this is Carl from techville goodies and

play18:01

I'm out

Rate This

5.0 / 5 (0 votes)

الوسوم ذات الصلة
3D打印Tina 2s初学者家庭使用教育工具自动调平Wi-Fi连接模型库打印配件社区资源
هل تحتاج إلى تلخيص باللغة الإنجليزية؟