How to Use Accelerometers on the Arduino - Ultimate Guide to the Arduino #42
Summary
TLDRThe video introduces the 'Three in One Smart Car and IoT, Learning Kit' from SunFounder, an all-inclusive electronics kit designed for mastering Arduino. It includes an Arduino, sensors, modules, and tools for building various projects, such as a remote-controlled smart car, IoT temperature and humidity monitoring, and a plant monitor. The script also covers the ADXL345 accelerometer, detailing its functionality, wiring, and programming with the Arduino, showcasing raw data and G's conversion, and highlighting SunFounder's extensive support for STEM and IoT projects.
Takeaways
- 🚗 The 'Three in One Smart Car and IoT Learning Kit' from SunFounder is an all-inclusive electronics kit designed for mastering Arduino.
- 🔧 The kit includes an Arduino, 22 different sensors and modules, breadboards, jumper wires, and other necessary components for building various projects.
- 🤖 Learn robotics by constructing a remote-controlled smart car that can be operated with an infrared remote or programmed to drive autonomously and avoid obstacles.
- 🌡️ Explore IoT with a project that monitors temperature, humidity, and light levels in a room via a smartphone app.
- 🌱 Build a plant monitor to track temperature, humidity, light intensity, and soil moisture, displaying this information on a smartphone for remote plant care.
- 📈 Accelerometers, like the ADXL345, are used to detect motion and orientation and can be used in various applications, including waking up an Arduino or detecting device falls.
- 🔢 The ADXL345 can measure both static (from gravity) and dynamic (from motion) acceleration and communicates with the Arduino over SPI or I2C.
- 📊 Accelerometers measure acceleration in units of meters per second squared or G's, with 1G being equivalent to 9.8 m/s², the acceleration due to gravity.
- 🔍 The ADXL345 outputs separate acceleration measurements for each axis (x, y, z) and uses changes in capacitance to calculate acceleration values.
- 🛠️ Different accelerometers have varying sensitivities, measured in G's, with ranges from ±1G to ±250G, allowing for detection of subtle to significant forces.
- 🔧 The ADXL345 has four selectable sensitivity ranges: ±2G, ±4G, ±8G, and ±16G, and requires a specific library for programming and interpreting its data.
Q & A
What is the 'Three in One Smart Car and IoT Learning Kit' from SunFounder?
-The 'Three in One Smart Car and IoT Learning Kit' from SunFounder is a comprehensive electronics kit designed for learning to master the Arduino platform. It includes an Arduino, 22 different sensors and modules, breadboards, jumper wires, and other necessary components to build various fun and educational projects.
What can you learn from the kit about robotics?
-With the kit, you can learn about robotics by building a remote-controlled smart car that can be operated with an infrared remote controller, drive autonomously, avoid obstacles, or follow a line.
How does the kit help in learning about the Internet of Things (IoT)?
-The kit includes an IoT project that allows you to monitor temperature, humidity, and light levels of a room from an app on your smartphone, and build a plant monitor that tracks and displays temperature, humidity, light intensity, and soil moisture.
What is an accelerometer and how is it used in the context of the ADXL 345?
-An accelerometer is a sensor used to detect motion and orientation. The ADXL 345, which is featured in the script, can be used to wake up an Arduino when tapped or picked up, detect falling devices, and is used in smartphones to turn off the display after a period of inactivity.
How does the ADXL 345 communicate with the Arduino?
-The ADXL 345 can communicate with the Arduino over SPI (Serial Peripheral Interface) or I2C (Inter-Integrated Circuit). The script demonstrates using I2C for communication.
What are the two common units of acceleration measurement mentioned in the script?
-The two common units of acceleration measurement mentioned are meters per second squared and G's, with 1G being equivalent to the acceleration due to gravity, which is 9.8 meters per second squared.
How does the ADXL 345 measure acceleration?
-The ADXL 345 measures acceleration by detecting changes in capacitance along each axis. It has a tiny plate suspended between two micro springs that can move back and forth. When the sensor accelerates, the distance between the plates changes, altering the capacitance, which the sensor measures to calculate the acceleration value.
What are the different sensitivity ranges of the ADXL 345?
-The ADXL 345 has four different sensitivity ranges: plus or minus 2G, plus or minus 4G, plus or minus 8G, and plus or minus 16G.
How do you convert the raw sensor readings from the ADXL 345 to G's?
-To convert the raw sensor readings to G's, you multiply the two's complement output by the scale factor provided in the datasheet for the selected sensitivity range.
What is the purpose of the SparkFun ADXL 345 library mentioned in the script?
-The SparkFun ADXL 345 library is used to interface with the ADXL 345 sensor from within an Arduino sketch. It provides useful functions to initialize the sensor, set its range, and read acceleration data from the sensor.
How can you calibrate the ADXL 345 sensor if the readings seem off?
-If the ADXL 345 sensor readings seem off, you can calibrate it by following a tutorial provided by SparkFun, which is mentioned in the script and can be found on their website.
What additional components does SunFounder provide for Arduino and Raspberry Pi projects?
-SunFounder provides a wide selection of STEM, robotics, and IoT kits, as well as various useful sensors and modules for Arduino and Raspberry Pi projects. They also offer online tutorials with wiring diagrams and example code for every product.
Outlines

This section is available to paid users only. Please upgrade to access this part.
Upgrade NowMindmap

This section is available to paid users only. Please upgrade to access this part.
Upgrade NowKeywords

This section is available to paid users only. Please upgrade to access this part.
Upgrade NowHighlights

This section is available to paid users only. Please upgrade to access this part.
Upgrade NowTranscripts

This section is available to paid users only. Please upgrade to access this part.
Upgrade NowBrowse More Related Video
2023 Arduino Tutorial for Beginners 01 - Introduction

TUTORIAL MEMBUAT PROJECT IOT SMART GARDEN / SMART FARMING DENGAN ESP32 #arduinoproject #esp32project

PolarFire® SoC Discovery Kit - Making RISC-V Accessible to All Embedded Engineers

Geiger Counter Experiments
Libelium-Yazamtec-Loriot LW Smart Parking SK BS Multitech
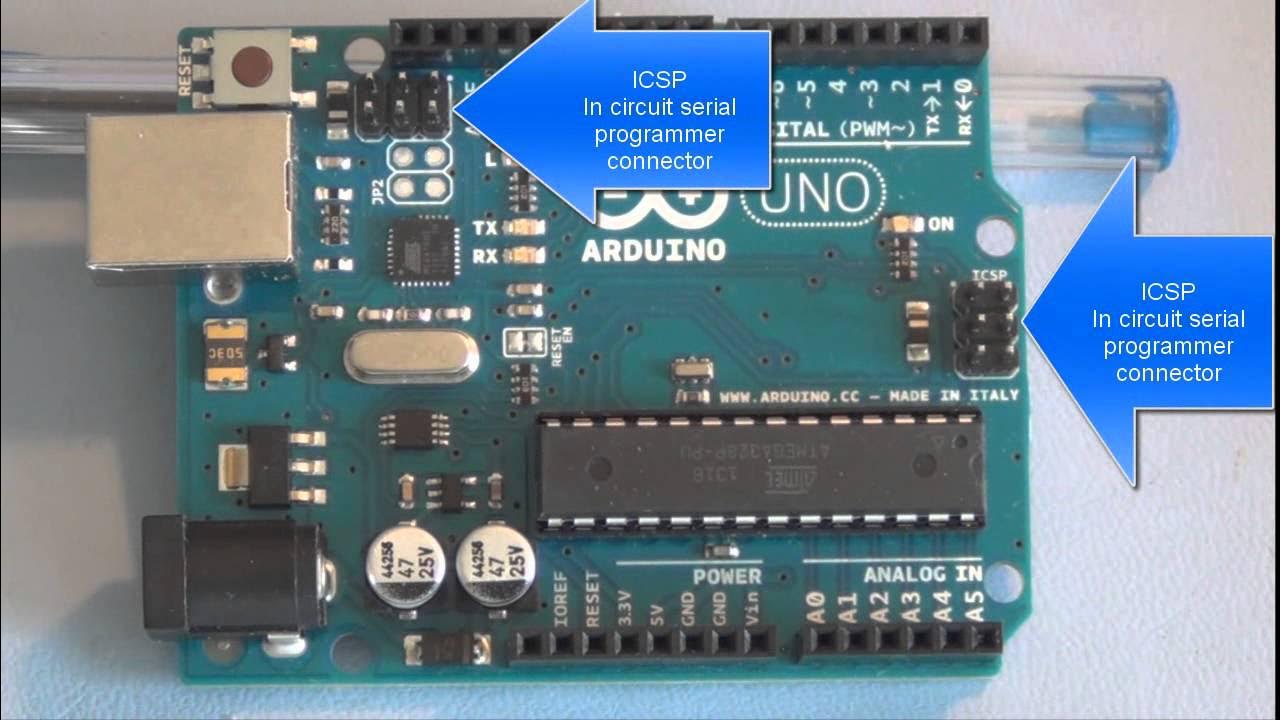
Arduino Uno tutorial Basic microcontroller overview
5.0 / 5 (0 votes)