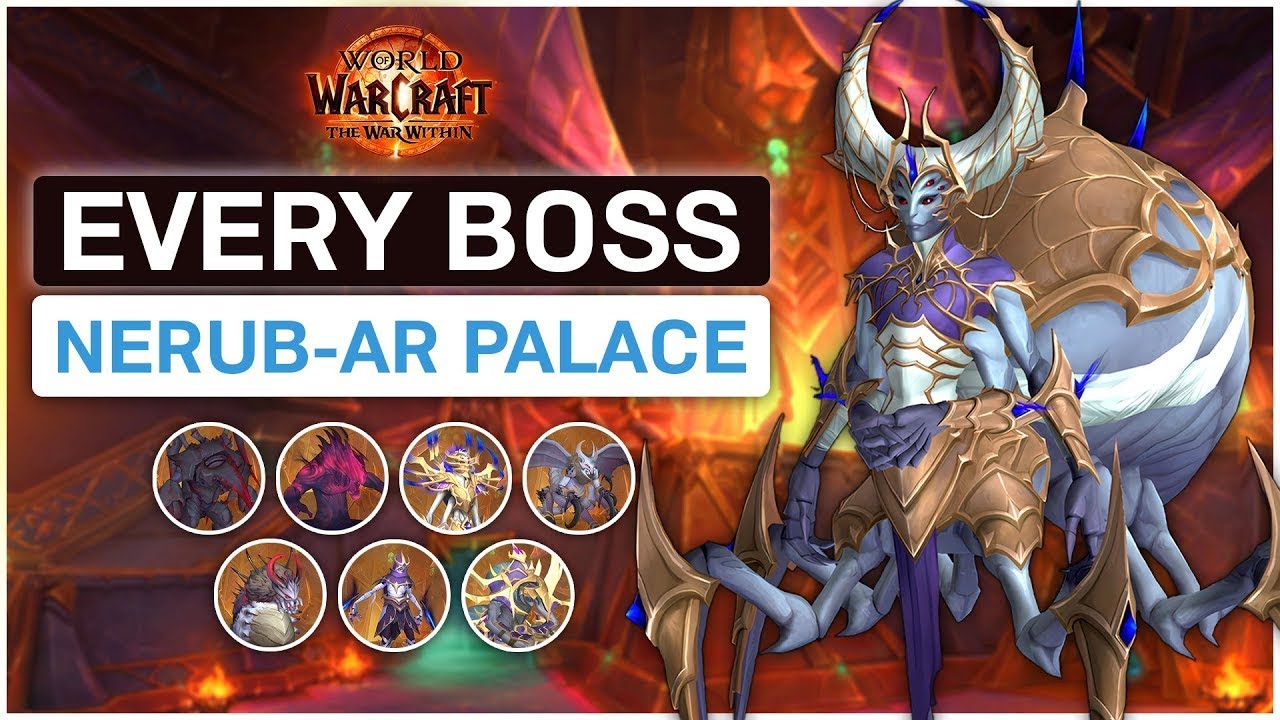
The Silken Court Boss Guide - Nerub-ar Palace - Heroic/Normal - The War Within Raid 11.0

Ready Check Pull
7 Sept 202406:38

Summary

TLDRZax introduces a guide to defeating the Silken Court, the penultimate boss in Nerub-ar Palace, in a video brought to you by Wowhead's new raid cheat sheets. The fight involves two bosses with three phases and intermissions, requiring strategic use of mechanics like tethers to prevent raid-wide damage. Key strategies include managing the 'tether' mechanic, dealing with adds, and coordinating debuffs during intermissions. The guide also highlights the importance of role assignments and coordination for a successful raid.

Takeaways

  • šŸŒ The Silken Court is a boss encounter in the Nerub'ar Palace with two bosses: a melee and a caster.
  • šŸ”— Players must manage a 'tether' mechanic during phase one to prevent massive raid damage.
  • šŸŽÆ On heroic difficulty, two pairs of players are needed to handle the tether mechanic effectively.
  • šŸ’„ The melee boss's charge ability must be stopped by tethers to avoid a wipe.
  • šŸ¤ŗ Tanks need to taunt swap after the melee boss casts Piercing Strike to mitigate increased damage.
  • šŸ§™ā€ā™‚ļø The caster boss frequently casts Poison Bolt, requiring regular dispels on the tank.
  • šŸŒ€ Players marked with a green circle should spread out to avoid damaging explosions.
  • šŸ› Adds spawned by the melee boss fixate on players and should be风ē­ through the melee boss for cleaving.
  • šŸ›”ļø Intermissions involve the bosses hiding and casting abilities that require raid-wide movement and avoidance.
  • šŸ” Phase two introduces new abilities, including the Stinging Swarm debuff which must be transferred to the caster boss to interrupt a devastating cast.
  • šŸŽ‰ WoWHead Cheatsheets provide quick access to key information and strategies for each boss in Nerub'ar Palace.

Q & A

  • What is the Silken Court boss fight in Nerub-ar Palace?

    -The Silken Court is a boss fight in the game where players face two bosses simultaneously, a melee boss and a caster boss, in a multi-phase encounter with specific mechanics to manage.

  • What is the significance of the 'tether' mechanic in the Silken Court fight?

    -The 'tether' mechanic is crucial in the first phase of the fight. Players must create tethers to prevent the melee boss from charging across the room and causing massive raid-wide damage.

  • How many players are needed to handle the 'tether' mechanic in the normal and heroic modes?

    -In normal mode, two players are needed to handle the 'tether' mechanic, while in heroic mode, two pairs of two players, totaling four, are required.

  • What should players do when the melee boss is about to cast a charge?

    -When the melee boss is about to cast a charge, one of the tethered players must move to the opposite side of the charge to stretch the tether across the path, stopping the boss and preventing damage.

  • Why is it important to manage the 'Piercing Strike' ability during the fight?

    -The 'Piercing Strike' ability deals significant physical damage and increases damage taken from subsequent strikes. Tanks must taunt swap after each cast to mitigate this effect.

  • How should players deal with the adds that spawn during the fight?

    -When adds spawn, they fixate on random players and deal increased damage with each stack. Players should drag these adds through the melee boss to be slowed and cleaved down.

  • What happens during the first intermission in the Silken Court fight?

    -During the first intermission, the melee boss hides, and the caster boss goes to the center, gains a shield, and starts a long channel that spawns explosive cones around the room.

  • What is the main mechanic to focus on during the second phase of the fight?

    -In the second phase, the main mechanic involves dispelling a debuff called 'Stinging Swarm' onto the caster boss to interrupt her 'Cataclysmic Entropy' cast, which would otherwise wipe the raid.

  • How do players manage the raid-wide pull-in ability during phase three?

    -In phase three, players must manage the raid-wide pull-in by keeping tethers for the charge mechanic. Ranged and healers should keep their tethers unless specified otherwise by the raid leader.

  • What additional mechanics are introduced in the third phase of the Silken Court fight?

    -In the third phase, players face a combination of mechanics from the first two phases, including the charge and the need to transfer debuffs to the caster boss. Additionally, the melee boss spawns rings on the ground that players must avoid.

  • What is the role of WoWHead Cheatsheets in relation to the Silken Court guide?

    -WoWHead Cheatsheets provide a quick and easy reference for key information about each boss in Nerub-ar Palace, including strategies, assignments, and pro tips.

Outlines

00:00

šŸŽ® Silken Court Boss Fight Strategy

Zax introduces a guide to defeating the Silken Court, the penultimate boss in Nerub-ar Palace, brought to viewers by Wowhead's new raid cheat sheets. The fight involves two bosses, a melee and a caster, and is divided into three phases with intermissions. The guide emphasizes the importance of the 'tether' mechanic, where two players (four on heroic) must manage a web explosion to create a tether that prevents the melee boss from causing massive damage. The caster boss requires frequent dispelling due to Poison Bolt, and the tanks must taunt swap after Piercing Strike. Additional mechanics include dodging swirlies, managing adds, and avoiding ground effects. The guide promises Patreon supporters exclusive content like mythic plus guides.

05:01

šŸ›” Advanced Phase Mechanics and Recap

The second paragraph delves into the advanced mechanics of the Silken Court fight. In the second phase, the melee boss no longer charges but instead applies a 'Stinging Swarm' debuff that must be transferred to the caster boss to interrupt a devastating cast. The third phase reintroduces the charge mechanic and requires the debuffs to be managed simultaneously. The guide suggests using Wowhead Cheatsheets for quick strategies and thanks Patreon supporters for enabling the creation of exclusive content. The guide concludes with a reminder to check out the provided links for more detailed guides and resources.

Mindmap

Keywords

šŸ’”Silken Court

The Silken Court refers to the second-to-last boss in the Nerub-ar Palace raid. It consists of two bosses: a caster and a melee fighter. The fight against the Silken Court involves multiple phases and intermissions, where players must deal with mechanics like tethering and dodging abilities.

šŸ’”Tether Mechanic

The tether mechanic requires players to link together by stepping into a web and creating a connection. This tether plays a key role in stopping the melee boss from charging across the room, which would otherwise cause massive raid-wide damage. On heroic difficulty, two pairs of players need to manage this mechanic.

šŸ’”Bloodlust

Bloodlust is a key strategy in the fight, referring to a powerful spell that increases attack speed for all raid members for a limited time. The guide advises using Bloodlust right at the start of the fight for maximum damage output during the Silken Court encounter.

šŸ’”Phase One

Phase One is the initial phase of the Silken Court fight. In this phase, players deal with both bosses simultaneously, with the primary mechanic being the management of the melee boss's charge using the tether. Successful coordination during this phase sets up the raid for an easier transition to the later stages.

šŸ’”Intermission

An intermission occurs when one boss temporarily hides while the other becomes the focus. In the first intermission, the melee boss disappears, and the caster boss moves to the center of the room, gaining a shield. Players must break this shield while dodging environmental hazards like exploding cones.

šŸ’”Void Bolt

Void Bolt is one of the caster bossā€™s key abilities in Phase Two. This spell targets the tank and deals significant damage, applying a debuff that requires a dispel. Managing this ability is crucial for tank survival during the fight.

šŸ’”Cataclysmic Entropy

Cataclysmic Entropy is a powerful raid-wide ability cast by the caster boss in Phase Two. If not interrupted by transferring three stacks of a debuff onto the caster, this ability will wipe out the entire raid. Players must carefully manage the debuff to prevent this from happening.

šŸ’”Piercing Strike

Piercing Strike is a heavy physical attack used by the melee boss, which requires tanks to perform a taunt swap. This ability increases the damage taken by the next Piercing Strike, so alternating tanks is necessary to prevent overwhelming damage to a single tank.

šŸ’”Phase Three

Phase Three is the final stage of the Silken Court encounter, combining mechanics from both previous phases. Both bosses return, and players must handle the melee bossā€™s charge while transferring debuffs to the caster to interrupt her catastrophic spell casts. This phase is the most complex and demanding in terms of coordination.

šŸ’”Raid-wide damage

Raid-wide damage refers to damage that affects all players in the raid simultaneously. This type of damage occurs frequently in the Silken Court fight, especially during the bossā€™s charge or when certain mechanics fail to be managed correctly, such as when tethers are broken or the caster's shield isnā€™t destroyed in time.

Highlights

Introduction to Silken Court, second to last boss in Nerub-ar Palace, presented by Wowhead.

Fight mechanics involve two bosses: the caster boss and the melee boss, fought simultaneously with 3 phases and intermissions.

Key phase one mechanic involves the 'tether' ā€“ players must create a tether by exploding webs and prevent the melee boss from charging into the wall.

Melee boss charge mechanic, when stopped, doubles damage taken by the boss for a few seconds.

Tanks should taunt swap on the melee boss after Piercing Strike, and dispel Poison Bolt from the caster boss.

Green circle mechanic requires players to spread out to avoid overlapping circles before explosion.

Phase one intermission: the caster boss gets a shield and starts channeling raid-wide damage while spawning exploding cones.

In phase two, Stinging Swarm debuff must be transferred to the caster boss, interrupting her Cataclysmic Entropy cast to prevent a wipe.

In phase two, melee boss no longer charges but places dispellable debuffs on random players that need to be managed.

Phase two intermission mirrors the first, but with rings around the room instead of cones.

Phase three combines mechanics from both earlier phases ā€“ charge from phase one and Stinging Swarm from phase two.

In phase three, tethers are created randomly by the caster boss's raid-wide pull-in, and players need to manage them dynamically.

Melee boss no longer spawns adds or performs a frontal attack in phase three but instead spawns dodgeable rings and channels raid-wide damage.

Recommendation for ranged DPS and healers to keep their tethers for charge management, especially on heroic.

Introduction of Wowhead's new Cheatsheets for concise boss strategies and key assignments in Nerub-ar Palace.

Transcripts

play00:00

Hey, we pullin'?

play00:02

Hey Iā€™m Zax and hereā€™s our guide to theĀ  Silken Court, the second to last boss inĀ Ā 

play00:05

Nerub-ar Palace. This guide is brought to you byĀ  Wowhead and their brand new raid cheat sheets,Ā Ā 

play00:10

which weā€™ll tell you more about rightĀ  after the boss. Also big thank you toĀ Ā 

play00:13

our supporters on patreon, hope youā€™llĀ  enjoy all the patreon-exclusive contentĀ Ā 

play00:17

weā€™ve got coming out this tier,Ā  like mythic plus guides and more.

play00:20

Alright, so the Silken Court is dumb and dumberĀ  over here. Weā€™ll call the skinny one the casterĀ Ā 

play00:25

boss and this other guy the melee boss. They haveĀ  3 phases, with a couple intermissions in betweenĀ Ā 

play00:30

them. You fight both bosses at the sameĀ  time, so itā€™s a mostly two-target cleaveĀ Ā 

play00:34

fight. And youā€™ll want to bloodlust on pull. But before you pull, you need to assign 2Ā Ā 

play00:37

players to be in charge of the ā€œtetherā€Ā  mechanic of the fight, and you shouldĀ Ā 

play00:40

put a mark on them so theyā€™re easy to see.Ā  Ideally they are mobile ranged dps or healers,Ā Ā 

play00:45

and on heroic, you actually need to assign twoĀ  pairs of two players for this, so 4 total. ThisĀ Ā 

play00:50

assignment is for the most important mechanicĀ  in phase one, and hereā€™s what they need to do.Ā 

play00:54

When a bunch of these swirlies spawn onĀ  the ground, everyone needs to dodge them,Ā Ā 

play00:57

and then stay out of the webs they leave on theĀ  ground, and then the assigned players need toĀ Ā 

play01:00

move together next to one of the webs and wait.Ā  Then when the melee boss gets to around 90 energy,Ā Ā 

play01:05

they both need to move into the web, and one ofĀ  them needs to move into the little bubble in theĀ Ā 

play01:09

middle of the web to explode it, which creates aĀ  tether between the two players. Then they need toĀ Ā 

play01:13

stay close enough to each other to not break theĀ  tether, shown by this big circle around them. AndĀ Ā 

play01:17

finally, when the melee boss gets to full energyĀ  and starts casting this charge across the room,Ā Ā 

play01:21

one of the players needs to move to the other sideĀ  of the charge, to stretch the tether across theĀ Ā 

play01:25

charge path, so when the boss charges, the tetherĀ  stops him and prevents him from hitting the wall,Ā Ā 

play01:30

which would do an insane amount of raid-wideĀ  damage and probably cause a wipe. As a bonus,Ā Ā 

play01:34

the boss takes double damage for a few secondsĀ  if you stop the charge, so thatā€™s nice. ButĀ Ā 

play01:37

you have to do all this twice in theĀ  phase before itā€™s over, and on heroic,Ā Ā 

play01:40

you need the charge to go through two differentĀ  tethers to stop it, which is why you need twoĀ Ā 

play01:44

pairs of two players to handle all that. Itā€™s definitely a little complicated,Ā Ā 

play01:48

but if you can manage the charge, everythingĀ  else in the phase is a lot simpler.Ā 

play01:51

The bosses share health, so it doesnā€™t matterĀ  which one you hit, and the tanks should try toĀ Ā 

play01:55

keep them stacked as much as possible forĀ  cleave damage, but the caster boss canā€™tĀ Ā 

play01:59

be moved and he jumps around randomly, soĀ  they canā€™t be stacked 100% of the time.Ā 

play02:03

The tanks also have to taunt swap on the meleeĀ  boss after every time he casts Piercing Strike,Ā Ā 

play02:08

because it does a ton of physical damage andĀ  increases damage taken from the followingĀ Ā 

play02:11

Piercing Strike. And the tank that has aggro onĀ  the caster boss has to be dispelled pretty often,Ā Ā 

play02:16

because she spam casts Poison Bolt on them,Ā  which does magic damage and applies a heavy dot.Ā 

play02:21

When everyone gets this green circle aroundĀ  them, you need to spread out so youā€™re not inĀ Ā 

play02:24

each otherā€™s circles before theyĀ  explode after a couple seconds.Ā 

play02:26

When the melee boss spawns these adds,Ā  they fixate random players and melee them,Ā Ā 

play02:30

giving them stacks of a damage taken increase, soĀ  the fixated players need to try to drag the addsĀ Ā 

play02:35

through the melee boss so they can get slowed andĀ  cleaved down by everyone. On heroic, the adds haveĀ Ā 

play02:39

a big damage reduction buff that goes away overĀ  time, so they just take a little longer to kill.Ā 

play02:44

And when the melee boss casts this big coneĀ  on the ground, everyone needs to quickly moveĀ Ā 

play02:47

out of it before the cast finishes andĀ  it impales anyone it hits, doing a tonĀ Ā 

play02:51

of damage to the player and stunning them untilĀ  the impaling spike is destroyed by other people.Ā 

play02:56

Once the caster boss gets to full energy afterĀ  a couple minutes, the first intermission starts,Ā Ā 

play03:00

where the melee boss hides and the caster bossĀ  goes to the middle of the room, gets a big shield,Ā Ā 

play03:04

and starts a long channel. This channelĀ  does ramping raid-wide damage and spawnsĀ Ā 

play03:08

these cones all around the boss, which everyoneĀ  has to avoid being in when they explode after aĀ Ā 

play03:12

few seconds. The timing of the cones can be aĀ  little tricky because the whole room fills upĀ Ā 

play03:16

before they start exploding, but just stand in aĀ  newer cone until an older one explodes and thenĀ Ā 

play03:20

move into the safe spot it leaves behind. Once the bossā€™s shield is broken,Ā Ā 

play03:24

phase two starts, where the melee boss comesĀ  back and both bosses get some new abilities.Ā 

play03:28

The only thing that changes for the melee bossĀ  is that he doesnā€™t do the charge in this phase,Ā Ā 

play03:32

but now instead, he has the new mainĀ  mechanic of the phase. At some point,Ā Ā 

play03:36

he puts a dispellable debuff, Stinging Swarm, onĀ  three random players, and when this debuff getsĀ Ā 

play03:41

dispelled, it jumps to the closest player OR toĀ  the caster boss if sheā€™s the closest. And the goalĀ Ā 

play03:46

with these debuffs is to get them all onto theĀ  caster, importantly getting the third stack ofĀ Ā 

play03:50

the debuff onto her when she gets to full energyĀ  and starts her big raid-wiping cast, CataclysmicĀ Ā 

play03:55

Entropy. When she gets the third stack, itĀ  interrupts the cast, preventing the wipe.Ā 

play03:59

The way we recommend making this happen isĀ  by having the three players with the debuff,Ā Ā 

play04:03

which you can see based on this swirly purpleĀ  effect on them, go stand in a triangle aroundĀ Ā 

play04:07

the caster boss while everyone else gets awayĀ  from them. And then when the big cast starts,Ā Ā 

play04:11

quickly dispel all three of them, and gg. YouĀ  could even use mass dispel from a priest toĀ Ā 

play04:15

make it real easy. Each dispel also does someĀ  raid-wide damage, so the healers will need toĀ Ā 

play04:20

get everyone topped beforehand. So thatā€™s the new main mechanic.Ā 

play04:23

As for the caster boss, herĀ  abilities are all new but simple.Ā 

play04:26

The cast she spams at the tank is nowĀ  Void Bolt, but it does the same thing,Ā Ā 

play04:30

just needs a dispel sometimes. She has a random cone on the groundĀ Ā 

play04:33

for everyone to dodge before it explodes. And she casts a raid-wide pull-in that alsoĀ Ā 

play04:37

tethers random players together, followedĀ  immediately by a big explosion in a circleĀ Ā 

play04:42

around her that everyone has to quickly runĀ  out of. You donā€™t actually need the tethersĀ Ā 

play04:45

for anything in this phase, so just make sureĀ  to run away from your partners and break theĀ Ā 

play04:49

tethers to remove the dot it puts on you. Once the melee boss gets to full energy afterĀ Ā 

play04:53

another couple minutes, the second intermissionĀ  starts, where the caster boss hides and the meleeĀ Ā 

play04:57

boss goes to the middle, gets a big shield, andĀ  starts a long channel, very similar to the firstĀ Ā 

play05:01

intermission. But now instead of cones on theĀ  ground, a bunch of these rings spawn around theĀ Ā 

play05:05

room that everyone has to avoid being in when theyĀ  explode, or else they take a bunch of damage andĀ Ā 

play05:09

get impaled and have to be broken out. Once the bossā€™s shield is broken,Ā Ā 

play05:12

phase three starts, where the casterĀ  boss comes back and things get real.Ā 

play05:16

This phase has both of the main mechanics fromĀ  phase one and two, so the melee boss does theĀ Ā 

play05:20

charge again AND puts out those debuffs that youĀ  have to transfer to the caster boss at the rightĀ Ā 

play05:24

time. And to make things even more complicated,Ā  the only way to get tethers for the charge isĀ Ā 

play05:28

from the raid-wide pull-in the caster does,Ā  which just tethers random people together,Ā Ā 

play05:33

so you canā€™t really just rely on the assignedĀ  people from phase one to handle it. There willĀ Ā 

play05:37

probably be some add-on or weakaura thingĀ  that tells you who should keep their tether,Ā Ā 

play05:41

but otherwise, we recommend all the ranged andĀ  healers keep their tethers and use them for theĀ Ā 

play05:45

charge, unless the raid leader calls for specificĀ  people to keep their tether and then everyone elseĀ Ā 

play05:49

can break them to prevent some dot damage. AndĀ  donā€™t forget, two tethers are needed on heroic.Ā 

play05:54

As for the other mechanics of phase three, theĀ  melee boss doesnā€™t spawn adds anymore and heĀ Ā 

play05:58

doesnā€™t have a frontal. Instead he spawns ringsĀ  on the ground for everyone to dodge, like in theĀ Ā 

play06:02

second intermission. And he has a big raid-wideĀ  damage channel for the healers to watch out for.Ā 

play06:07

And thatā€™s pretty much it!Ā 

play06:08

For our recaps this tier, we're excited toĀ  introduce the new WoWHead Cheatsheets - aĀ Ā 

play06:12

quick and easy way to get all of the keyĀ  info for every boss in Nerub-ar Palace,Ā Ā 

play06:16

including concise strategies, key assignments,Ā  and any pro tips you might need. So checkĀ Ā 

play06:21

out the Cheat Sheet link in the description. Thanks again to our supporters on patreon! Weā€™veĀ Ā 

play06:25

got a ton of patreon-exclusive content coming thisĀ  tier like extended heroic guides, mythic guides,Ā Ā 

play06:29

and a bunch more. So check out that link below. See you next time.

Rate This
ā˜…
ā˜…
ā˜…
ā˜…
ā˜…

5.0 / 5 (0 votes)

Related Tags
World of WarcraftRaid GuideSilken CourtBoss MechanicsRaid StrategiesWoWhead CheatsheetsRaid TipsHeroic ModeDungeon TacticsGaming Guides