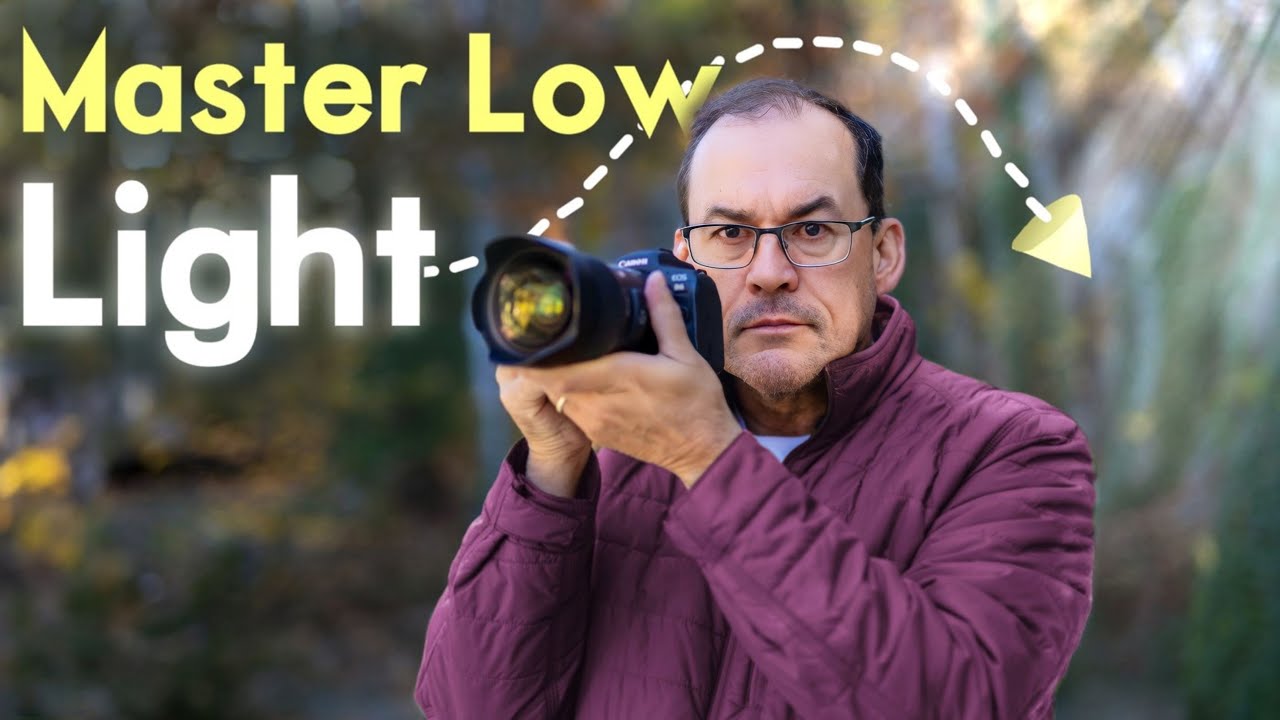
My secret for amazing low light Fujifilm portraits…

Iamtongue
28 May 202313:44

Summary

TLDRIn this video, the photographer shares tips for capturing low light portraits, emphasizing the use of a crop sensor body like Fujifilm and embracing noise as inevitable. Key advice includes understanding your camera's capabilities, particularly Image Stabilization (IBIS), and experimenting with settings. The video showcases a winter storm photoshoot, highlighting the use of fast lenses, LED light sticks for additional lighting, and the importance of following the light and experimenting with colors for visual interest. The photographer encourages viewers to learn from their mistakes, embrace the challenges of low light photography, and find a photography buddy to enhance the learning experience.

Takeaways

  • 📸 Embrace noise in low light photography as it's inevitable and can add character to your shots.
  • 🤳 Use a camera with IBIS (In-Body Image Stabilization) to allow for slower shutter speeds and less noise.
  • 🔧 Understand your camera's capabilities, especially how far you can push the ISO and shutter speed.
  • 📷 Fujifilm APS-C sensors are capable of producing great low light portraits, proving full-frame isn't always necessary.
  • 🔦 Utilize fast prime lenses with wide apertures (F1.2 to F0.95) to gather more light for cleaner images.
  • 👥 Collaborate with a photography buddy to assist with holding lights and to learn from each other.
  • 💡 Always follow the light and use warm-up shots to experiment with composition and lighting.
  • 🎨 Use color theory to complement the scene's tone; for example, using warm tones against a cool, snowy backdrop.
  • 📈 Learn from constructive criticism, especially from those with higher skill levels, to improve your photography.
  • 🧳 Dress warmly and be prepared for the weather conditions when shooting in low light and challenging environments.

Q & A

  • What is the main challenge when shooting low light portraits on a crop sensor body?

    -The main challenge is capturing quality images without introducing noise, as crop sensor bodies are more prone to noise in low light conditions.

  • What is the photographer's attitude towards noise in low light photography?

    -The photographer embraces noise, considering it inevitable and suggesting that it can be a creative tool rather than something to avoid.

  • Why does the photographer recommend using a camera with In-Body Image Stabilization (IBIS) for low light photography?

    -IBIS allows for the use of slower shutter speeds to let in more light without introducing motion blur, which helps in reducing the need to increase ISO and thus minimize noise.

  • What type of lens is suggested for low light portrait photography?

    -A wide aperture lens, such as those ranging from F2.8 to F0.95, is recommended to gather more light and produce cleaner images.

  • Why is it beneficial to have a photography buddy during a low light photo session?

    -A photography buddy can help hold additional lights, allowing the photographer to focus on capturing the shot, and it also provides an opportunity to learn from each other and share tips.

  • What is the significance of the Fujifilm XS10 in the context of this photo shoot?

    -The Fujifilm XS10 was chosen for its quality sensor and built-in IBIS, which helps in low light conditions by allowing lower ISO settings and slower shutter speeds.

  • How does the photographer handle the issue of noise in post-processing?

    -The photographer suggests experimenting with the camera's RAW files to manipulate colors and light, which can help in hiding some of the noise.

  • What is the photographer's response to criticism about noisy images?

    -The photographer views noisy images as a learning opportunity and a way to develop creativity and technical skills, rather than a negative aspect of their work.

  • What is the importance of following the light when shooting low light portraits?

    -Following the light is crucial as it dictates the primary light source and influences the composition, focusing, and overall mood of the portraits.

  • How does the photographer use color theory in low light photography?

    -The photographer uses color theory to create complementary contrasts, such as using warm tones against a cool-toned background to convey the cold weather and add visual interest.

  • What advice does the photographer give for improving low light photography skills?

    -The photographer advises to experiment, make mistakes, and embrace the noise and darkness, as these experiences lead to growth and improvement in low light photography.

Outlines

00:00

📸 Embracing Noise in Low Light Photography

The speaker begins by addressing the challenges of capturing low light portraits, particularly with a crop sensor body. They share their experience and a key insight: embracing noise as an inevitable part of the process. The video aims to demonstrate techniques for shooting low light portraits, using the Fujifilm X-S10 with IBIS, which allows for slower shutter speeds and lower ISO settings to reduce noise. The speaker emphasizes the importance of understanding one's equipment and experimenting with settings to push the camera's capabilities. They also discuss the use of wide aperture lenses to gather more light and the practicality of using an RGB LED light stick for additional lighting. The value of having a photography buddy to assist with lighting and to learn from each other is highlighted.

05:03

🌃 Mastering Low Light Portraits with Fujifilm

This paragraph delves into the speaker's personal journey with low light photography, using Fujifilm cameras like the XT2 and X-S10. They recount facing criticism for noisy images but argue that such challenges have honed their skills in lighting, composition, and post-processing. The speaker encourages viewers to embrace noise as a stepping stone to improvement. The discussion continues with practical advice on shooting low light portraits, such as following the light, warming up with initial shots, and experimenting with compositions. The importance of shooting in burst mode to capture the sharpest image is also mentioned. The speaker shares their settings, including ISO 1250 and a shutter speed of 1/60th of a second at F1.2 with the SevenArtisans 35mm F1.2 lens, and explains how the camera's IBIS feature aids in achieving sharp images in low light conditions.

10:04

🎨 Creative Low Light Photography in Harsh Weather

The final paragraph describes a shift in location to a pier at the harbor front, where the photographer had to rely more on an LED light stick due to the lack of ambient light installations. The photographer chose a warm yellow light to contrast the cool tones of the snowy environment, drawing from color theory to create a visually striking image. They discuss the influence of the Batman movies, particularly the Gotham aesthetic, on their choice of lighting and mood. The paragraph concludes with the photographer's ISO setting at 3200, acknowledging the presence of noise but appreciating the gritty outcome. The speaker advises viewers to seek constructive criticism from skilled individuals, to embrace mistakes as part of the learning process, and to enjoy the photography experience despite challenging conditions like a snowstorm.

Mindmap

Keywords

💡Low light portraits

Low light portraits refer to the photography technique of capturing images in conditions with minimal ambient light, which is challenging due to the potential for increased noise and the need for slower shutter speeds. In the video, the speaker discusses various strategies for shooting effective low light portraits, emphasizing the importance of embracing noise and utilizing available light sources.

💡Crop sensor body

A crop sensor body is a type of digital camera sensor that is smaller than a full-frame sensor, typically found in more affordable or compact cameras. The video mentions that while full-frame cameras may offer advantages in low light, the speaker has successfully captured low light portraits using a crop sensor body, highlighting the skill and technique can compensate for equipment limitations.

💡Noise

In photography, noise refers to the grainy, speckled appearance that can occur in images shot at high ISO settings or in low light conditions. The video encourages viewers to embrace noise as an inevitable part of low light photography, suggesting that it can add character to images and should not deter photographers from experimenting with their craft.

💡ISO

ISO in photography is a measure of the camera's sensitivity to light. A higher ISO allows the camera to capture more light but can introduce noise into the image. The video discusses the delicate balance of adjusting ISO to achieve the desired exposure without excessive noise, which is crucial in low light photography.

💡Shutter speed

Shutter speed is the length of time the camera's shutter is open, determining how much light reaches the sensor. In low light conditions, slower shutter speeds are often necessary to allow more light in, but this can introduce motion blur. The video mentions using Image Stabilization (IS) to counteract this, allowing for slower shutter speeds without blur.

💡Image Stabilization (IS)

Image Stabilization is a technology in cameras and lenses that compensates for camera shake, allowing for slower shutter speeds without introducing motion blur. The video highlights the advantage of having IS in low light photography, as it enables the photographer to use slower shutter speeds to capture more light without worrying about blur.

💡Aperture

Aperture refers to the opening in a camera lens that controls the amount of light that enters. A wider aperture (lower f-number) allows more light in, which is beneficial for low light photography. The video discusses the importance of using lenses with wide apertures to gather more light and achieve cleaner images in low light conditions.

💡Fujifilm

Fujifilm is a brand of cameras and photographic equipment. The video specifically mentions using a Fujifilm X-S10 camera for its sensor quality and built-in Image Stabilization, demonstrating the brand's suitability for the low light portrait photography discussed.

💡RGB LED light stick

An RGB LED light stick is a portable, multi-colored light source that photographers can use to supplement ambient light or create specific lighting effects. The video describes using an RGB LED light stick during the shoot to provide additional light when natural light was insufficient, showcasing its utility in low light photography.

💡Post-processing

Post-processing refers to the editing and manipulation of images after they have been captured. The video mentions that the Fujifilm's RAW format contains a lot of information, allowing for significant adjustments in post-processing to improve image quality, hide noise, and enhance colors, which is particularly important in low light photography.

💡Bokeh

Bokeh is the aesthetic quality of the out-of-focus areas in an image, produced by a lens. The video discusses using background lights to create visually interesting bokeh effects, which can add depth and draw attention to the subject in low light portraits.

Highlights

Embrace noise in low light portraits as it's inevitable.

Use a crop sensor body effectively for low light photography.

Full frame cameras can clean up images but are not always necessary for good low light portraits.

In-body Image Stabilization (IBIS) allows for slower shutter speeds and less noise.

Understanding your camera's capabilities is crucial for pushing its limits in low light conditions.

Experiment with RAW files to manipulate colors and light, and to reduce noise.

Choose a lens with a wide aperture to gather more light.

Having an RGB LED light stick is beneficial for low light situations.

Collaborate with photography buddies to share tips and improve.

Don't be afraid of criticism; use it as a building block for improvement.

Follow the light and use warm-up shots to understand your surroundings.

Use the environment's lights to create visual interest in the background.

Shoot in burst mode to increase the chances of getting a sharp image.

Experiment with different ISO and shutter speed settings to find what works best for you.

Use color theory to complement the scene's mood with your lighting choices.

Don't be afraid to make mistakes and learn from them in low light photography.

Encourage viewers to go out and shoot, embracing the challenges of low light.

Transcripts

play00:00

low light portraits is one of the

play00:01

hardest things to capture especially on

play00:03

a crop sensor body and I've been doing

play00:04

this for years and if you're afraid of

play00:06

noise being introduced into shot I'll

play00:08

let you in a little secret embrace it

play00:11

it's inevitable so instead of running

play00:14

away from the noise embrace the noise

play00:15

don't worry people will understand so in

play00:19

today's video I'm going to show you how

play00:20

I shoot low light portraits in hopes

play00:22

that you can take what I share with you

play00:23

guys and apply it on your next low light

play00:26

photo session hey guys welcome back to

play00:28

the channel and in today's video I want

play00:29

to talk about this photo shoot that I

play00:30

did last year February during a winter

play00:33

storm it's been over a year since this

play00:35

happened man time flies I was out with

play00:38

Anthony my friend Jake who was filming

play00:40

us and Rachel the model I wanted to make

play00:41

this video since I have some of you guys

play00:43

asking for low light portrait tips so

play00:45

why don't we just get started and let's

play00:46

just start off with the gear that I use

play00:48

on this shoot since I use Fujifilm you

play00:50

know it's going to be a crop sensor body

play00:52

but you can use whatever camera you want

play00:55

crop sensored full frame medium format

play00:58

whatever floats your boat I've been

play00:59

getting in great low light portraits

play01:01

with an aps-c sensor for years it's

play01:04

proof that you don't always need

play01:05

full-frame cameras but full frame

play01:08

cameras does help clean the image right

play01:10

up but it's not necessary also if you

play01:12

have a camera with Ibis that would be

play01:14

clutch because you can use a slower

play01:16

shutter speed to allow in more light

play01:17

without introducing motion blur so why

play01:20

would you want to do this for the fact

play01:21

that you can lower the iso without

play01:22

introducing noise it's a delicate

play01:24

balance when it comes to this stuff

play01:25

you've got to know when to push the iso

play01:28

you've got to know when you can like

play01:30

lower the shutter speed and one of the

play01:32

ways you can lower the shutter speed is

play01:34

if you have Ibis in the body or ois in

play01:37

one of your lenses and that's probably

play01:39

one of the reasons why my low light Fuji

play01:41

portraits looks a bit cleaner than

play01:43

everybody else it's because I know my

play01:45

equipment it's very important when you

play01:48

shoot with your gear to understand your

play01:49

gear and experiment on how far you can

play01:52

push your camera such as your Ibis

play01:55

experiment with your raws and I can't

play01:57

say the last part enough your Fuji Ross

play01:59

has so much information inside so you

play02:02

can do some serious pushing and pulling

play02:04

to manipulate colors to manipulate light

play02:07

and you can also hide some of those

play02:09

noise away because of it so experiment

play02:12

guys and again I chose the Fujifilm xs10

play02:15

for this uh shoot because it has a nice

play02:17

quality sensor to it and plus it has

play02:19

Ibis although it's not weather sealed it

play02:22

held up quite nice in this weather the

play02:24

next option is the lens now since this

play02:26

is a low light shoot you're going to

play02:27

want to be shooting with a wide aperture

play02:29

anything from F28 to F2 F 1.8 F 1.4 F

play02:34

1.2 F 1.0 and F 0.95 all those lenses

play02:39

are good but remember the wider the

play02:41

aperture the more light will be gathered

play02:43

to have a clean image otherwise you're

play02:45

going to be introducing unwanted noise

play02:47

and we don't want that so again choose

play02:50

the right tool for the right jobs during

play02:52

the shoot I was using the seven Artisans

play02:54

35 millimeter F12 for the Fujifilm X

play02:56

Mount but any fast prime lenses can do

play02:59

whenever I go roam the city streets at

play03:01

night time I always have an RGB LED

play03:03

light stick on me just in case we don't

play03:05

have enough light this is why it's

play03:07

important to go with at least one other

play03:09

photography buddy so they can help you

play03:11

hold the light and then you can return

play03:12

the favor that's what you're seeing in

play03:14

this video I got my buddy Anthony

play03:15

helping me out by holding the lights

play03:18

while I snap some photos and then once I

play03:20

was done it was his turn to snap some

play03:22

photos so I was the one holding the

play03:23

lights I highly encourage you guys to

play03:25

find some photography buddies to shoot

play03:27

with because it will make the experience

play03:29

so much better you guys can learn off

play03:31

each other you guys can share tips and

play03:33

bounce ideas off each other and you guys

play03:36

can grow faster than you would if you

play03:38

were to do this all by yourself if you

play03:40

want to know what light stick I'm using

play03:41

go check out the links down in the

play03:43

description below there's something I

play03:45

have to talk to you about like I'm being

play03:46

serious I've been told by so many people

play03:48

online that they cannot shoot low light

play03:50

with an aps-c camera so if they can't

play03:53

you can't right that's how Society works

play03:55

if I can't do it I'm going to make sure

play03:57

you can't do it too well low light

play03:59

portrait it has been my thing for a

play04:01

while now and throughout all that time I

play04:03

was using my Fujifilm cameras starting

play04:06

with the xt2 and I've gotten plenty of

play04:08

good shots with it and so what if

play04:10

there's noise in the shot and so what if

play04:12

it's slightly soft or out of focus there

play04:14

would be a few people sometimes that

play04:15

would chime in on my low light shots in

play04:17

one of those fujif film Facebook groups

play04:19

telling me that the image is noisy or I

play04:21

miss Focus or the image is kind of soft

play04:23

and all I'm thinking is so what thank

play04:26

you for the feedback but so freaking

play04:28

what I honestly don't care about your

play04:31

opinion until you can show me your own

play04:33

low light shots you're in no position to

play04:35

talk to me because I'm out here having

play04:38

fun doing what I love the noisy photos

play04:41

actually helps Flex my creativity

play04:43

muscles I'm out here learning about

play04:45

lighting learning how to direct models

play04:46

learning composition learning

play04:48

storytelling learning how to pose

play04:49

learning how to better communicate with

play04:52

the subject learning how to operate my

play04:54

cameras learning how far I can push the

play04:57

limits on my camera learning how to

play04:59

post-process a noisy image these are all

play05:03

skills that I've learned because I went

play05:05

out and took some noisy images so my

play05:08

question is do you want to be the person

play05:09

who complains about the noise image or

play05:11

do you want to be the person who took

play05:13

that noisy image I've gotten my fair

play05:15

share of criticism when it comes to my

play05:17

noisy images don't let it phase you

play05:19

because the amount of that I've

play05:21

learned through my noisy images made me

play05:24

a better photographer it made me a

play05:26

better editor and I'm a better person

play05:28

overall because of it so embrace the

play05:30

noise don't be upset when people are

play05:32

on your images these are

play05:34

building blocks that will make you great

play05:36

uh thank you for letting me go on this

play05:37

tangent and back to the show

play05:39

so let's start off with the most

play05:41

important rule guys and you guys should

play05:43

probably know this by now rule number

play05:45

one to low light portraits or any

play05:47

photography at all is follow the light

play05:50

Anthony suggested that we hit up this

play05:52

art installation because it has some

play05:54

cool lights at the harbor front so

play05:56

that's what we did as you can see here

play05:57

this big block of light is what we use

play05:59

as our key light or the main light

play06:00

whatever you want to call it this was

play06:03

our primary light source and once you

play06:04

find that light source what you want to

play06:06

do is do your warm-up shots and

play06:08

experiment with the composition shooting

play06:10

photos like this you're fairly limited

play06:12

to what your background looks like

play06:13

because the key light is stuck you can't

play06:16

move that main light source around like

play06:18

you would your own studio lights so it's

play06:19

important to angle the model in a way to

play06:22

avoid any distractions from the

play06:24

background and this is why I always say

play06:25

it's important to do your warm-up shots

play06:27

so you can get a feel of what's around

play06:29

the surrounding areas uh when you you

play06:31

know when you take a photograph and I

play06:33

like taking 10 to 15 minutes just to

play06:35

shoot and getting a feel of the person's

play06:37

strength when it comes to posing and

play06:38

what I look for in the background is to

play06:40

look for more lights in the distance

play06:42

from Apartments to business buildings

play06:45

the shops on the ground floor and the

play06:47

traffic like when shooting low light

play06:48

stuff these things that I'm looking for

play06:50

adds visual interest they are part of

play06:53

the bokeh in the background I can also

play06:55

use those lights and manipulate them

play06:57

even further and post by changing the

play06:58

colors around and because I'm shooting

play07:00

at F12 those lights will become

play07:02

pokeballs in the background thus

play07:04

creating visual interest for the viewers

play07:06

what I like about this art installation

play07:07

is that it changes colors so we were

play07:09

working with different colors different

play07:10

temperatures at any given moment which

play07:12

does add a bit of pressure because we

play07:14

don't know when it's changing and if you

play07:16

like a certain color that the art

play07:18

installation was emitting you're going

play07:20

to have to wait a full cycle before it

play07:22

returns back to that color that you like

play07:23

but I was working with the color red for

play07:25

a minute and I didn't like this color as

play07:27

you can see in these photos the color

play07:28

red I find is just too powerful I'm not

play07:31

a fan of red as a key light maybe as an

play07:33

accent or a rim light or like or a hair

play07:36

is fine but Reds just sort of makes you

play07:39

lose focus on the human subject and it

play07:42

kind of it kind of makes them look

play07:43

otherworldly demonic but then the light

play07:46

installation does change color and we

play07:47

get something like this where the LED

play07:49

lights is bright and it seemed like it's

play07:52

a cool white light this is where you're

play07:53

able to see the person's face and the

play07:56

eyes a bit better and shooting portraits

play07:58

is all about making connections with the

play08:00

eyes the eyes are the windows to the

play08:02

sole and then once we got warmed up a

play08:04

bit we were able to hit our stride and

play08:06

in some of these shots right here that I

play08:08

took with Rachel my ISO was at ISO 1250

play08:11

and my shutter speed was at 1 60th of a

play08:13

second while shooting it at wide open at

play08:15

F12 with the seven Artisans 35

play08:17

millimeter F12 ISO 1250 is an ISO number

play08:21

that I'm comfortable at and for the

play08:22

shutter speed most people would want to

play08:24

try to shoot this at 1 over 250th of a

play08:27

second or one over 500 of a second to

play08:29

get a sharp image but we can't do that

play08:31

in low light portraits if you want to

play08:33

use those shutter speeds you can but by

play08:35

doing that you're going to need to

play08:36

increase that ISO and we all know that

play08:39

increasing the iso means you're going to

play08:41

increase the chances of noise coming in

play08:42

so we don't want that but thankfully the

play08:44

xs10 has Ibis and this helps because I

play08:47

can lower my shutter speed which allows

play08:49

in more light and the Ibis will

play08:51

counteract any shakiness coming from my

play08:53

hands and again these are my settings

play08:54

and what I'm comfortable with I'm pretty

play08:56

sure I can lower my ISO even more and my

play08:59

shutter speed even lower to keep the

play09:00

noise down but sometimes when the

play09:02

environment is working against you you

play09:04

don't have time to slow down and think

play09:05

the weather was cold we were getting wet

play09:08

there was a snowstorm happening so it

play09:10

was just best for me to just have these

play09:12

settings down and not worry about it at

play09:15

all the art installation for the most

play09:16

part was giving a consistent light

play09:18

source even though it changes colors

play09:20

every couple of minutes but the

play09:21

Luminosity does not change so my

play09:23

settings didn't change as much as well

play09:24

but again I highly recommend you guys

play09:26

experiment with your camera and

play09:27

experiment with your shutter speed and

play09:29

with the iso that you're comfortable in

play09:30

using some of you guys may have said

play09:32

your hands than me so you guys can use a

play09:34

slower shutter speed probably something

play09:36

like a 1 over 50th of a second and in

play09:38

doing so you can lower your ISO so much

play09:40

more and it'll help improve your overall

play09:43

image quality another tip that I have

play09:44

for you when shooting in low light is to

play09:46

shoot and burst if you can that way not

play09:47

only do you have options but what I

play09:49

usually do is hope that one of those

play09:51

burst shots that I took gets into Focus

play09:53

because it's usually the first few that

play09:55

are slightly soft and then the mid to

play09:57

towards the end part of the burst are

play09:59

where I have the keepers and these are

play10:01

the shots that are in Focus or slightly

play10:03

in focus and I'll take it

play10:08

[Music]

play10:20

and afterwards we walked to a different

play10:21

location exploring the harbor front in

play10:24

Toronto and we found this little pier

play10:25

the pier had a good composition as I saw

play10:28

a leading line composition in my head

play10:30

but at this location there weren't any

play10:31

light installations so we were going to

play10:33

be relying on my LED light stick a lot

play10:35

more I could have chose any color that I

play10:37

wanted but I ended up choosing a warmish

play10:39

yellow color I had an idea in my head

play10:41

the snow was falling a lot so it added

play10:43

texture in the background which I think

play10:45

is dope it was so cold I was just

play10:47

thinking in my head that I would use the

play10:49

a cool tone mixed with the snow falling

play10:52

falling down to convey how cold the

play10:54

weather was that evening this is where

play10:55

my minimal knowledge of color theory

play10:57

came into Play If I decided that the

play10:59

scene is set up to be a cool tone dark

play11:01

image the complementary color to cool

play11:03

tones is warm tones so like I said

play11:06

earlier I chose a warmish yellow color

play11:08

to use as a key light and then I got

play11:11

something like this

play11:14

[Music]

play11:20

foreign

play11:27

[Music]

play11:35

it was giving Gotham Vibes which is

play11:37

awesome because I love the Batman movies

play11:39

The Dark Knight is one of my favorite

play11:40

superhero movies of all time and I just

play11:42

love whenever filmmakers try to show the

play11:44

city of Gotham it's always shrouded in

play11:46

darkness and with clouds and just it

play11:49

rains all the freaking time so I wanted

play11:51

to give a little Flair to it of my own I

play11:54

shot this at ISO 3200 so you can see

play11:57

some noise and some grittiness here but

play11:59

I like the way it turned out I like the

play12:01

images even though there's noise I still

play12:03

find it to be acceptable so them

play12:05

haters I get that constructive criticism

play12:07

is a thing and I'll listen to criticism

play12:09

any day but I also recommend that you

play12:12

get constructive criticism from people

play12:13

that you feel are better than you skill

play12:16

level wise that way it's going to be

play12:18

someone you respect someone that you

play12:20

feel knows what they're talking about

play12:21

why are you going to take constructive

play12:23

criticism from a person whose images are

play12:25

always crooked it doesn't make sense

play12:28

I'm not saying ignore ignore the other

play12:29

folks completely but don't take what

play12:32

they say with that much weight but then

play12:33

again if there is a general consensus

play12:36

that agrees with the criticism that's

play12:38

when you should take that constructive

play12:40

criticism into consideration but other

play12:42

than that if you think your photos look

play12:44

dope that's all that matters someone

play12:45

else out there will share the same

play12:47

feelings for the photo even if there are

play12:49

some who don't like it the only way to

play12:50

get good at low light is to experiment

play12:52

and make mistakes guys don't be afraid

play12:54

to up and if you do up and

play12:55

then get the images that you would like

play12:57

don't worry there will be plenty more

play12:59

opportunities to come in the future so

play13:01

make as much mistakes as you can embrace

play13:03

the noise embrace the darkness and the

play13:05

Shadows don't be afraid of the noise

play13:07

it's bound to happen people will

play13:09

understand go out and shoot with a buddy

play13:11

have him or her hold on to the lights

play13:13

and just go out and have fun and dress

play13:15

warmly and don't go out and shoot during

play13:17

the snowstorm that was really dumb on my

play13:19

part my question to you guys is do you

play13:21

guys find low light photography hard let

play13:23

me know in the comments section below if

play13:25

you find this video helpful or valuable

play13:26

do me a favor and subscribe to my

play13:28

channel I would clearly appreciate that

play13:30

if you are interested in the LED lights

play13:32

or any of the gear that I mentioned in

play13:34

this uh photo shoot links to them are

play13:36

down in the description below as always

play13:38

my name is Tung and I'll see you in the

play13:40

next video

play13:41

I love you

play13:43

goodbye

Rate This

5.0 / 5 (0 votes)

関連タグ
Low LightPortrait PhotographyFujifilm TipsCrop SensorNoise EmbraceWinter Storm ShootPhotography GearISO SettingsImage QualityCreative Lighting
英語で要約が必要ですか?