Making Your First Black & White Darkroom Print

ILFORD Photo
26 Feb 201807:06

Summary

TLDRThis video script offers a comprehensive guide to traditional darkroom photography, detailing the setup and process for creating prints. It covers the equipment needed, chemical preparation, negative selection, image focusing, aperture setting, and the steps for making both test and final prints using ILFORD MULTIGRADE materials. The tutorial emphasizes the importance of temperature control, chemical mixing ratios, and precise timing for optimal results, providing a clear introduction to the art of darkroom printing.

Takeaways

  • 📸 Essential Equipment: To print photos, you need a darkroom setup with an enlarger, photographic paper, chemicals, and safety gear.
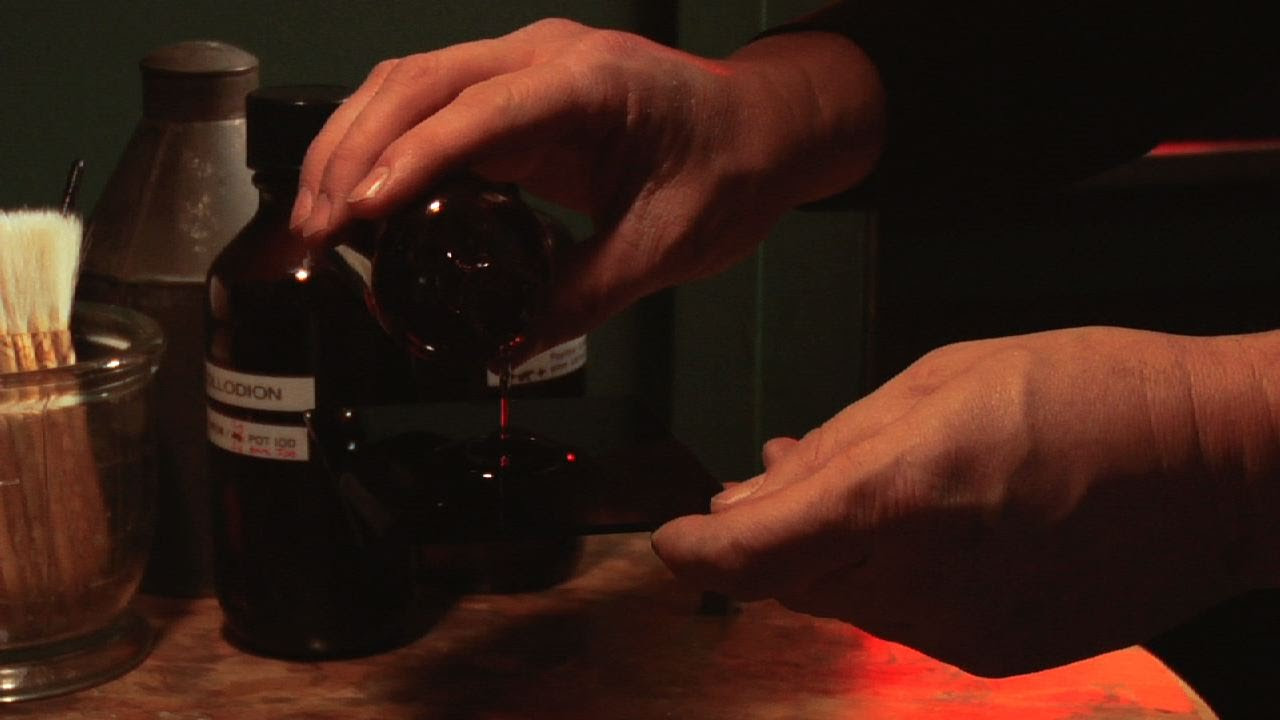
  • 🔍 Preparing Chemicals: The volume and dilution of developer, stop bath, and fixer depend on the paper size and should be prepared according to the manufacturer's instructions.
  • 🌡️ Temperature Sensitivity: Maintain the chemicals at the recommended temperature, and use warmer water if the environment is cold.
  • 🎨 Developer Selection: For beginners, a liquid developer like ILFORD MULTIGRADE is recommended for its ease of use.
  • 📏 Measuring Precisely: Accurately measure the chemicals and water to ensure the correct dilution for even development.
  • 🏷️ Labeling and Organizing: Use different colored trays for each chemical and label them to avoid confusion.
  • 🔍 Negative Selection: Choose the desired negative, read the edge numbers, and place it into the negative carrier with care.
  • 👀 Focusing: Use the enlarger's focusing wheel and a focus finder to achieve optimal image sharpness.
  • 📹 Test Printing: Start with test prints to determine the correct exposure time, using a timer and observing the results in the developer.
  • ⏱️ Timing is Key: Set the darkroom timer for incremental exposures to find the right development time for your final print.
  • 💧 Washing Process: After fixing, wash the print under running water to remove residual chemicals, ensuring a clear and lasting image.

Q & A

  • What is the essential equipment needed for creating photographic prints in a darkroom?

    -To create photographic prints, you need an enlarger, a darkroom with a safelight, negatives, photographic paper such as ILFORD MULTIGRADE, a puffer brush, a loupe, a focus finder, MULTIGRADE filters, developer, stop bath, fixer, containers for water and chemicals, a stirrer, a measuring cylinder, a thermometer, rubber gloves, safety glasses, developing trays and tongs, and a darkroom timer.

  • Why is it important to have enough space in the darkroom?

    -Enough space in the darkroom is important to comfortably work with the enlarger, move around the trays, and handle photographic paper without causing any damage or accidents.

  • What are the different forms in which paper developers come, and why are liquid developers recommended for beginners?

    -Paper developers come in both liquid and powder forms. Liquid developers, such as ILFORD MULTIGRADE DEVELOPER, are recommended for beginners because they are easier to mix and use, reducing the complexity of the process.

  • How should the developer solution be prepared for printing 8 x 10 inch ILFORD MULTIGRADE RC Glossy photographic paper at 20 °C / 68°F?

    -For an 8 x 10 inch print at 20 °C / 68°F, you need 1000ml of diluted developer solution prepared with 100ml of developer and 900ml of water at the same temperature. This ensures an even development of the print.

  • What is the purpose of a safelight in the darkroom, and when should it be used?

    -A safelight is used in the darkroom to provide a low level of light that is safe for working with photographic materials without affecting the exposure of the paper. It should be switched on when working with the enlarger and switched off when not in use to prevent accidental exposure.

  • How do you ensure optimal sharpness when focusing your image in the darkroom?

    -To ensure optimal sharpness, use a focus finder with the enlarger head at maximum aperture after you have sized and framed your image and brought it into focus using the focusing wheel.

  • What is the recommended starting point for setting the aperture (F-Stop) on the enlarger?

    -The recommended starting point for setting the aperture on the enlarger is F8, which is usually a good starting point for achieving a balanced exposure.

  • Why is it necessary to make a test print before making the final print?

    -A test print is necessary to determine the correct exposure time and to evaluate the overall look of the print, including tones and contrast, before committing to the final print.

  • How should you handle the photographic paper during the test print exposure process?

    -During the test print exposure process, place the sheet of ILFORD MULTIGRADE paper on the easel with the shiny side up, reseal the packet to prevent exposure, and use the timer to give the paper incremental exposures of 5 seconds until the entire sheet is exposed.

  • What is the correct sequence of chemical processing for the test print after exposure?

    -The correct sequence for processing the test print is to first immerse it in the developer for 60 seconds, then transfer it to the stop bath for 10 seconds, and finally to the fixer for 30 seconds.

  • How long should the final print be washed after fixing, and what is the purpose of this washing?

    -The final print should be washed for at least 2 minutes in water at 20°C / 68°F to remove residual chemicals and to ensure the longevity and stability of the print.

Outlines

00:00

📸 Darkroom Photography Setup and Chemical Preparation

This paragraph outlines the essential tools and materials needed for darkroom photography, including a darkroom setup with an enlarger, photographic paper, and various accessories. It also details the process of preparing chemicals such as developer, stop bath, and fixer, emphasizing the importance of correct dilution and temperature for even development. The recommended developer is ILFORD MULTIGRADE DEVELOPER, and specific mixing ratios are provided for each chemical at a given temperature. Tips are given for maintaining the temperature of the solutions and organizing the processing trays.

05:01

🔍 Negative Selection and Image Focusing Techniques

The paragraph describes the process of selecting and preparing a negative for printing. It guides the user on how to hold and read the edge numbers on the negative strip, place the negatives into the carrier, and clean them with a puffer brush. The focus then shifts to the image focusing process, which involves using a safelight, enlarger, and a focus finder to achieve optimal sharpness. The paragraph also explains how to adjust the enlarger head for size and framing, and the use of a MULTIGRADE 2 filter to enhance the print tones.

🎞 Adjusting Aperture and Making a Test Print

This section explains how to set the aperture of the enlarger lens to F8 and use a MULTIGRADE 2 filter for an average negative to achieve a good range of print tones. It also covers the steps for making a test print, including placing photographic paper on the easel, setting the darkroom timer, and exposing the paper in increments to reveal the entire sheet. The test print is then processed through developer, stop bath, and fixer, with specific timing for each step. The paragraph concludes with rinsing the test print and examining it to select the correct exposure for the final print.

🖨 Final Print Production and Washing Process

The final paragraph details the steps for producing the final print, starting with taking another sheet of MULTIGRADE paper and exposing it with the correct timing. It then describes the processing steps in the developer, stop bath, and fixer, with the same timing as for the test print. After fixing, the print requires washing in water at 20°C / 68°F for 2 minutes, with the suggestion to frequently change the wash water or use running water to remove residual chemicals. The paragraph concludes with the completion of the first print, marking the end of the darkroom photography process.

Mindmap

Keywords

💡Darkroom

A darkroom is a space that is light-tight and used for photographic processing. It is essential for traditional film photography where prints are made from negatives. In the video, a darkroom is described as necessary for working with an enlarger and photographic paper, highlighting its importance in the process of creating physical prints from negatives.

💡Enlarger

An enlarger is a device used in photography to project an image from a negative onto photographic paper, allowing for the enlargement of the image. In the script, the enlarger is central to the process, as it is used to project the image onto the paper, which is then developed into a photograph.

💡Photographic paper

Photographic paper, such as ILFORD MULTIGRADE mentioned in the script, is a type of paper coated with a photosensitive emulsion that reacts to light exposure to create a visible image. It is a key material in the process of making prints from negatives, and different types of paper can affect the final look of the photograph.

💡Developer

Developer is a chemical used in photography to make the latent image on the photographic paper visible by reacting with the light-exposed silver halide crystals. In the video, ILFORD MULTIGRADE DEVELOPER is recommended for beginners, and the script provides specific mixing ratios for the developer solution.

💡Stop bath

A stop bath is a solution used to halt the development process in photographic printing. It is crucial for ending the development at the correct point to prevent overdevelopment. The script mentions using ILFORD ILFOSTOP as the stop bath solution.

💡Fixer

Fixer, or fixing agent, is used to make the developed image on photographic paper permanent by removing unexposed silver halide crystals. The script describes the use of ILFORD RAPID FIXER and provides a dilution ratio for preparing the fixer solution.

💡Safelight

A safelight is a light source used in the darkroom that emits light of a specific wavelength that does not affect the photographic materials being processed. In the script, the safelight is turned on to provide visibility while working with the enlarger and photographic paper without affecting the light-sensitive materials.

💡Focus Finder

A focus finder is a tool used to help achieve sharp focus in photographic enlarging. It is especially useful for beginners to ensure that the projected image is in focus before making a print. The script instructs using a focus finder when the enlarger head is at maximum aperture for optimal sharpness.

💡Filter

In the context of the script, a filter refers to a device that can alter the quality of the light in the enlarger, affecting the tonal range and contrast of the print. The MULTIGRADE 2 filter is mentioned as providing a good range of print tones with an average negative.

💡Test print

A test print is an initial print made to determine the correct exposure and processing times for a photograph. It is a crucial step in the printing process, allowing adjustments to be made before making the final print. The script describes the process of making a test print with 5-second increments to find the correct exposure time.

💡Washing

Washing is the process of rinsing the photographic print after fixing to remove any residual chemicals and to prepare the print for drying. The script mentions washing the final print in water at 20°C / 68°F for 2 minutes and emphasizes the importance of changing the wash water to ensure thorough cleaning.

Highlights

Essential equipment for darkroom photography includes an enlarger, negatives, photographic paper, and a safelight.

ILFORD MULTIGRADE photographic paper is recommended for beginners due to its ease of use.

Proper mixing of chemicals is crucial for even development, with specific dilutions provided for ILFORD MULTIGRADE DEVELOPER.

Maintaining a consistent temperature of 20°C/68°F is recommended for optimal chemical performance.

Different colored trays can be used for organizing developer, stop bath, and fixer solutions.

Choosing the right negative involves reading edge numbers and ensuring cleanliness with a puffer brush.

Focusing the image requires adjusting the enlarger head and using a focus finder for sharpness.

Setting the aperture to F8 and using a MULTIGRADE 2 filter is a good starting point for exposure.

A test print involves exposing photographic paper in increments to find the optimal exposure time.

The development process includes a 60-second developer phase, followed by a 10-second stop bath, and a 30-second fixer.

A test print should show varying exposure levels to help determine the correct exposure time.

The final print requires careful exposure and processing with the same developer, stop, and fixer steps.

Washing the final print is essential for removing residual chemicals, ideally in water at 20°C/68°F.

The process emphasizes the importance of safety equipment, such as rubber gloves and safety glasses.

Technical data sheets from ilfordphoto.com provide essential information for chemical mixing ratios.

A darkroom timer is crucial for accurate exposure times during the test print and final print stages.

The process of making a print involves multiple steps, each with specific durations and solutions.

Using a color enlarger allows for dialing in filtration equivalent to a MULTIGRADE filter for color balance.

Transcripts

play00:08

Part 1: What you will need

play00:12

A darkroom with an enlarger and enough space to comfortably work

play00:15

Negatives

play00:21

Puffer brush

play00:24

Loupe

play00:29

Photographic paper such as ILFORD MULTIGRADE

play00:32

Focus Finder

play00:37

MULTIGRADE filters

play00:39

A Safelight

play00:44

Developer - Make the images appear on the paper

play00:48

Stop bath -Brings development to an end

play00:52

Fixer - Makes the developed image permanent

play00:57

Container for water

play01:00

Containers to mix your chemicals x 3

play01:03

Stirrer

play01:06

Measuring cylinder

play01:08

Thermometer

play01:11

Rubber gloves

play01:13

Safety glasses

play01:18

Set of 3 developing trays and tongs

play01:25

Darkroom timer

play01:28

Part 2: Preparing the chemicals

play01:31

The volume and dilution of chemicals you need to mix will depend on the size of the paper and trays that you are using

play01:35

you should prepare enough chemicals to cover the print in the tray to ensure an even development. This information can be found in the relevant technical data sheet on ilfordphoto.com

play01:40

Paper developers come in liquid and powder form. For beginners we recommend a liquid developer such as ILFORD MULTIGRADE DEVELOPER as they are the easiest to mix and use.

play01:45

We are printing 8 x 10" ILFORD MULTIGRADE RC Glossy photographic paper at a temperature of 20 °C / 68°F

play01:50

1000ml of diluted developer solution at 1+9 = 100ml developer +900ml water (at 20°C / 68° F).

play01:56

Measure 100ml of MULTIGRADE developer. pour this into a large cylinder.

play02:00

Add 900ml of water at a temperature of 20°C / 68° F to this and stir.

play02:05

1000ml of ILFORD ILFOSTOP at 1+19 = 50ml ILFOSTOP +950ml water (at 20°C / 68° F).

play02:10

1000ml of ILFORD RAPID FIXER at 1+4 = 200ml ILFORD RAPID FIXER + 800ml water (at 20°C / 68° F).

play02:15

Tip: If the area you are working in is cold, keep your prepared solutions at 20° C / 68° F.

play02:19

Stand them in a try of water that is a couple of degrees warmer until you are ready to use them.

play02:22

Add your processing solutions to their respective trays.

play02:32

We recommend using different coloured trays and labelling them.

play02:37

Developer Stop Fix

play02:44

Part 3: Choosing your negative

play02:48

Choose the negative that you want to print

play02:52

Hold the negative strip so that you can read the edge numbers, then turn the negative around (not over) so the number are furthest away from you.

play02:55

Place the negatives into the negative carrier.

play02:59

Use a puffer brush to remove any dust.

play03:02

Slide the carrier into place.

play03:06

Part 4: Focusing your image

play03:11

Switch on the safelight and switch off your room lights

play03:17

Turn on the enlarger. You should see your image projected onto the easel.

play03:21

Raise or lower the enlarger head to size and frame your image, bring it into focus using the focusing wheel.

play03:26

With the enlarger head at maximum aperture, use a focus finder for optimal sharpness.

play03:32

Part 5: Setting the aperture (F-Stop)

play03:37

Adjust the lens aperture to F8, this is usually a good starting point.

play03:42

Slide a MULTIGRADE 2 filter into the filter drawer or holder on your enlarger. This filter provides a good range of print tones with an average negative.

play03:46

if you have a colour enlarger you may prefer to dial in filtration equivalent to a MULTIGRADE filter 2.

play03:50

Part 6: Making a test print

play03:57

Put a sheet of ILFORD MULTIGRADE paper into the easel (shiny side up).

play04:05

Make sure to reseal the packet.

play04:09

Set the timer for 5 second increments. Cover approximately 4/5th of the sheet and expose for 5 seconds.

play04:16

Repeat until you have revealed all of the sheet (approximately 4 or 5 exposures).

play04:22

Take your sheet over to your trays of chemicals and slide it quickly and smoothly into the developer.

play04:31

Start the timer and watch your image appear.

play04:39

After 60 seconds use a pair of tongs to life the paper out and slide it into the stop bath. (Don't be tempted to remove the print too soon).

play04:49

Do not touch the stop bath solution with your tongs to avoid contamination.

play04:54

After 10 seconds use a 2nd pair of tongs to transfer the test print to the fixer. (Again not letting the tongs touch the next solution).

play05:00

Fixing should only take 30 seconds in fresh solution.

play05:09

Rinse your test print under running water.

play05:12

Turn the rooms lights on to examine your print.

play05:14

It should show 5 strips, each one darker than the previous one.

play05:21

Select the correct exposure from your test print, here we've chosen around 12.5 seconds.

play05:25

Part 7: Making the final print

play05:31

Ensuring the room is in safelight, take out another sheet of MULTIGRADE paper. Position this on the easel and use the timer to give the paper the correct exposure.

play05:49

Repeat the processing steps taken previously

play05:57

Developer 60 seconds

play06:03

Stop 10 seconds

play06:12

Fixer 30 seconds

play06:17

After the fixer you will need to wash the final print

play06:23

Place it in a tray of water, ideally at 20°C / 68° F for 2 minutes.

play06:27

You should empty and refill the wash water a few times during this to remove the chemicals, or use water running through a hose to syphon water from the bottom of the tray.

play06:37

You have now made your first print.

Rate This

5.0 / 5 (0 votes)

関連タグ
Darkroom PrintingPhotographic PaperILFORD MULTIGRADEDeveloper MixPhotography TutorialNegative CarrierEnlarger FocusTest PrintPrint ProcessingPhotography Techniques
英語で要約が必要ですか?