GAK USAH BELI AC !! Bikin seperti ini saja !!
Summary
TLDRIn this creative DIY video, the host demonstrates how to construct a homemade air cooler using a 12-volt fan, PVC pipes, and plastic containers. The device is designed to cool a room by circulating cold air produced from frozen ice blocks infused with air freshener. The tutorial covers assembling the fan, shaping the pipes, and connecting the electrical components. The result is a cost-effective cooling solution that not only refreshes the room but also adds a pleasant scent to the air.
Takeaways
- 😀 The video is a tutorial on creating a homemade air cooler, inspired by numerous requests from viewers.
- 🛠️ The main tool required is a 12-volt DC mini fan, which can be purchased at an electronics store for around 10,000 to 20,000 currency units, depending on size.
- 💡 The fan's power consumption is specified as 0.30 ampere, and it's recommended to choose a larger fan for higher air pressure.
- 📦 A plastic container is needed as the base for the cooler, with the size being adjustable to fit individual needs.
- 🔧 Additional materials include a used 4-inch PVC pipe, which will be cut, cleaned, and shaped to form part of the cooler's structure.
- 🔥 The PVC pipe is heated to make it pliable, then shaped into the desired form and cooled down to set its shape.
- 🔩 The fan is attached to the top of the container with adhesive, ensuring a tight fit for optimal air flow.
- 🔌 The fan is a DC 12-volt model, requiring a 12-volt adapter for power, with the positive and negative wires connected accordingly.
- 💧 The cooler functions by having a frozen block of ice inside, which cools the air that is then blown out by the fan.
- 🌀 The bottom of the container has a hole for air ventilation, which can also serve as an outlet for the pleasant scent from a fragrance added to the water.
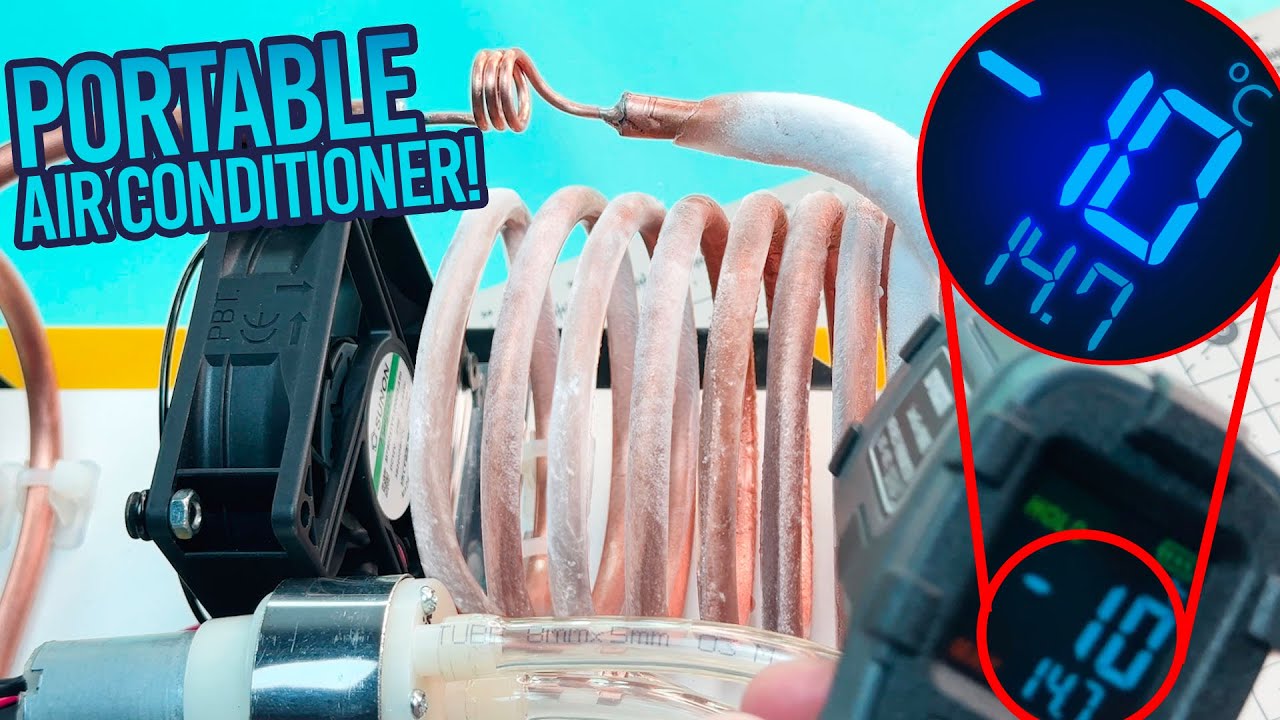
- 🌡️ The video demonstrates the cooling effect by showing a temperature drop from 35 degrees to below 30 degrees Celsius in the room.
Q & A
What is the main purpose of the project described in the video?
-The main purpose of the project is to create a homemade cooling device that can cool a room, similar to an air conditioner, using a 12-volt fan.
What type of fan is used in the project?
-A DC 12-volt fan is used, which can be purchased at an electronics store, with a price range of about 10,000 to 20,000, depending on the size.
What is the role of the plastic container in the project?
-The plastic container serves as the main body or housing for the homemade cooling device, and its size can be adjusted according to individual needs.
What material is used to create the air ducts for the cooling device?
-Used PVC pipes, specifically 4-inch pipes, are used to create the air ducts after being cut and shaped into the required form.
How are the PVC pipes prepared for use in the project?
-The PVC pipes are heated over a stove to make them pliable, then shaped into sheets and pressed until they regain their rigid form.
What is the function of the holes made in the plastic container?
-The holes in the plastic container serve as vents for air circulation, allowing the cooled air to exit the device.
How is the cooling effect achieved in the homemade device?
-The cooling effect is achieved by freezing water in the plastic container, which then melts and produces cold vapor that is blown out by the fan.
What additional function does the water in the container have besides cooling?
-The water in the container can be mixed with fragrance to serve a dual purpose of cooling the room and adding a pleasant scent to the air.
How can the device be powered?
-The device is powered by a 12-volt adapter, which connects to the positive and negative terminals of the DC fan.
What is the expected temperature reduction in the room when using the device?
-The device is expected to reduce the room temperature from around 35 degrees Celsius to below 30 degrees Celsius, providing a cooler environment.
How can the device be tested for its cooling effect?
-The device's cooling effect can be tested by using a temperature measuring tool to compare the room temperature before and after using the device.
Outlines
🛠️ DIY Cooling Fan Project
The script introduces a DIY project to create a cooling fan similar to an air conditioner using a 12-volt mini fan. The host explains the need for materials such as a DC 12-volt fan, which can be purchased from electronic stores for around 10,000 to 20,000 (currency not specified), depending on the size. The fan's specifications are detailed, emphasizing its power consumption and air pressure capabilities. Additional materials include a plastic container, a used 4-inch PVC pipe, and adhesive. The process involves cutting the pipe, cleaning it, heating it to shape it into a flat sheet, and then assembling it with the fan. The fan is connected using a 12-volt adapter, and the setup is designed to attach to the plastic container. The final step includes creating a back cover for the container and ensuring the fan is securely attached.
🌀 Demonstrating the Cooling Fan's Function
This paragraph describes the functionality of the DIY cooling fan, which is meant to cool a room rather than lower the overall room temperature like an air conditioner. The fan works by circulating air and using ice from frozen water bottles or ice blocks to cool the air. The host demonstrates how to prepare the water bottles with fragrance, freeze them, and then use them in the fan for a cooling and aromatic effect. The fan is shown to be effective in creating a cool breeze, with the temperature dropping from 35 degrees to around 28 degrees, providing a significant cooling effect. The video also includes a practical demonstration of the fan's cooling capabilities and a temperature test to show the difference in room temperature before and after using the fan.
🎥 Wrapping Up the DIY Cooling Fan Video
The final paragraph wraps up the video by emphasizing the simplicity and utility of the DIY cooling fan. The host notes that even without ice, the fan can be used as a regular fan, highlighting its versatility. The video concludes with a call to action for viewers to like and subscribe for more inspiring and interesting content from the channel. The host thanks the viewers for watching and expresses hope that the video was helpful, promising to see them in the next video.
Mindmap
Keywords
💡Fan
💡DIY (Do It Yourself)
💡Air Conditioner (AC)
💡Plastic Container
💡PVC Pipe
💡Adaptor
💡Ventilation
💡Refrigeration
💡Temperature
💡Soldering
💡Aromatherapy
Highlights
Introduction to creating a DIY air cooler similar to an air conditioner using a 12-volt fan.
Requirement of a DC 12-volt fan available at electronic stores for around 10 to 20 thousand, depending on size.
Explanation of fan specifications, emphasizing the importance of choosing a larger fan for higher air pressure.
Use of a plastic container as a base for the DIY cooler, adaptable to individual needs.
Utilization of a recycled 4-inch PVC pipe for constructing the cooler's body.
Demonstration of cleaning and cutting the PVC pipe for the cooler's construction.
Technique of heating the PVC pipe to create flat sheets for the cooler's body.
Instructions on shaping and assembling the PVC sheets to form the cooler's structure.
Preparation of the cooler's top cover and attachment method using heat.
Integration of the 12-volt fan into the cooler's structure with adhesive.
Connection of the fan's power cables, specifying the positive and negative connections.
Use of a 12-volt adapter to power the fan for the DIY cooler.
Creation of ventilation holes in the cooler for air circulation.
Explanation of the DIY cooler's function as a room cooling device, distinct from an air conditioner.
Demonstration of filling the cooler with frozen water and adding fragrance for dual functionality.
Practical application of the DIY cooler, showing its effectiveness in cooling a room.
Use of temperature measuring tools to demonstrate the cooling effect on room temperature.
Conclusion emphasizing the DIY cooler's practicality and cost-effectiveness as a room cooling solution.
Encouragement for viewers to like, subscribe, and stay updated with Inspirasi Usaha's latest videos.
Transcripts
[Musik]
Halo teman-teman Jumpa lagi bersama saya
di Inspirasi Usaha karena sudah banyak
sekali yang request di kolom komentar
minta dibuatkan kipas angin yang bisa
bikin ruangan sejuk Mungkin maksudnya
mirip-mirip seperti AC agak
dingin-dingin seperti itu kali ini saya
akan mencoba membuatkannya dengan cara
yang sangat mudah memanfaatkan kipas 12
volt seperti ini Oke Langsung saja
Seperti apa caranya dan bahan apa saja
yang dibutuhkan
jika video ini bermanfaat bantu tekan
like dan subscribe terima kasih
[Musik]
Oke untuk barang utama yang dibutuhkan
dalam video kali ini tentu saja kita
membutuhkan kipas Mini ini adalah kipas
DC 12 volt bisa terlihat ini DC 12 volt
0,30 ampere ini juga sama DC 12 volt
0,30 ampere jika kalian beli ini bisa
dibeli di toko peralatan elektronik
harganya sekitar 10 hingga 20 ribuan
tergantung ukuran yang kalian minta Nah
untuk ukurannya ini kan berbeda tapi
konsumsi dayanya bisa terlihat ini
spesifikasinya sama persis jadi mending
yang besar sekalian karena ini tekanan
anginnya jauh lebih tinggi
untuk barang selanjutnya di sini saya
siapkan satu buah wadah plastik untuk
ukurannya ini terserah bisa menyesuaikan
dengan kebutuhan masing-masing saya
pakai seadanya saja dan barang
selanjutnya di sini saya siapkan satu
buah pipa ini adalah pipa bekas pipa
bangunan bekas ukuran 4 inch langsung
saja kita potong pipa ini
setelah terpotong pipanya kita belah
ini dia hasilnya karena ini masih sangat
kotor langsung saja kita cuci
[Musik]
Oke ini sudah lumayan bersih langkah
selanjutnya pipa pvc ini kita Panaskan
di atas kompor dan kita jadikan lembaran
[Musik]
setelah pipanya lentur seperti ini
tinggal kita press kali ini saya
menggunakan papan
kita tekan-tekan saja hingga pipanya
mengeras kembali
lembaran pipanya kita bagi menjadi 3
bagian
yang sudah kita beri tanda ini kita
Panaskan kemudian kita tekuk
untuk pipa yang pertama ini sudah
selesai bentuknya Hanya seperti ini
kemudian kita siapkan tutup toplesnya
kita letakkan di bagian atas
ini sedikit menyusut ya teman-teman
ketika sudah kita Panaskan tetapi tidak
masalah ini sudah pas tinggal kita
pasang
kipasnya Nah kan
ini sudah pas jadi tinggal kita lem saja
agar kipas dan juga pipa ini menempel
kemudian di bagian bawah juga kita beri
lem
[Musik]
untuk yang bagian belakang karena ini
masih belum ada tutupnya kita buatkan
tutup dari pipa pvc lagi ini kita
pipihkan kemudian kita tempelkan seperti
tadi
[Musik]
untuk yang bagian belakang sudah
tertutup kemudian tinggal kita pasang ke
tutupnya
oke mantap sekali ini kipasnya sudah
merekat dengan sangat kuat kemudian
untuk bagian tengahnya ini kita beri
lobang
lubangnya agak besar tidak masalah
[Musik]
nah kemudian di sini kan ada dua buah
kabel yang belum tersambung Ini yang
merah adalah yang positif yang hitam
adalah yang negatif karena ini adalah
kipas DC 12 volt jadi kita membutuhkan
adaptor 12 volt juga nah ini sudah saya
siapkan adaptor 12 volt langsung saja
kita sambung positif ke positif negatif
ke negatif
[Musik]
Oke ini untuk rangkaian utamanya sudah
jadi ini ada adaptor dan juga kipas ini
nanti ketika kita colokan langsung bisa
menyala kipasnya kemudian di sini untuk
wadah toples yang bagian bawah kita beri
lobang sedikit di bagian sampingnya ini
fungsi dari lubangnya untuk angin-angin
atau ventilasi udara kali ini saya pakai
solder saja agar lebih cepat
[Musik]
Dan setelah semua perasa tadi hasilnya
kurang lebih seperti ini ya teman-teman
alatnya sudah jadi Hanya seperti ini
saja ini adalah alat untuk menyejukkan
ruangan jadi ini fungsinya mirip seperti
AC tetapi untuk AC itu kan mendinginkan
ruangan dan alat ini bukan untuk
mendinginkan melainkan untuk menyejukkan
ruangan saja karena kapabilitasnya ini
sangat kecil berbeda dengan AC itu
lumayan besar tekanan dan juga dayanya
jadi alat ini fungsinya untuk
menyejukkan ya teman-teman untuk cara
kerjanya nanti ini kan sudah saya
siapkan toples yang di bagian bawah
nanti tinggal kalian pasang saja seperti
ini
Nah di sini kan ada angin-anginnya ini
untuk ventilasi udara masuk ini kan saya
tutup semua di bagian belakang dan
samping saya tutup jadi ketika kipasnya
menyala nanti kipasnya akan otomatis
menekan udara ke bagian luar dan
menghisap udara dan masuk di sebelah
sini untuk bagian dalamnya ini nanti
kalian isi dengan menggunakan air yang
kalian campur pewangi agar dua fungsi
sekaligus untuk mengharumkan ruangan dan
untuk menyejukkan ruangan udaranya yang
keluar itu wangi Dan juga sejuk Oke
Langsung saja saya praktekan bagaimana
cara penggunaannya
jadi untuk cara kerjanya toples ini
kalian isi air kemudian kalian masukkan
ke dalam kulkas sehingga airnya membeku
Contohnya seperti ini ini sudah lumayan
membeku cukur-syukur jika kalian
mempunyai kulkas sendiri di rumah bisa
menggunakan dua toples yang berbeda jadi
ketika digunakan ketika ini sudah
mencair bisa kalian ganti dengan toples
yang lainnya atau jika kalian tidak
punya kulkas bisa diisi dengan
menggunakan es batu
[Musik]
untuk air yang saya bekukan ini adalah
air dengan campuran pengharum pakaian
jadi uapnya agak sedikit harum langsung
saja kita tes ini kita tutup
untuk bagian sebelah sini akan saya
pasang kresek sedikit agar anginnya
lebih terlihat di kamera langsung saja
kita colokkan 1 2 3 dan hasilnya seperti
ini
[Musik]
nah mantap sekali ya teman-teman
Anginnya sangat kencang karena kali ini
saya menggunakan kipas 12 volt yang
ukurannya lumayan besar dan ini untuk
prinsip kerjanya uap dingin dari es batu
yang sudah kita pasang di bagian dalam
ini akan otomatis keluar dan dihembuskan
oleh kipasnya jadi angin yang keluar ini
agak dingin selain dingin angin yang
keluar ini juga harum Karena untuk
campuran es batu yang saya bekukan ini
adalah campuran dari pengharum pakaian
sangat mantap pengharum pakaian itu
sangat murah ya teman-teman hanya 500
perak jadi bisa kalian masukkan di
bagian sebelah sini untuk pengharum
ruangan juga
bisa terlihat anginnya lumayan kencang
dan ini anginnya dingin
alat ini sangat cocok digunakan ketika
siang hari kalian tidur di kamar dan
kamar kalian terasa panas jadi alat ini
bisa kalian gunakan untuk menyejukkan
ruangan kalian atau kipas yang
menyejukkan
sebagai pembuktian disini sudah saya
siapkan alat untuk mengukur suhu ruangan
jadi alat ini nanti akan saya letakkan
di bagian sebelah sini ini suhu di luar
ruangan ini 35 derajat ini lumayan panas
jadi ketika saya tempelkan di sebelah
sini kita lihat apakah ini nanti bisa
turun hingga di bawah 30 derajat kita
lihat saja hasilnya
[Musik]
nah ini langsung turun ya teman-teman
[Musik]
bisa terlihat kita tunggu saja hingga
berapa derajat yang
diukur oleh alat ini apakah di bawah 30°
[Musik]
Oke ini alatnya sudah mulai berhenti
mengukur tetapi ini masih turun terus
jadi alat yang saya buat kali ini
suhunya lumayan dingin ya teman-teman
untuk suhu yang keluar ini sekitar 28
derajat lumayan dingin Karena suhu
ruangan atau suhu di siang hari itu
biasanya sekitar
35 hingga
35 keatas itu normalnya di siang hari
seperti itu dan ini keluar 28 derajat
jadi Lumayan mantap digunakan di siang
hari ketika suhu ruangan kalian atau
suhu kamar kalian lumayan panas
[Musik]
coba saya letakkan di bagian sebelah
sini
[Musik]
nah ini suhunya langsung naik
bisa terlihat ini 30 lebih terus naik
meskipun alatnya sederhana yang penting
manfaatnya
jika tidak punya es batu ini juga bisa
digunakan sebagai kipas biasa ya
teman-teman sangat mantap sekali oke
mungkin Cukup Sekian dulu video terbaru
dari Inspirasi Usaha kali ini jika
kalian suka dengan video-video dari
Inspirasi Usaha kalian bisa Klik tombol
like yang ada di bawah dan jangan lupa
juga tekan tombol subscribe agar tidak
ketinggalan video-video menarik dan
terbaru dari inspirasi saya lainnya Oke
terima kasih sudah menonton semoga
bermanfaat See you next video
[Musik]
関連動画をさらに表示
💥 Wow! Easy DIY Science Experiment For Kids | Make Convection Currents at Home | Kara Walker
Testing If You Can Blow Your Own Sail
DIY BedJet Cloud Sheet Substitute
The History of Electric Fan and Unboxing of Rechargable Fan
Cara Membuat Alat Destilasi Sederhana Untuk ekstrak minyak atsiri dan pestisida nanati
World Record Compost Tea! THE BEST Fertilizer 4 ALL Plants Is AACT:Compost Tea Brewer Recipe, HowTo
5.0 / 5 (0 votes)