Common Scientific Glassware and the Undergraduate Chemistry Laboratory
Summary
TLDRThis script introduces essential laboratory equipment for chemistry, emphasizing the importance of using the right tools for various tasks. It covers glassware like beakers, graduated cylinders, and test tubes, and explains their specific uses. It also discusses safety equipment, such as fume hoods, and the correct use of balances for weighing solids. The video aims to familiarize viewers with lab practices for safe and accurate chemistry experiments.
Takeaways
- 🧪 Beakers are versatile glassware used for conducting reactions, transporting solutions, and as water baths for temperature control, and come in various sizes from 5ml to several liters.
- 📏 Graduated cylinders are used for accurately measuring liquid volumes, and readings should be taken from the bottom of the concave meniscus.
- 🔬 Test tubes are small reaction vessels for observing visible changes, requiring a test tube rack for stability and a holder for heating or suspending in water baths.
- 🍶 Erlenmeyer flasks are conical and used for mixing reagents and conducting reactions, with sizes varying and measurements being imprecise.
- 🔬 Buchner flasks, or filter flasks, are similar to Erlenmeyer flasks but have a side arm for vacuum filtration and should not be used for other purposes.
- 🌡️ Spatulas are used for picking up solids, coming in various shapes and should be handled gently to avoid bending.
- 🧪 Stirring rods are for briefly stirring solutions and should not be confused with thermometers, requiring careful handling to prevent rolling away.
- 💧 Pipettes are used for adding small amounts of liquid, operated by squeezing a bulb to draw and release liquid.
- 📊 Burettes are used in titrations, with inverted gradations to measure the volume added to another vessel.
- ⚗️ Volumetric flasks are used for making standard solutions, with a single line indicating the exact volume, and require careful handling near the neck due to rapid filling.
- 🌀 Separatory funnels are used for separating immiscible liquids and require the correct size cap and ring clamp for stability and to prevent spilling.
Q & A
What is the primary purpose of a beaker in a chemistry lab?
-Beakers are used for conducting reactions, transporting solutions and solvents, and as water baths to control the temperature of other vessels.
Why should we not use beakers for precise volume measurements?
-The measurements on the sides of beakers are for estimating volume, but they are not accurate enough for precise measurements, which should be done using more precise glassware.
What is the main function of a graduated cylinder?
-A graduated cylinder is used to measure the volume of a liquid accurately.
How should you read the volume in a graduated cylinder?
-You should read the volume from the bottom of the concave meniscus to avoid ambiguity.
Why are test tubes useful for observing reactions?
-Test tubes are small reaction vessels that allow for the observation of visible changes in reactions, but they require a test tube rack or holder to prevent them from rolling away or being heated safely.
What is the difference between an Erlenmeyer flask and a Buchner flask?
-An Erlenmeyer flask is used for mixing reagents and conducting reactions, while a Buchner flask has a side arm specifically for vacuum filtration.
Why should a Buchner flask not be used for purposes other than filtration?
-The side arm opening of a Buchner flask can cause the liquid to escape if used for other purposes, making it unsuitable for reactions where containment is necessary.
What is the purpose of a separatory funnel?
-A separatory funnel is used for separating two immiscible liquids.
How should you handle a pipette when transferring liquids?
-You should squeeze the pipette bulb to draw the liquid in, release the bulb to fill the pipette, and then transfer the liquid to the new vessel.
What is the role of a burette in a titration process?
-A burette is used to measure and add precise volumes of liquid to another vessel during a titration.
Why is it important to be cautious when using a volumetric flask?
-Volumetric flasks have long necks that can be easily knocked over, and they require careful handling, especially when filling near the neck, to avoid spillage.
What is the purpose of a mortar and pestle in a lab?
-A mortar and pestle are used to crush solid materials into a powder.
What is the significance of the ground glass joint in glassware?
-The ground glass joint is the thickest part of the glassware and should be clamped whenever possible to ensure stability and prevent breakage.
How does a reflux condenser work?
-A reflux condenser works by cooling the gas in the tube, causing it to condense and drip back into the solution, allowing for continuous boiling without loss of volume.
Why is it crucial not to block the top of a condenser?
-Blocking the top of a condenser can cause pressure to build up, which may result in an accident due to the potential for explosion or breakage.
Outlines

Dieser Bereich ist nur für Premium-Benutzer verfügbar. Bitte führen Sie ein Upgrade durch, um auf diesen Abschnitt zuzugreifen.
Upgrade durchführenMindmap

Dieser Bereich ist nur für Premium-Benutzer verfügbar. Bitte führen Sie ein Upgrade durch, um auf diesen Abschnitt zuzugreifen.
Upgrade durchführenKeywords

Dieser Bereich ist nur für Premium-Benutzer verfügbar. Bitte führen Sie ein Upgrade durch, um auf diesen Abschnitt zuzugreifen.
Upgrade durchführenHighlights

Dieser Bereich ist nur für Premium-Benutzer verfügbar. Bitte führen Sie ein Upgrade durch, um auf diesen Abschnitt zuzugreifen.
Upgrade durchführenTranscripts

Dieser Bereich ist nur für Premium-Benutzer verfügbar. Bitte führen Sie ein Upgrade durch, um auf diesen Abschnitt zuzugreifen.
Upgrade durchführenWeitere ähnliche Videos ansehen

PENGENALAN ALAT-ALAT LABORATORIUM KIMIA DAN KEAMANAN & KESELAMATAN KERJA (K3) DI LABORATORIUM KIMIA

The Chemical Laboratory

Pengenalan Alat Laboratorium

Ayo kenalan dengan Laboratorium Kimia! Kimia SMA kelas 10 semester 1
Praktikum Kimia Dasar Modul 1. Pengenalan Alat Laboratorium
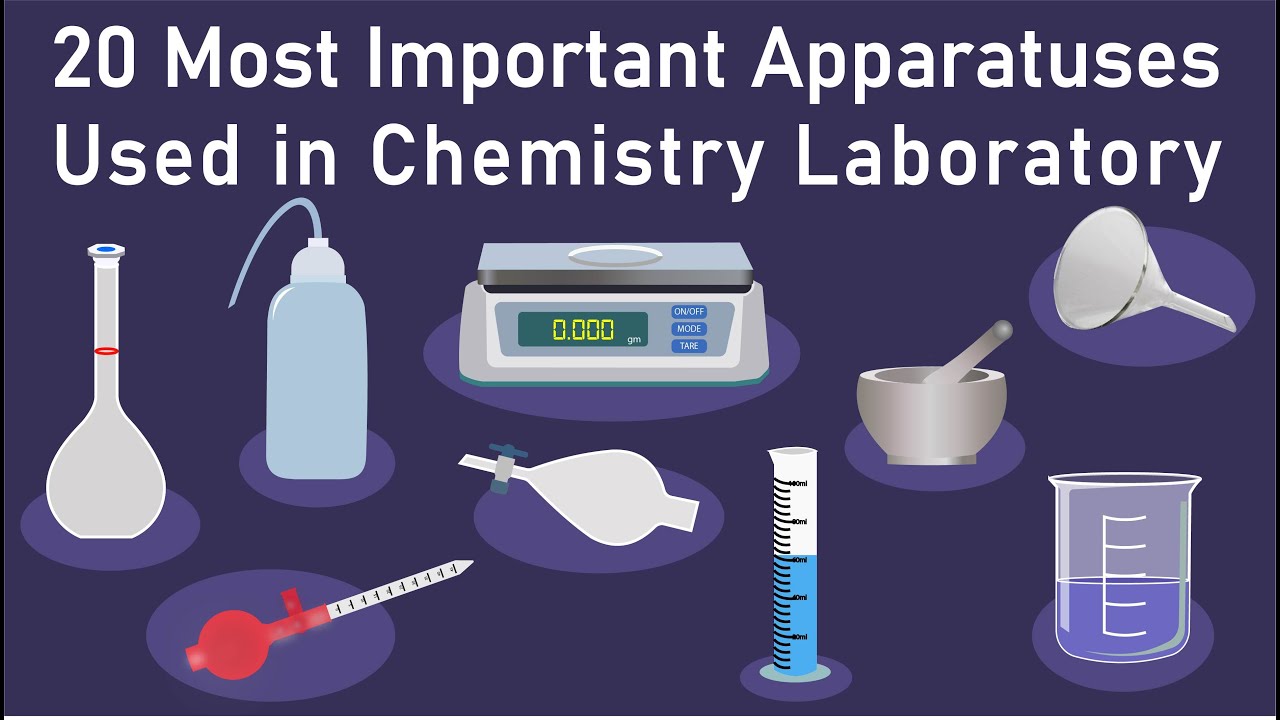
20 most important apparatus used in chemistry lab | chemistry lab apparatus name with picture
5.0 / 5 (0 votes)
