Cara Membuat Rangkaian Seri / Rangkaian Listrik Yang Dipasang Secara Berurutan Mudah Dan Sederhana
Summary
TLDRIn this video, viewers are guided through the creation of a simple series electrical circuit. The process includes setting up two light bulbs, preparing wires, and assembling the components step-by-step. Viewers learn how to connect the components, including the addition of a switch to control the flow of electricity. The video demonstrates how to test the circuit using one or two batteries and shows the effect of a lamp turning off, causing the others to go dark in a series setup. The video also highlights the key aspects of creating a working series circuit using basic materials.
Takeaways
- 😀 The video demonstrates how to create a simple and easy series circuit.
- 😀 A series circuit is explained as one where components are connected in a single path, and if one light goes out, all lights go out.
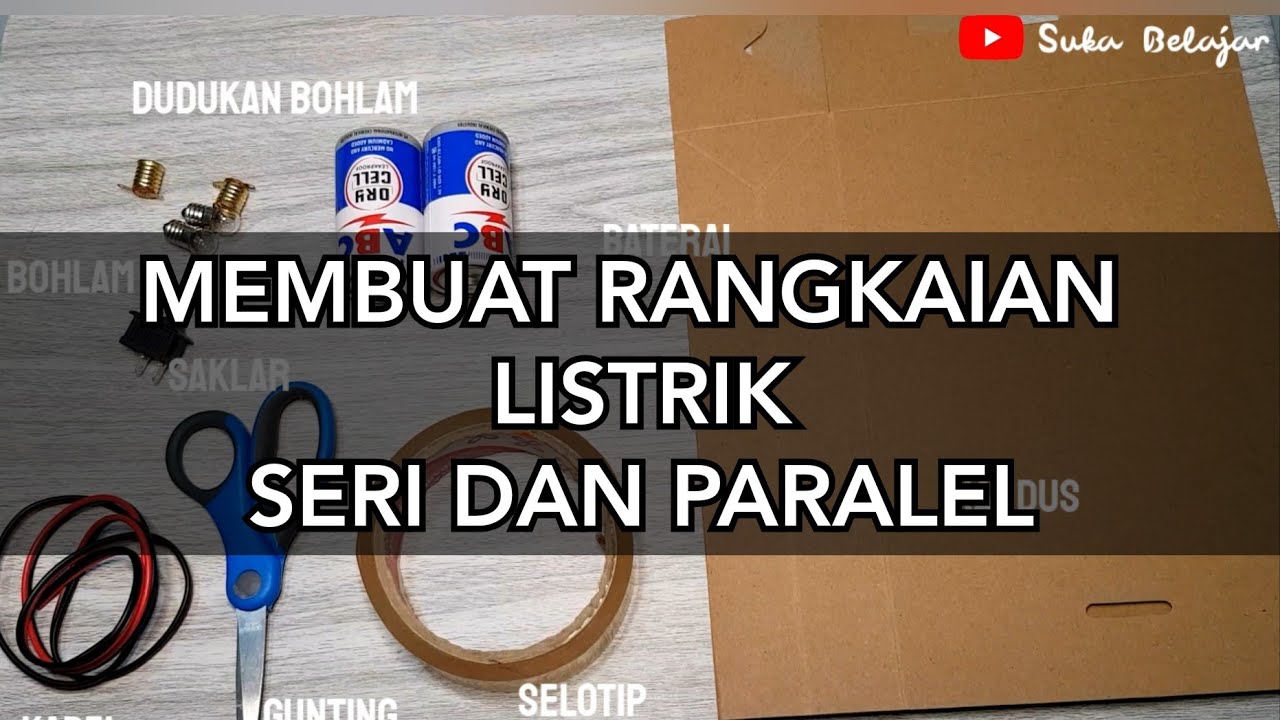
- 😀 The materials used include two flashlight bulbs, lamp holders, wires, and a battery.
- 😀 The process begins with preparing the components, such as attaching bulbs to their holders.
- 😀 The video explains how to separate the positive (red) and negative (white) wires for proper connection.
- 😀 The wires are cut into sections and the insulation is stripped from the ends to expose the copper wire.
- 😀 The wires are connected to the lamps in a series, ensuring that they are securely fastened.
- 😀 The circuit is tested using one battery, initially lighting the bulbs dimly, then with two batteries, which makes them shine brighter.
- 😀 A switch is added to the circuit to control the flow of electricity, turning the lights on and off.
- 😀 The circuit is mounted on a cardboard base to secure the components and ensure they function correctly.
- 😀 The video concludes with an explanation that in a series circuit, when one bulb is removed or burned out, all bulbs go out because the electrical flow is interrupted.
Q & A
What is the main focus of the video?
-The video focuses on creating a simple series electrical circuit, demonstrating how it works and how to assemble the components.
Why is the circuit called a series circuit?
-The circuit is called a series circuit because the components (in this case, the lights) are connected in a single path. If one light goes out, the others will also go out.
What are the key materials required for building the circuit?
-The key materials include two flashlight bulbs, bulb holders, wires (60 cm in length), a battery, a switch, and a cardboard base.
How do you prepare the wires before connecting them to the lamps?
-You need to strip the insulation off the wires and twist the exposed copper to make the connections clean and secure.
What is the significance of using two batteries in the circuit?
-Using two batteries helps provide enough power to light up both bulbs brightly. With one battery, the bulbs would light up dimly.
What function does the switch serve in the circuit?
-The switch controls the flow of electricity. It can turn the circuit on or off by either connecting or disconnecting the electrical path.
Why should the batteries be tightly secured with tape?
-The batteries need to be securely taped to ensure good electrical contact. If they are loose, the circuit may not work properly, and the lights might not turn on.
How does the light brightness change in a series circuit?
-In a series circuit, the brightness of each bulb is reduced, and they do not shine as brightly as when connected in parallel. The voltage is shared between the bulbs.
What happens if one of the bulbs in the series circuit is removed or fails?
-If one bulb is removed or fails, the entire circuit is interrupted, and all the lights in the series will go out.
What is the conclusion of the video regarding the series circuit?
-The video concludes by explaining that in a series circuit, the lights may not be very bright, and if one light fails, the others will also stop working. It encourages viewers to like, subscribe, and ask questions if needed.
Outlines

Dieser Bereich ist nur für Premium-Benutzer verfügbar. Bitte führen Sie ein Upgrade durch, um auf diesen Abschnitt zuzugreifen.
Upgrade durchführenMindmap

Dieser Bereich ist nur für Premium-Benutzer verfügbar. Bitte führen Sie ein Upgrade durch, um auf diesen Abschnitt zuzugreifen.
Upgrade durchführenKeywords

Dieser Bereich ist nur für Premium-Benutzer verfügbar. Bitte führen Sie ein Upgrade durch, um auf diesen Abschnitt zuzugreifen.
Upgrade durchführenHighlights

Dieser Bereich ist nur für Premium-Benutzer verfügbar. Bitte führen Sie ein Upgrade durch, um auf diesen Abschnitt zuzugreifen.
Upgrade durchführenTranscripts

Dieser Bereich ist nur für Premium-Benutzer verfügbar. Bitte führen Sie ein Upgrade durch, um auf diesen Abschnitt zuzugreifen.
Upgrade durchführenWeitere ähnliche Videos ansehen

Cara membuat rangkaian seri dan paralel sederhana / tugas kelas 6 tema 3

Cara Membuat Rangkaian Listrik Seri Dengan Cara Yang Mudah

Experiment Direct current
#SukaBelajar #Tematik MEMBUAT RANGKAIAN LISTRIK SERI DAN PARALEL

Petunjuk Praktikum Membuat Rangkaian Listrik dan Pengukuran dengan Basicmeter
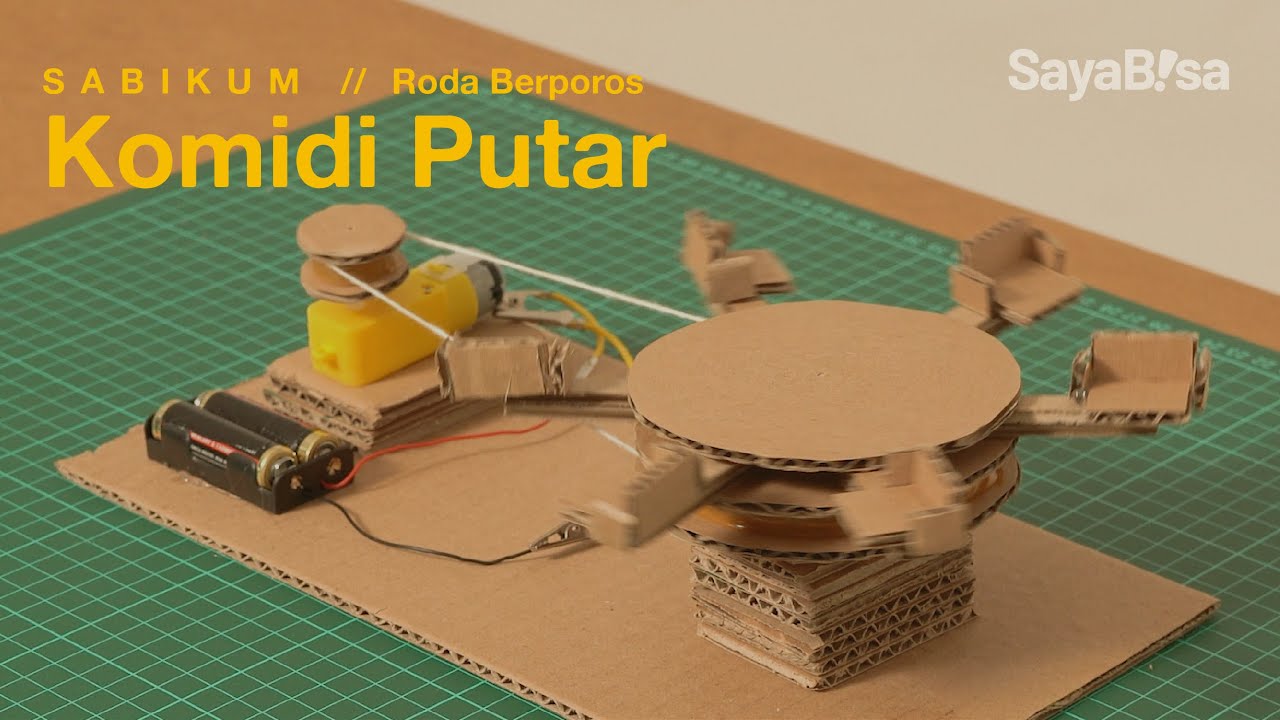
Praktikum Roda Berporos - Komidi Putar | SaBiKum |Eksperimen Sains | DIY
5.0 / 5 (0 votes)
